Wondering how to start?
Here’s a simple guideline on how to add a new project in Primavera P6 Pro. This article helps you navigate through the primary software used the industry for project and construction management. Follow the step-by-step guide to get your projects planned and scheduled properly.
1ST STEP:
Once Primavera P6 Pro screen is open we see that the EPS (Enterprise Project Structure) setup as well the WBS and OBS is already defined in the system.
2nd Step:
Go to Project layout select EPS mode. This is where the project will be created.
3RD STEP:
Once you know which EPS Node to create the project, scroll down the list of EPS Node’s and Projects until you find it. Create the new project by clicking on top right of the screen and click ADD. Create new project dialogue will be show up. You can now choose the EPS location then click NEXT.
4TH STEP:
Now by clicking NEXT enter the project ID and project name then hit NEXT.
5TH STEP:
Determine the start and finish date of the project as shown.
6TH STEP:
Identify the responsible manager for the Project then click NEXT.
7TH STEP:
Assign a rate type for the project which basically we select the standard rate and then click NEXT.
8TH STEP:
Congratulations your new project has been created. To modify the project properties and define more setting to your new project we need to go further on the settings which we will discuss further below.
Further Settings on How to Add a New Project
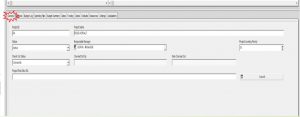
General Tab
Change the Project ID to identify the project using a maximum of 20 characters. It is advisable to keep it to 8 capital characters or less. Many organizations will tell you exactly what the Project ID will be. We have set the Project ID to RA in this example.

Change the Project Name to describe what the project does. We have set the Project Name to Road Asphalt Project for using in P6 Pro.
The Project Status There are four types of status in a project (Planned, Active, What if, and Inactive).
- A Planned Project Status should be assigned to a Primavera P6 Project that is currently being developed into a project that should start in the future. Of course, some of the best planned projects don’t ever start.
- An Active Project Status denotes a project that is on going and being executed. It should be regularly updated with progress information and is probably busy consuming resources.
- What-If Project Status to a copy of a on going project that is being used to try out alternatives, such as the effect of a change in scope, alternative scenarios to deliver the project scope and so forth.
- The Inactive Project Status should be given to projects that have been completed or curtailed so there will be no more work left to do on them.
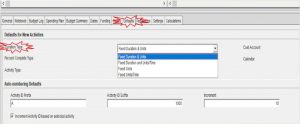
Defaults Tab
Verify the Duration Type
There are four tabs available in duration type according to which duration units we want our project activity to be chosen.
They are: (Fixed Duration & Units, Fixed Duration and unit/time, Fixed Units, and Fixed units/Time)
You can select a new duration type. If you change the default duration type, P6 Professional only applies the default duration type to new activities. Changing this setting does not affect existing activities.

Verify the Percent Complete Type
There are three types of PCT in project activities:
Duration: Choose when progress for the activity can best be reported based on budgeted-planned work days and scheduled work days remaining.
Physical: Choose when Project progress is best measured by physical examination.
Units: choose when project progress is best measured on actual work effort to date and the amount of work remaining.
You can select a new default percent complete type. If you change the default percent complete type, P6 Pro only applies the default percent complete type to new activities. Changing this setting does not affect existing activities.

Verify the Activity Type
There are six activity types (Task Dependent, Finish Milestones, Level of Efforts, Resource Dependent, Start Milestone, and WBS Summary).

Verify the Calendar Type
Calendar is the most important activity type in any project in P6 Pro, because we should define/choose a calendar as per our needs from default system and sometimes create a separate calendar in our project. Therefore, we will study in details about calendar creation and setting in separately topic in this course.
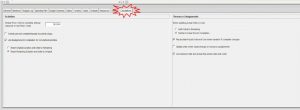
Settings Tab
In the settings tab there are three parts which are as follows:
Summarized data: In the Summarized Data section, type the maximum WBS level to which the project can be summarized in the Summarize to WBS Level field. When P6 Professional is connected to a P6 EPPM database, this value represents the number of levels of data that will display in the Portfolios section of P6.
Project Settings: Here we can change setting for Fiscal Year begins on the 1st day of the project, A baseline for earned value calculations, and Project baseline or user primary baseline, (Project Baseline is chosen by system default).
Defined critical activities: In this section we can defined the total float activity to show on project greater than or equal to or show as the longest path activities in the project we are working on it.

Calculations Tab
In the calculations tab defines the project activity as below in two parts:
Activities
– Verify the Default Price / Unit for activities without resource or role Price / Unit is set to 0.00.
– Choose the Activity percent complete based on activity steps option. It is not selected by system default.
– Identify the Link budget and At Completion for not started activities option is selected.
– Select the Reset Original Duration and Units to Remaining option is selected. It is not selected by System default.
– Select the Reset Remaining duration and Units to Original option.
Resource Assignments: it use when we are going to update actual units or cost in project activities.
- Add actual to remaining.
- Subtract Actual from at Completion
- Recalculate Actual units and Cost when duration % complete changes.
- Update units when costs change on resource assignments.
- Link actual to date and actual this period units and costs.

Resource Assignments:
it use when we are going to update actual units or cost in project activities.
- Add actual to remaining.
- Subtract Actual from at Completion
- Recalculate Actual units and Cost when duration % complete changes.
- Update units when costs change on resource assignments.
- Link actual to date and actual this period units and costs.

Dates Tab
This tab let us to adjust the dates in out selected project like:
- Project planned start date for the project activity accordingly.
- Project Must Finish date by.
- Data date this set to the same date as the Project Planned Start and change it to match if it isn’t.
- The finish date of the project
- Actual start and actual finish date
- Anticipated start and finish date for the project.


