As previously mentioned in the previous article how we can manage resources and start the resource allocation process with Primavera P6 Software. In this article, we will present a different process for allocating resources using Microsoft Excel.
How Microsoft Excel Can Make the Resource Allocation Process Easier
The previous method can take a longer time when having so many resources that require allocation to the schedule. By using Excel in the process, you can assign a lot of resources in no time.
1. Let us first open an Excel sheet and add the following columns:
- Activity ID: this column lists the Activity IDs of the activities we want to allocate resources for.
- Activity Name: This includes the names of the activities that will be assigned.
- Resource ID: this column will include the IDs of the resources we will add.
- Budget Units: This column lists the budget hours for each resource.
| Activity ID | Activity Name | Resource ID | Budgeted Units |
| EC1230 | Excavation | R1-Exc | 80 |
| EC1330 | Install Underground Electric Conduit | R2-Elec | 60 |
| EC1340 | Form/Pour Concrete Footings | R3-Opt | 50 |
| EC1350 | Concrete Foundation Walls | R3-Opt | 50 |
| EC1360 | Form and Pour Slab | R3-Opt | 50 |
| EC1370 | Backfill and Compact Walls | R1-Exc | 80 |
| EC1430 | Concrete First Floor | R3-Opt | 100 |
| EC1460 | Erect Stairwell and Elevator Walls | R4-Labor | 140 |
| EC1470 | Concrete Basement Slab | R3-Opt | 130 |
| EC1480 | Concrete Second Floor | R3-Opt | 130 |
| EC1640 | Install Wiring and Cable | R2-Elec | 55 |
| Total | 925 | ||
2. Go to Primavera p6 and open the schedule to create the above resources similar to the resource dictionary built previously.

3. The next step is to assign these resources to just one activity on the list we have created. Let us choose
EC1230 – Excavation.
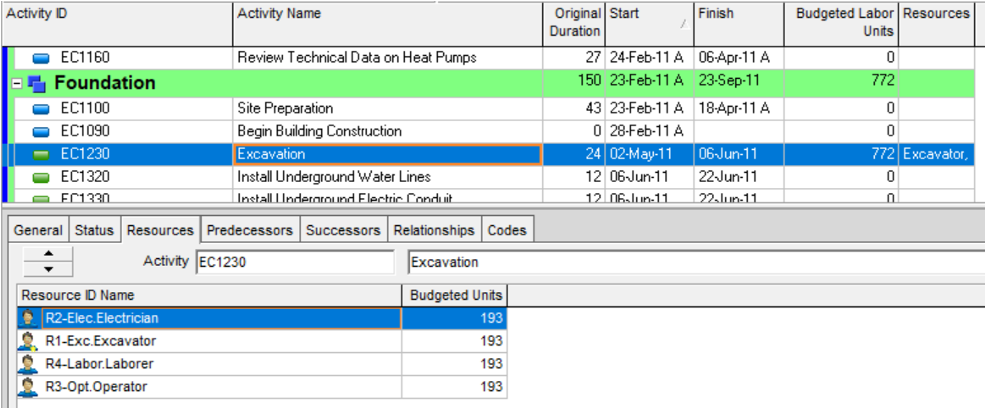
4. To link these resources to our activity list, let us export the resource assignments to Excel.
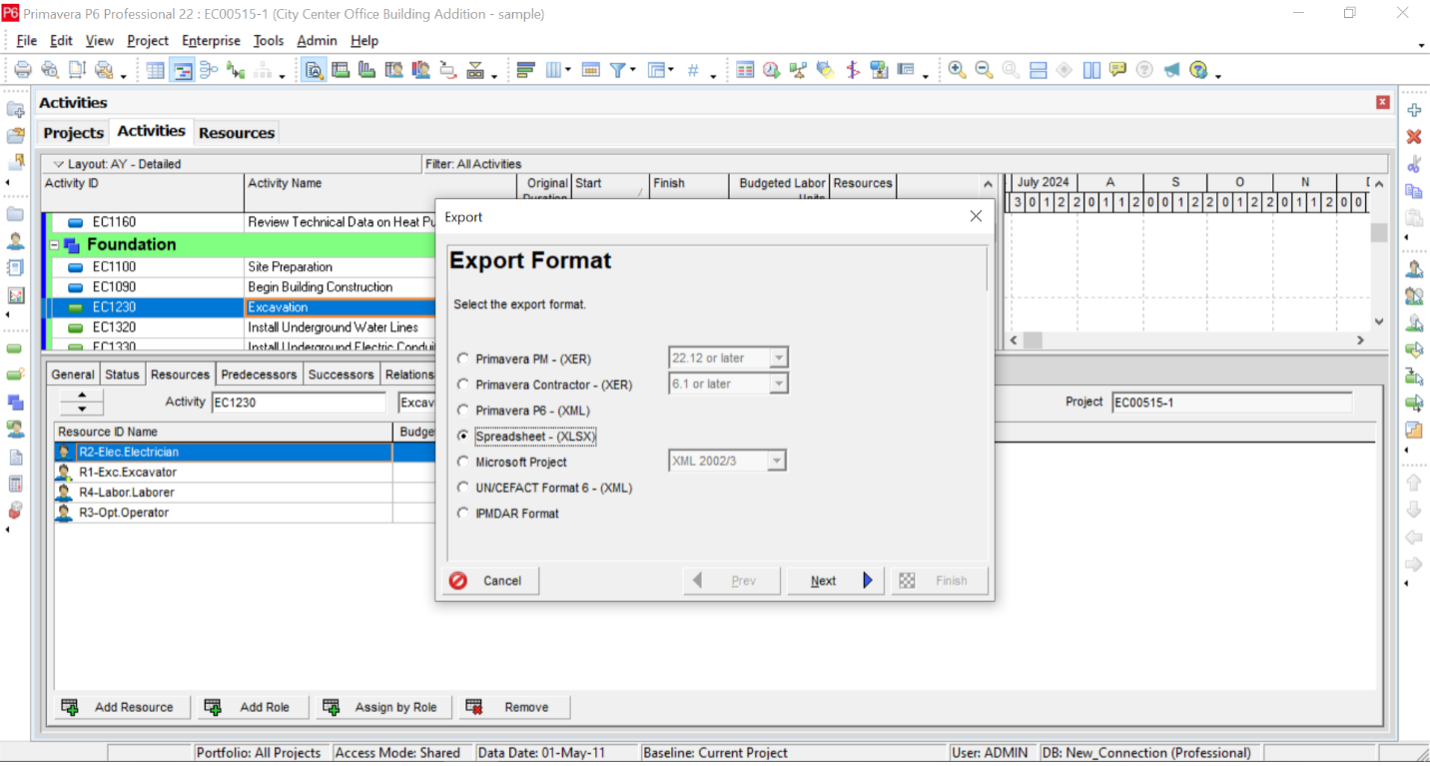
i. Click on “File” and choose “Export.” Then click on “Spreadsheet – XLSX” and click Next.
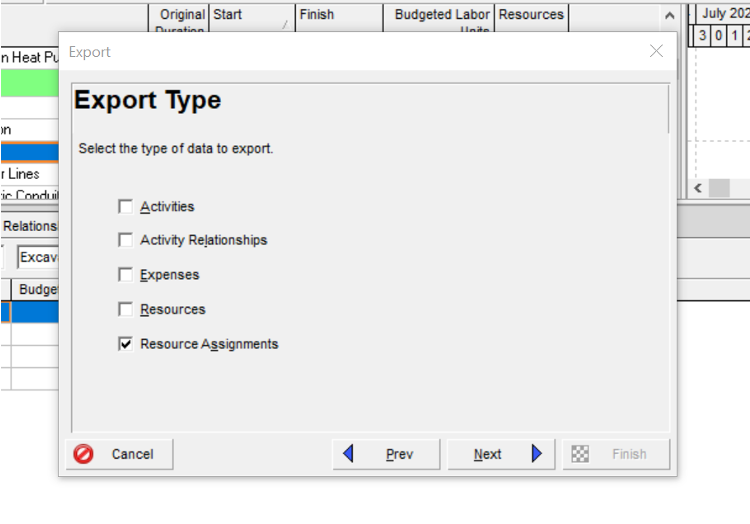
ii. Click on “Resource Assignments” and click on Next.
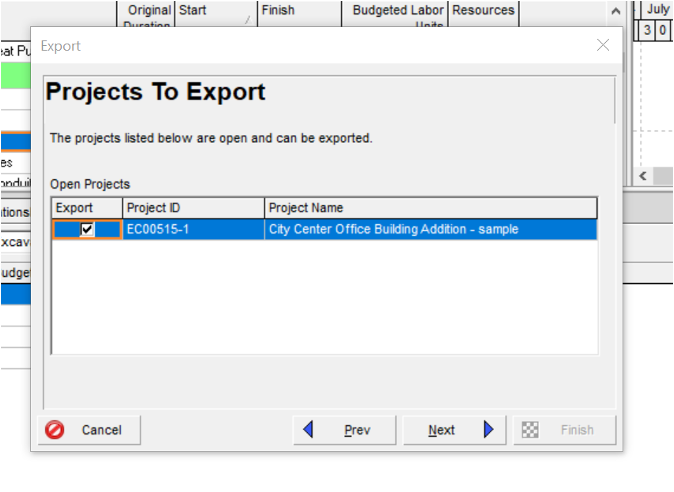
iii. Check the “Export Box” to export the project to Excel and click on Next.
iv. Click on “Add” to export the required columns for the Excel template.
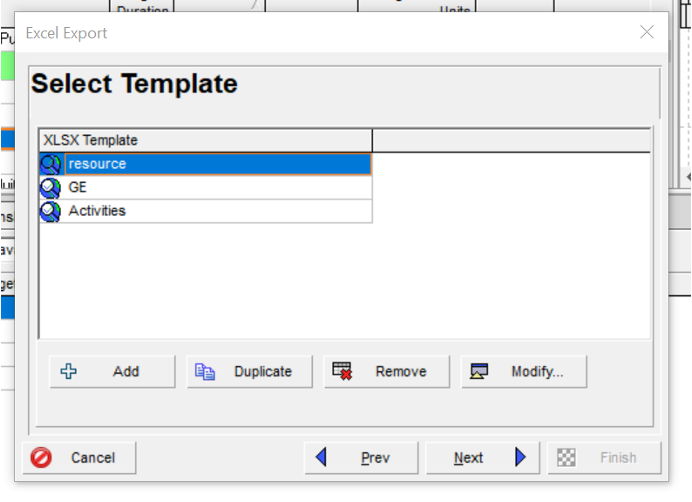
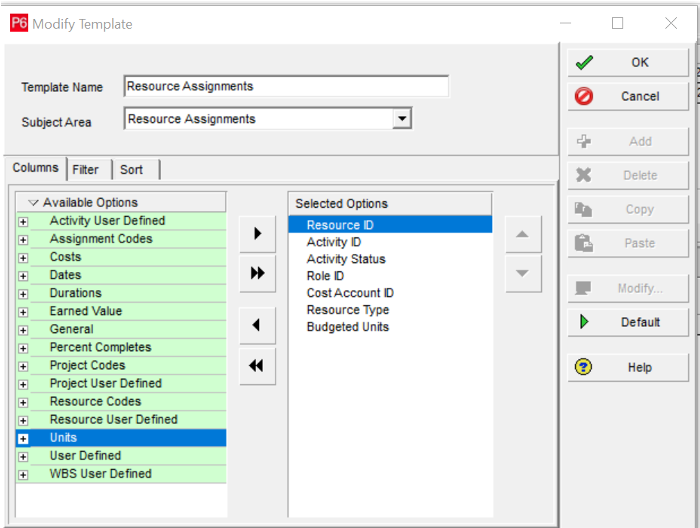
v. The below window will appear, choose these columns to be exported and click OK.
(Activity ID, Activity Name, Resource ID, Role ID, Cost Account ID, Resource Type, and Budgeted Units)
vi. Choose where you want to save your file and click finish.
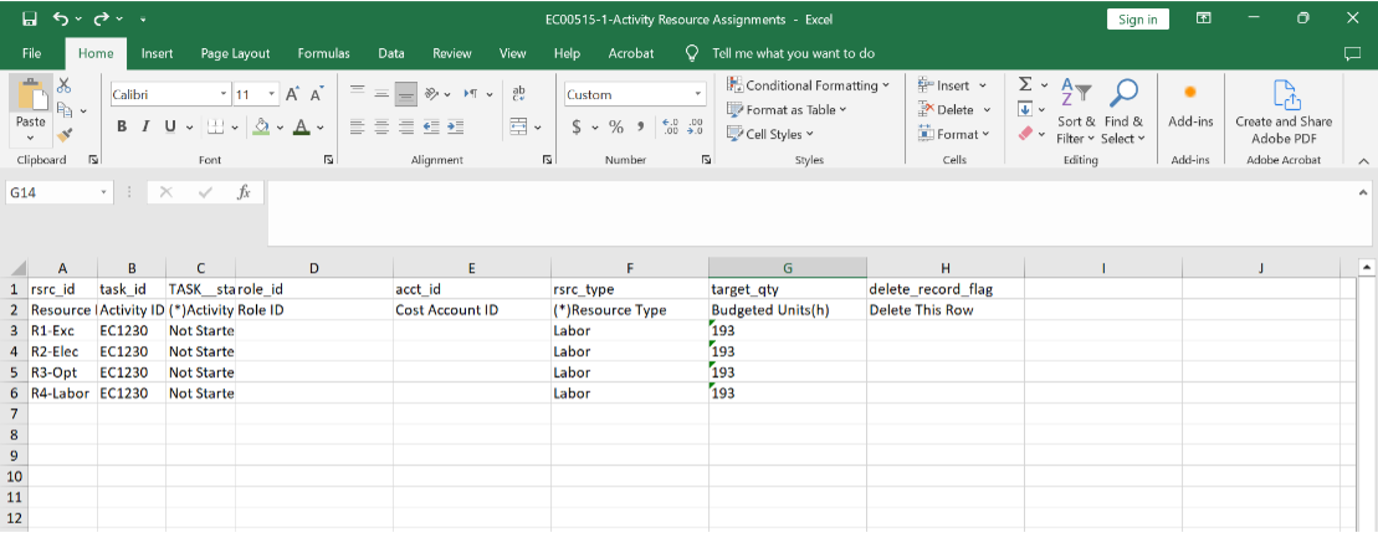
5. Alright, let’s open both Excel files; the one we created earlier and the one with the exported resource assignments. This is what the exported spreadsheet looks like:
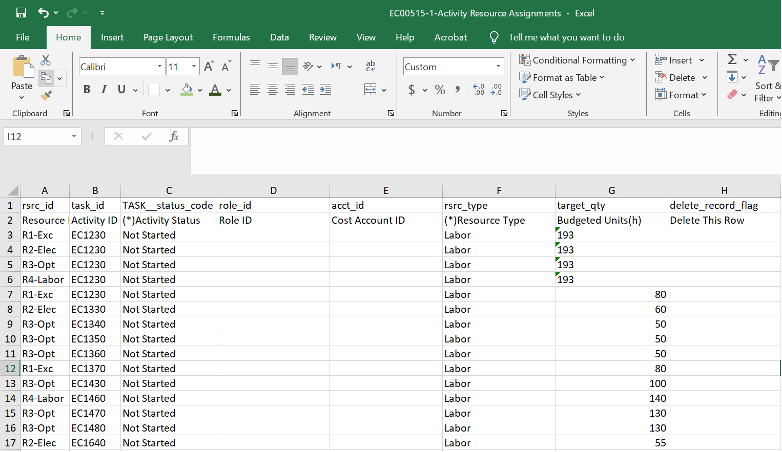
6. copy and paste the values created earlier in the sample sheet to the exported sheet. Fill down the activity status to have all activities “Not Started” and the Resource Type to “Labor”
7. The final step is to convert the Budget units column to “Text” as the primavera will not read the numbers. To fix this, we need to convert it to text format.
Select the Budgeted Units column. Go to “Data” and click on “Text to Column.” Choose “Delimited” and click Next.
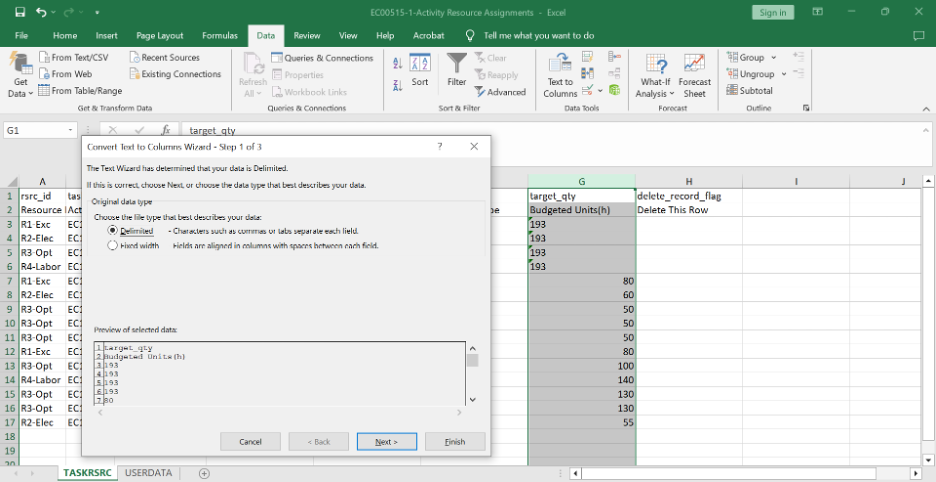
- Choose “Comma” and in the Text Qualifier also choose the apostrophe and click Next.
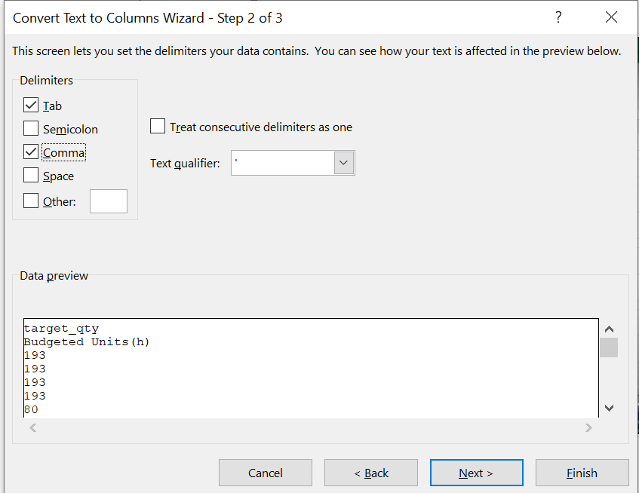
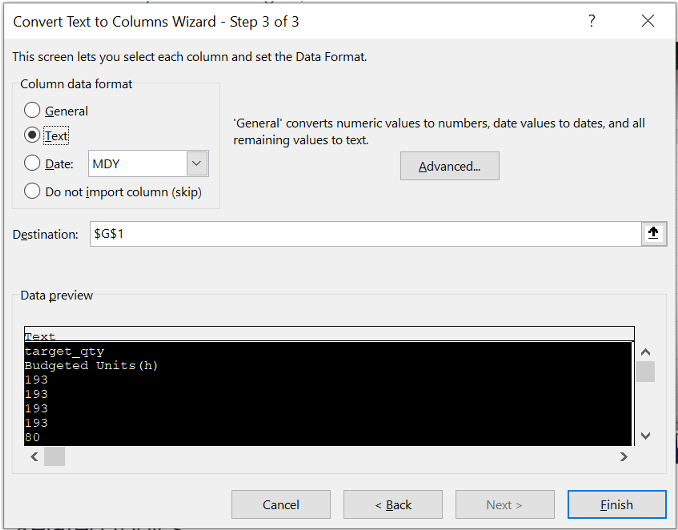
- Choose “Text” and Click Finish. Now all values are read in text format.
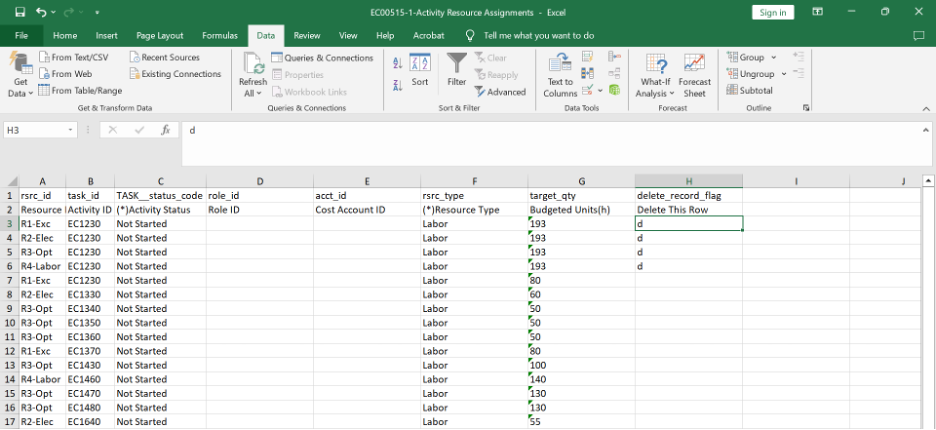
8. Now click type the letter “d” in Column H “delete this row” to delete the resource assignments on the Excavation activity in the first step. After that, save the file and close it.
9. Now, the next step is to import this file back to P6 to have the resources assigned to the required activities.
- Click on File and choose Import. Then choose “Spreadsheet – XLSX.”
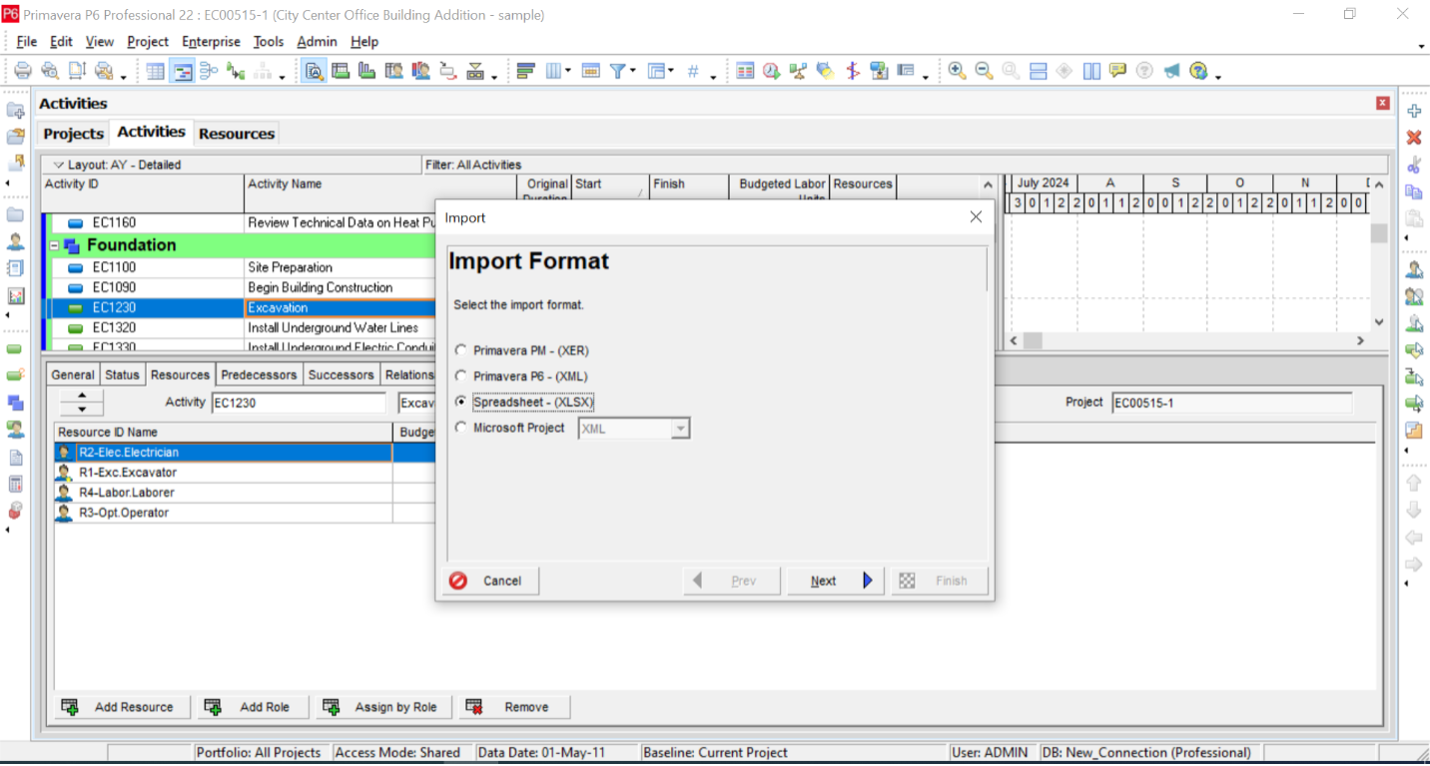
- Select the file you saved to be imported and click Next.
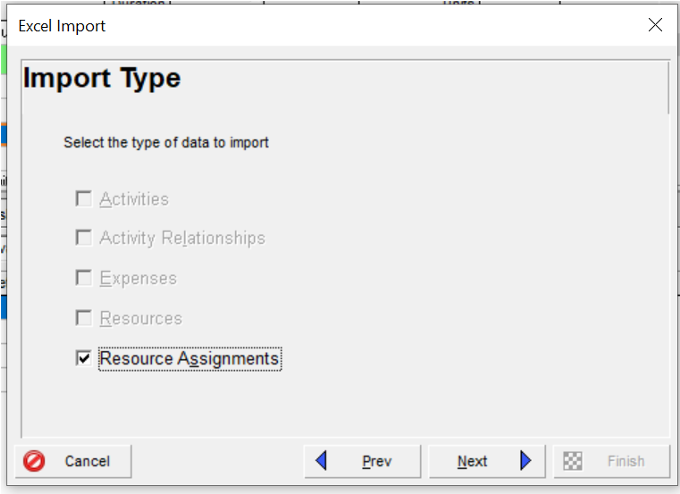
- Click on “Resource Assignments” and click on Next.
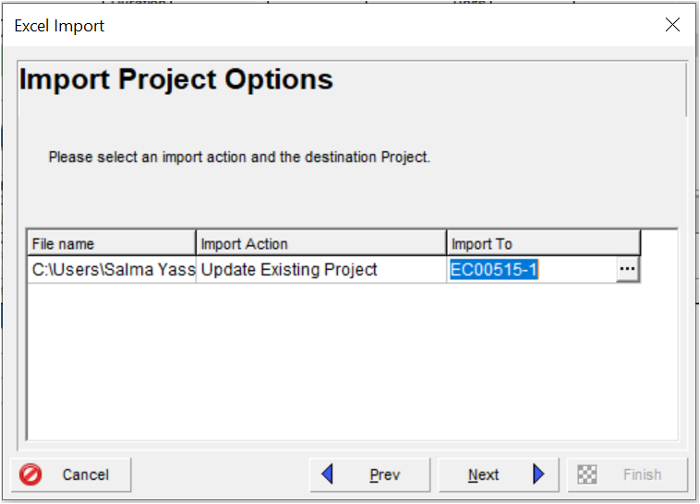
- The last step is to update the project with the resource assignments and click Next.
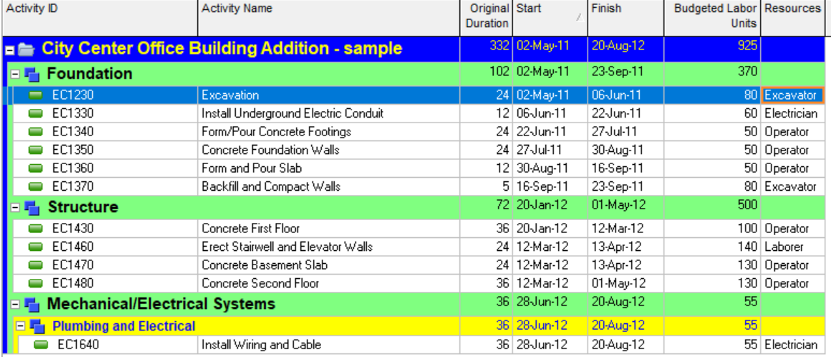
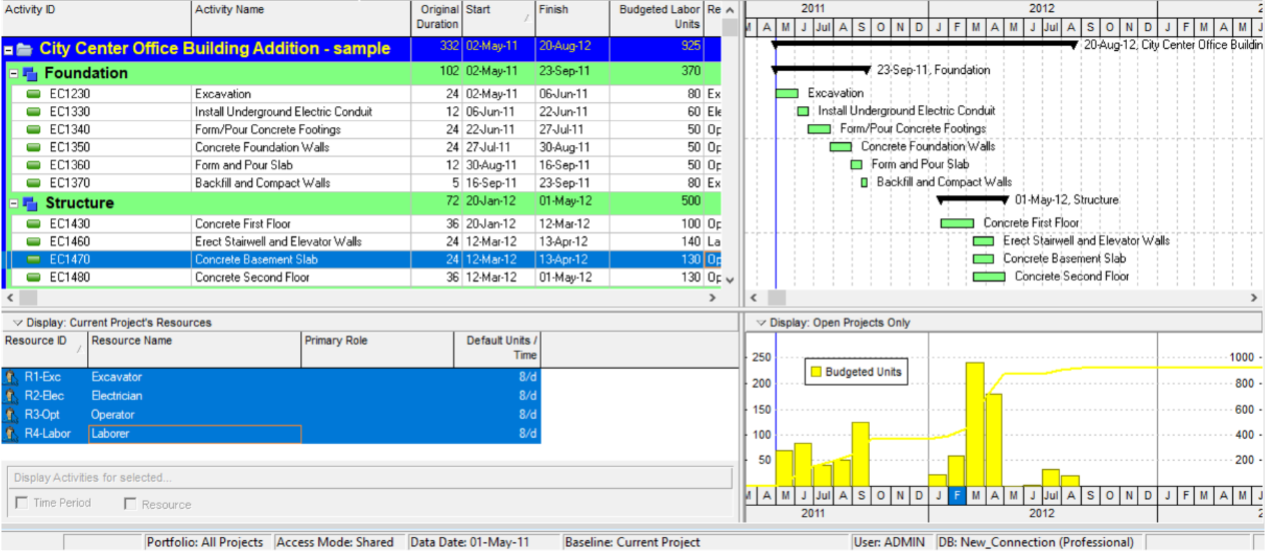
Finally, the resources you defined are assigned to the corresponding scheduled activities!
As expected, the Budgeted Units for these activities match the 925 hours created in the initial Excel file. The below figure shows a layout of these activities in p6.
Also, you can create a resource graph showing the hourly distribution of these activities as previously described.
Conclusion
In conclusion, resource allocation using Microsoft Excel can save a lot of time in the process. You can now start managing as many resources as you can from small to large scale projects.
In the end, continuous monitoring and controlling of these resources is crucial to ensure the project stays on time and within budget. We will explore this further in the next article.
Contact Leopard Project Controls for your next Construction Scheduling Project.


