Introduction to Issues and Notebook Topics in Primavera P6
Primavera P6 users can take advantage of tracking their project concerns with its ability to store and communicate project issues and notebook topics. Issues often arise during the execution of a project, and being able to conveniently document, store, and communicate these issues to the project team can be valuable throughout the project’s lifecycle. This Primavera P6 feature also provides a means to compare data to future execution projects. This article will cover how to use and work with Primavera P6 issues.
Working with Primavera P6 Issues and the Different Features
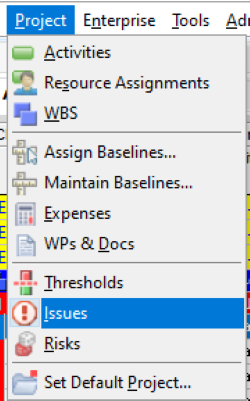
Issues can be associated with Work Breakdown Structure (WBS) elements, individual activities, and/or resources, and an issue’s history can be recorded throughout the project. To add an issue, go to the Project tab and select “Issues”:
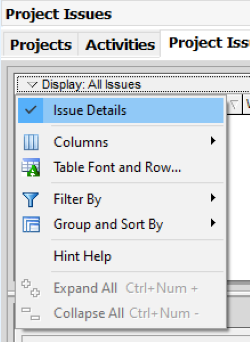
Right-Click in the Issues window and select “Issue Details” to get the full view of the Issues window view:
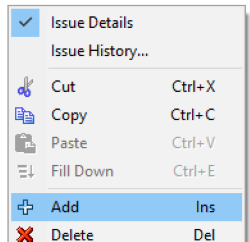
Right-click in the Issues box and select “Add” from the drop-down menu or use the plus sign icon on the right-side menu:

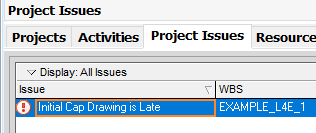
Type the title of the issue to identify it:
On the bottom half of the screen, you have several options that you can select from to specify certain details in the project issues. Go to the General tab and using the ellipses on the different options, you can assign a responsible manager, the date the issue was identified, the status of the issue, the priority ranking, the tracking layout, and the issue resolution date:

The Tracking Layout allows the user to view issue details through the Issue Navigator easily. In the Tracking Layout field, you can choose a layout that is associated with the issue:
![]()
The Details tab at the bottom of the screen allows you to manually identify numerical threshold values and associate the issue with a specific scheduled activity and responsible individual. It is important to assign a resource ahead of time when establishing thresholds because if the threshold monitor generates the selected issue during the execution of the project, a resource cannot then be assigned to the threshold, and the resource assignment cannot be changed.

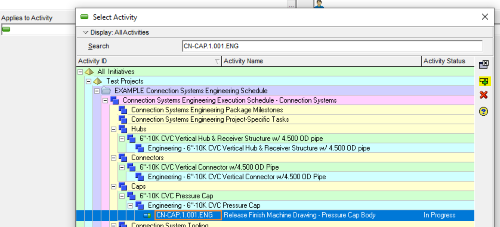
To relate an issue with a specific scheduled activity, click on the ellipsis and search for the activity in the Select Activity window that shows up. Use the green plus sign to add the activity’s association with a specific project activity:
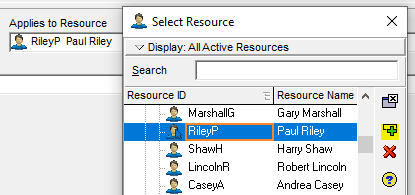
To assign a resource to an issue, select the ellipsis from the Details tab menu at the bottom of the screen next to “Applies to Resource”. Select the appropriate resource:
To update an issue’s status during project execution, use the General tab on the bottom screen and the “Status” pull-down menu:

To track the duration of an issue, compare the Date Identified box and the Resolution Date box to each other in the General tab:

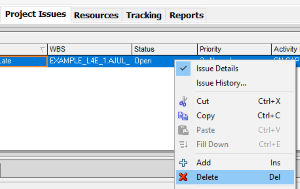
Issues can also be deleted by selecting the issue and right-clicking, then by selecting “Delete”:
The Notes tab at the bottom of the screen allows the user to document information relating to the issue. Another feature that Primavera P6 contains for issues is its ability to enable users to communicate issues via e-mail. It is important to note that for the e-mail function to work, the Primavera P6 administrator will have to set up the feature to enable users’ e-mail addresses for correspondence.
To send an e-mail regarding a Primavera P6 issue, the user will select the issue and either choose “Notify” from the Edit toolbar on the right side of the screen or right-click on the issue and select “Notify”. Use the Subject and Contents area to put in corrections or modifications to the issue, and click “Add” to add an e-mail recipient. E-Mail addresses can be added manually as well. Recipient information will need to be added to the issue history if the user wishes to record the e-mail.
To view an issue’s history, right-click on the issue and select “Issue History”:
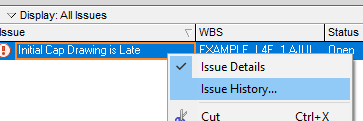
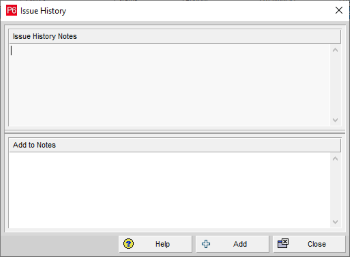
The Issue History box allows you to use the “Add” button to add additional information to the historical record:
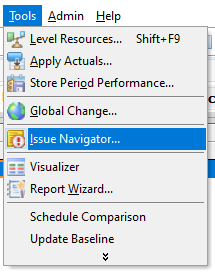
The Issue Navigator allows the user easy access to information on the issues by using the Tools tab and selecting “Issue Navigator”:
The different tabs presented below allow the user to access the information associated with the tracking layouts, activity details, Work Breakdown Structure (WBS), resources, and issue details:

Conclusion
Primavera P6 users can benefit from storing project issues during the execution of the project schedule. This Primavera P6 feature allows the project team to communicate critical data and store historical references that can be referred to later.
Contact Consult Leopard for owners rep project management now.


