Introduction
The Primavera P6 Professional is an excellent tool for managing large construction and engineering projects. One of the important aspects of the P6 is that it can handle many items, such as up to 100,000 activities in a single interspace. Project Management Many people have inquired about the printing capabilities of Primavera P6 Enterprise (PPM) and especially the printed Gantt charts. You should be excited to know that Primavera P6 EPPM has some really nice features for printing tables and charts.
Printing with P6 software is almost easy and certainly results in support graphics and narrow pages. Without doing any printer settings, we can just click on the print button and take the print, but we will not get the required printing preview as required. In this article, we will guide you step by step on how to take corrected and presentable prints of your schedule.
This article describes how to use the EPPM Primavera P6 printing function. It enables us to print PDF files with activity columns including Gantt charts.
General Printer Setup on P6
So, the first step in this process is to identify the columns that you will insert into the program table. Most likely, it will reduce the number of columns that appear to fit the functional table and the overall Gantt chart on the A4 sheet.
In our demonstration, we used Primavera P6 Professional version 8.3. As shown in Figure 1, we limit the work table to five columns.
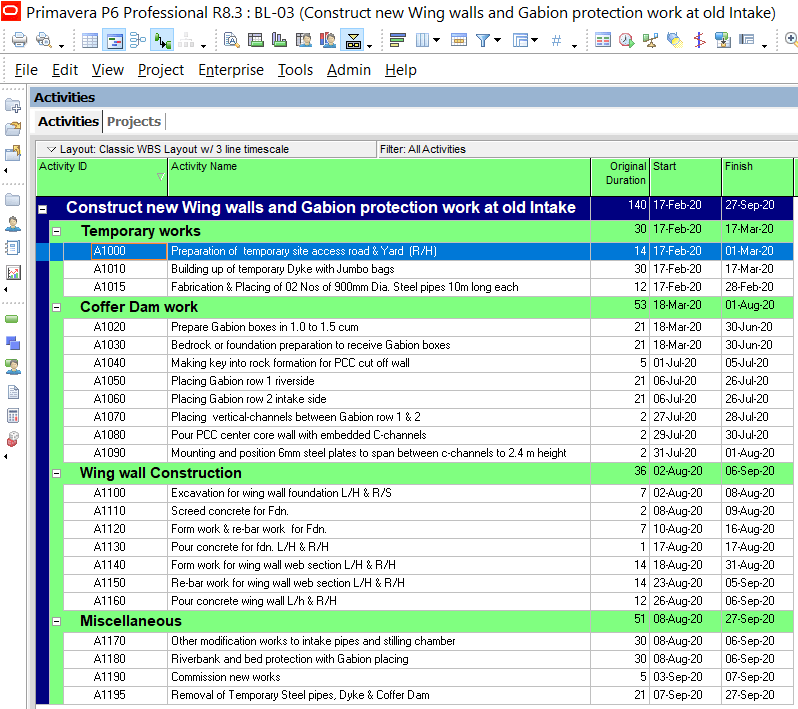
Figure 01
Now that you have configured the number of activity columns for the activity table, after that you can focus on the Gantt chart. Select the appropriate time period so that the entire Gantt chart can be seen on the screen. To do this, follow the Figures 2 and 3 below.
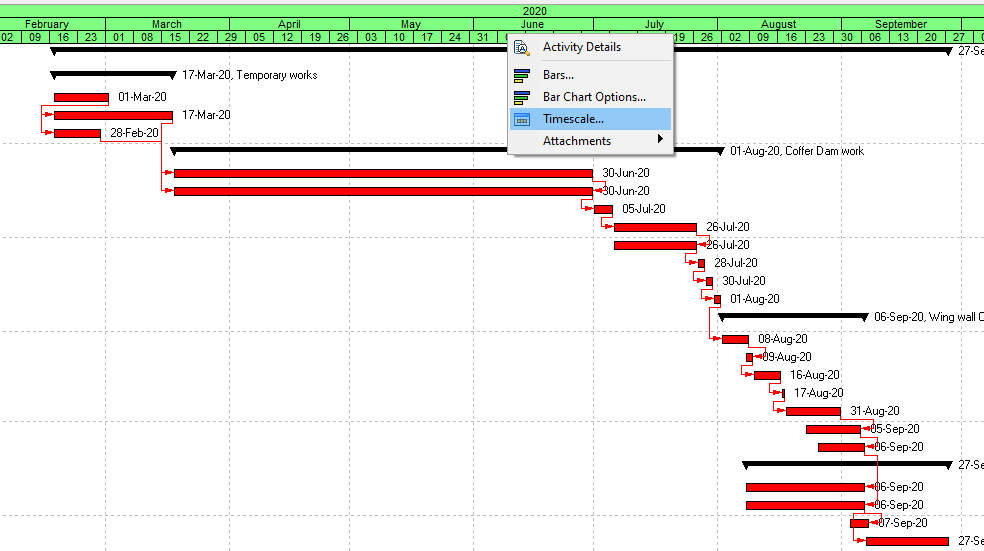
Figure 02
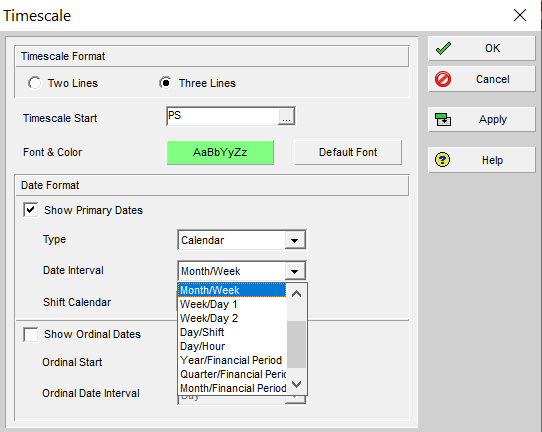
Figure 03
In our demo, we have selected the most effective Month / Week time in our Gantt chart. The worktable and the corresponding Gantt chart should now be clearly visible on the screen, as per Figure 4.
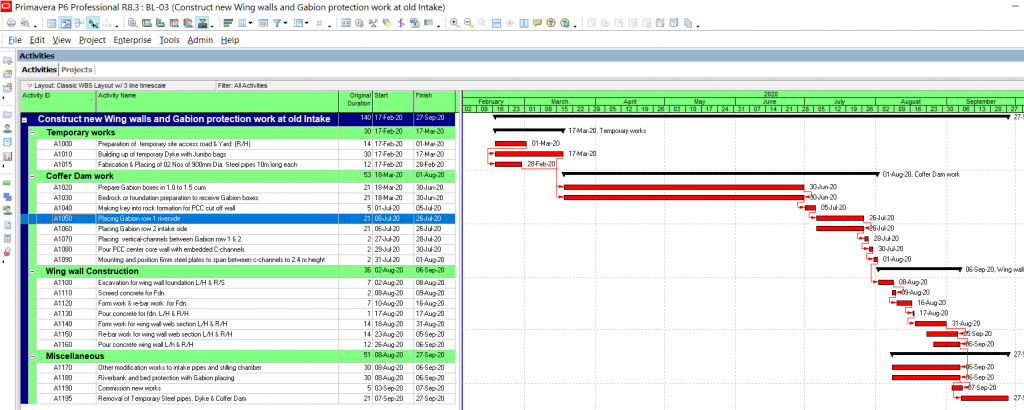
Figure 04
After you have obtained something like Figure 4, now you are ready to focus on the printing function. To do that select the File and select the Page Setup as shown in Figure 5.
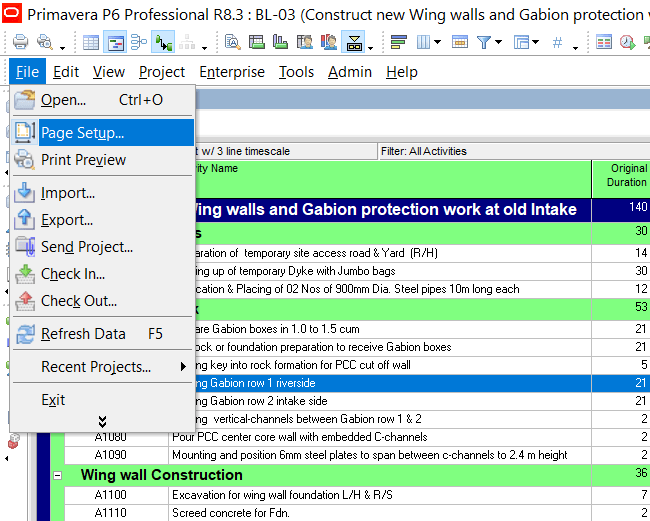
Figure 05
Therefore, in the page layout, as per Figure 6, you can adjust the orientation and size of the landscape A4.
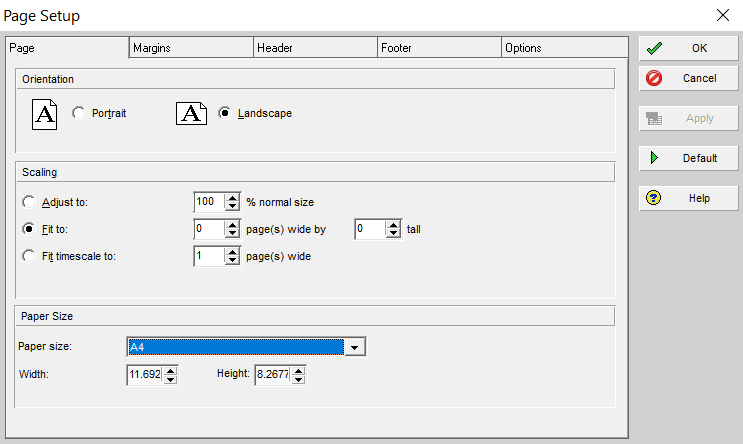
Figure 06
In the Table options in Figure 06, we set it to print 5 columns for our demonstration example. The scale is set to 100%. The scale shall be adjusted to fit the Gantt chart on a single A4 sheet of paper.
Here is an interesting one. Fix the print range to ‘Specific Date Range. Startup options should be set to ‘Startup Project Startup’, ‘-7’, and ‘Date’. Includes minimum days to check operating schedules and allow at the beginning of this schedule. One week before the start of the ‘first project’ is sufficient. Next, set the last option as ‘Recently Completed Project’, ” ” and ‘Week’. Activities It takes an additional four weeks to display the active name of the final activity printed to the right of the Gantt chart bar.
You can set the above dates by following the steps below in Figures 07 & 08: Page Setup> Options> Time Scale.
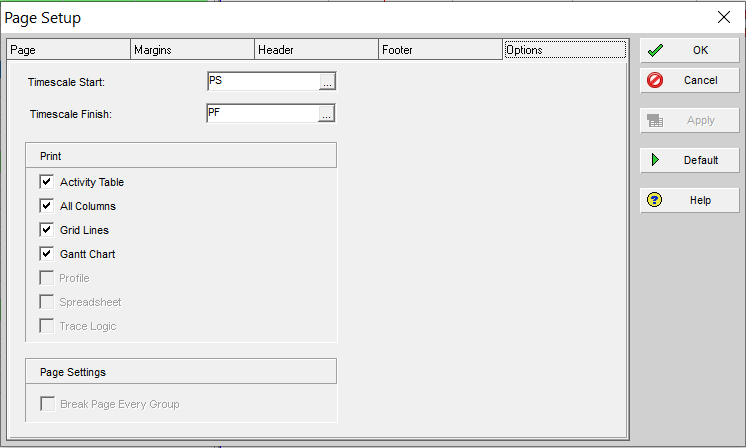
Figure 07
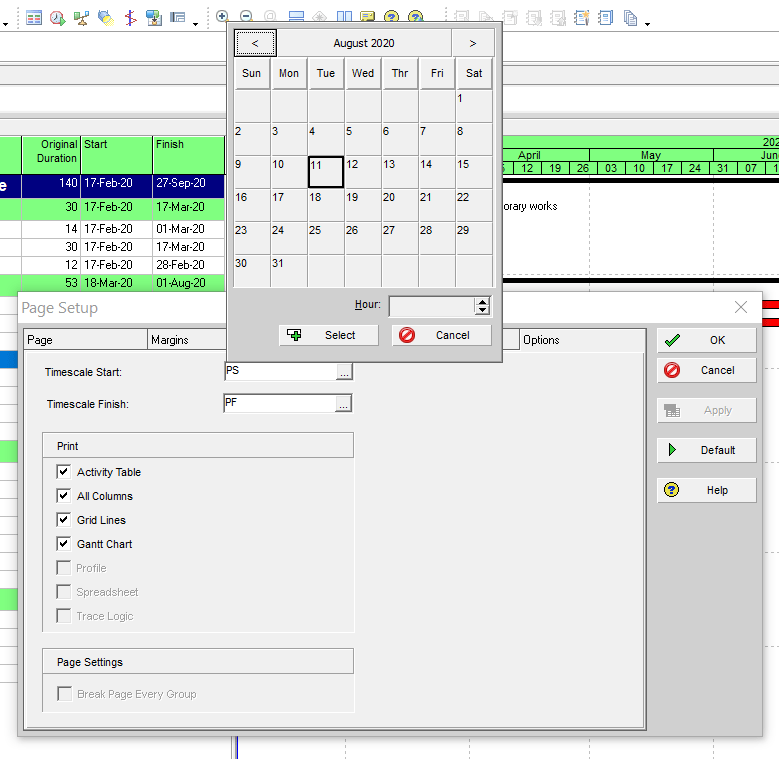
Figure 08
At this moment just, omit the Header / Footer and click OK. Now follow the steps from Figure 09 to 11 as per below.
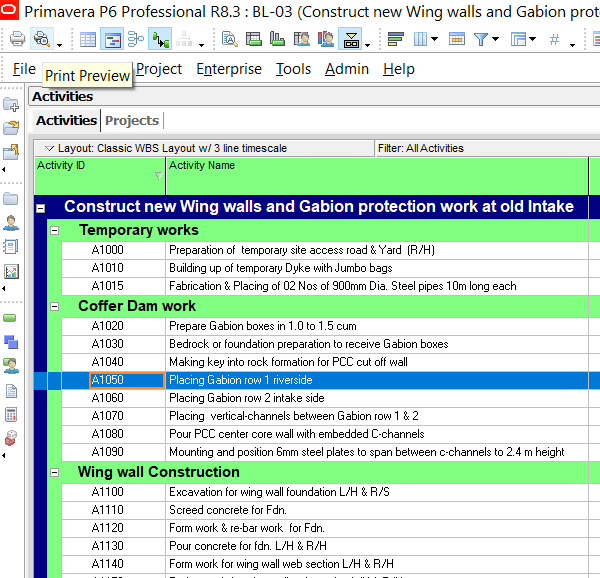
Figure 09
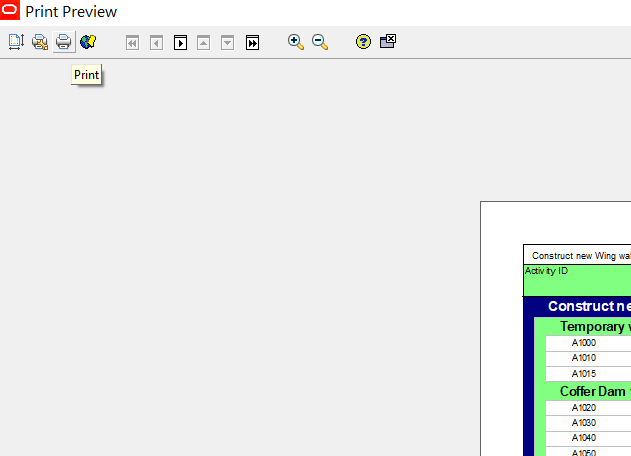
Figure 10
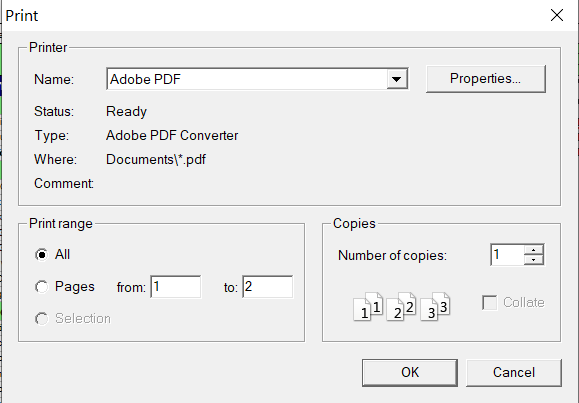
Figure 11
As in Figure 11, here you can choose and select pages to print according to your needs.
Congratulations! You have successfully completed the general print settings on Primavera P6.
Setting up Printer Header & Footer options
To configure the header and footer, return to the page settings window and select the Header or Footer tab. For, selecting the “Custom Header” function, as per our demonstration we display the Project name in the Left section, the Layout name in the center, and the Date and Time in the Right section as per Figure 12.
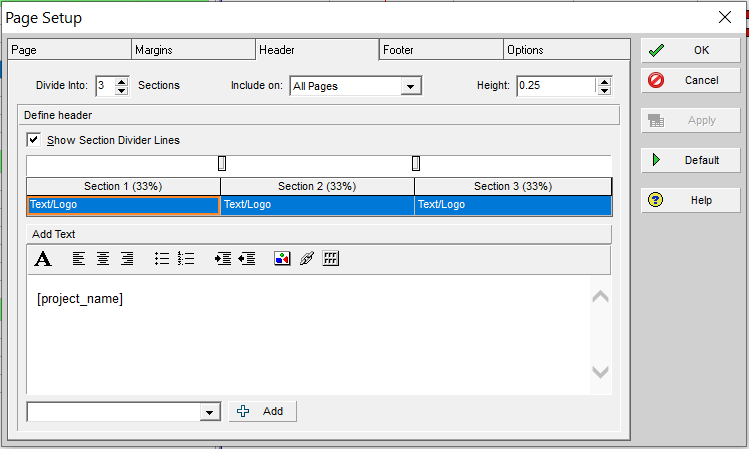
Figure 12
The Footer is also set to display page numbers in the center, the Gantt chart legend on the left, and the test on the right in the footer section, Figure 13. You can adjust these settings to suit your needs.
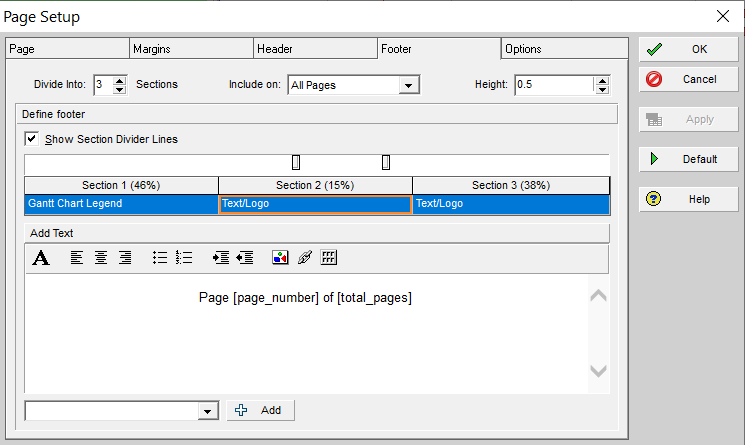
Figure 13
Naturally, you want to experiment with the Header/Footer settings to give your organization a preferred page title. The print preview should look like Figure 14.
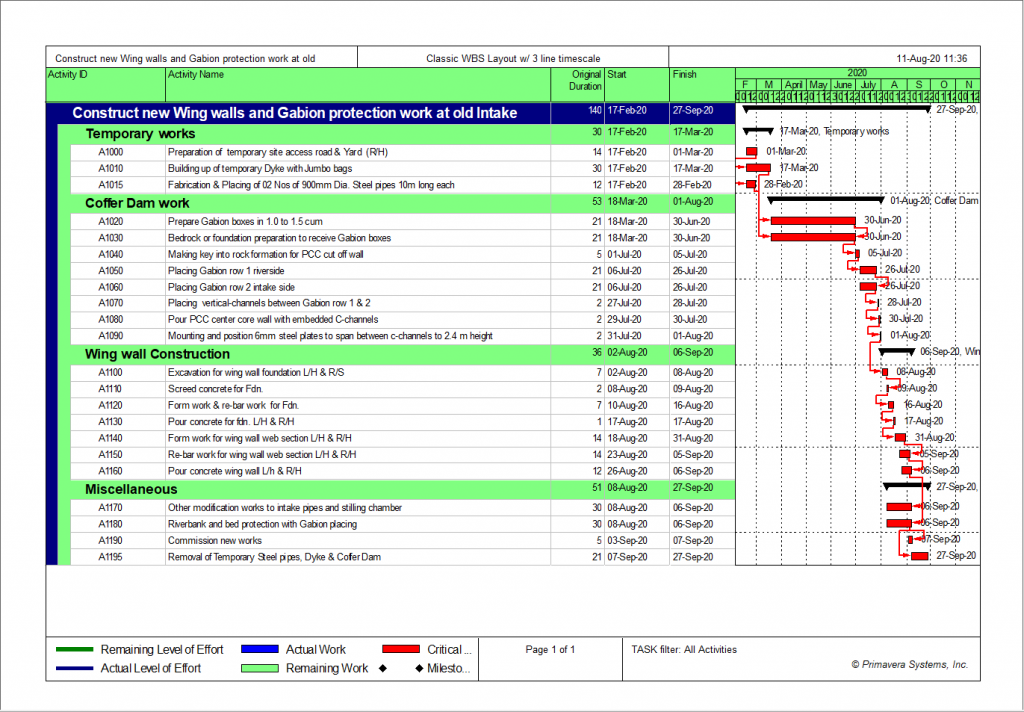
Figure 14
Creating PDF printout
The final step is to create a PDF file of your schedule. We suggest you install PDF software before proceeding with the following steps. This will give you many paper sizes to choose from. Note: To print one page, figure 15 will be displayed, we must scale it to the desired % of the original size.
Now you can simply get the PDF format of the Primavera Schedule by following Figures 15 and 16.
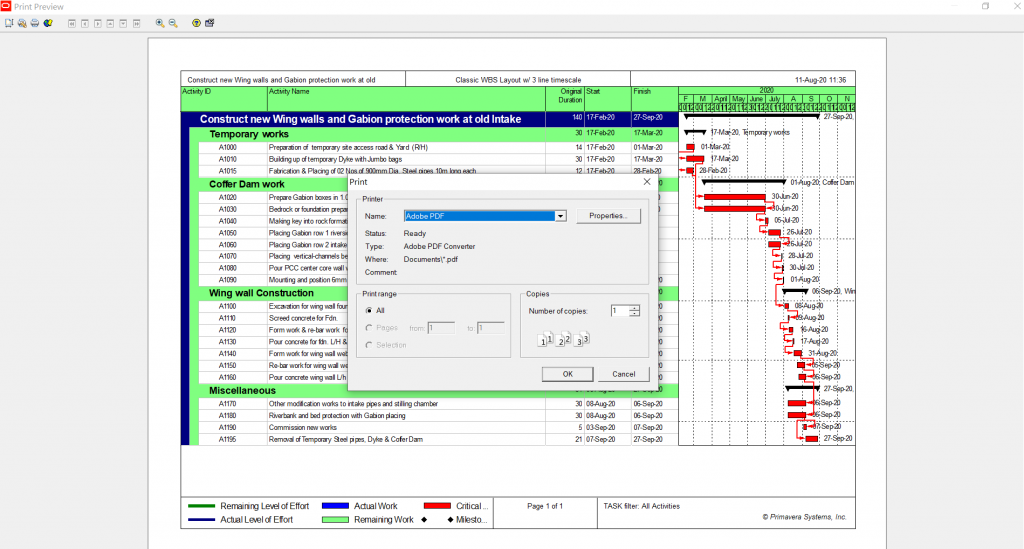
Figure 15
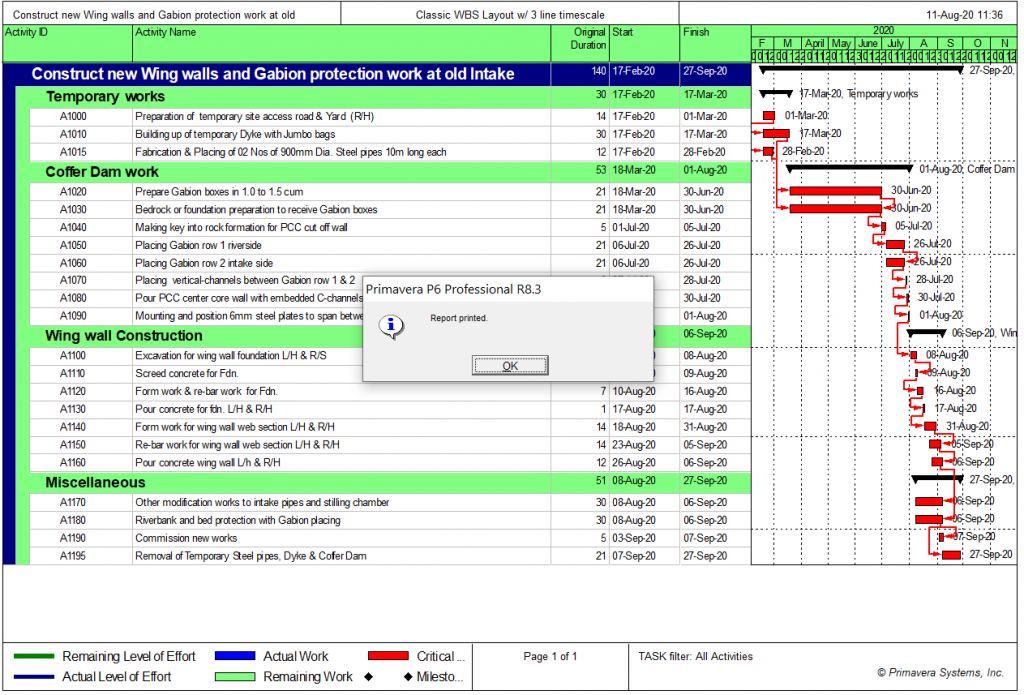
Figure 16
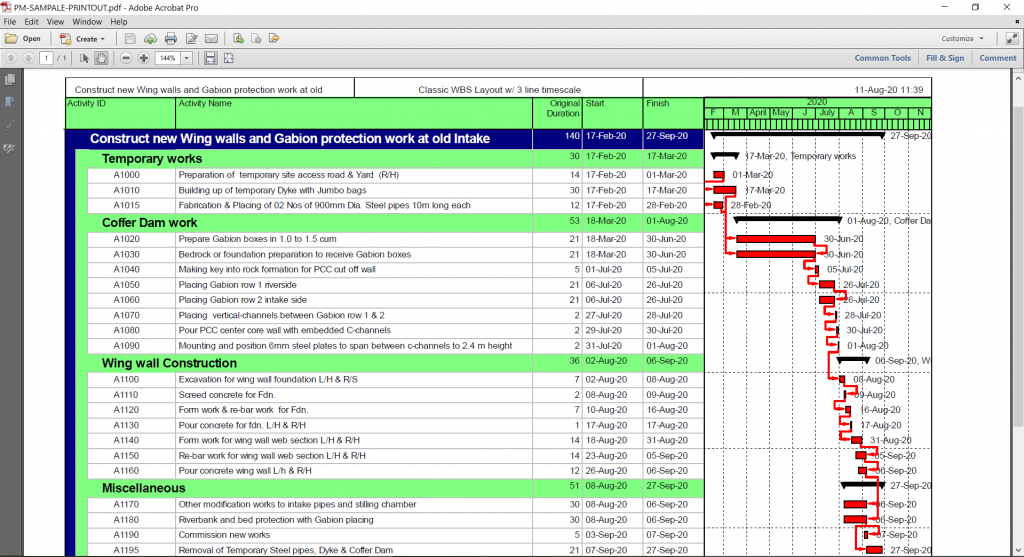
Figure 17
You can finally find a PDF file format, as shown in Figure 17.
Summary
The Primavera P6 Professional, activity table can be printed together with the Gantt chart for the Primavera P6 EPPM. Get all the information you need for an A4 or A3 size or any size for a sheet. To obtain this, some settings may be required.
In the first step, try to reduce the number of Columns in the table, and shrunk the Gantt chart timeline. Third, use the first project start minus a few days and the last completed project plus a few weeks of print functionality so that the Gantt chart, including labels, is clearly visible from start to finish. Besides, the Primavera P6 EPPM has many of the same header and footer features that occur in most word processing programs. Please note that all of these settings mentioned in this article are based on Primavera P6, R8.3 version. For other versions, these settings may slightly change. Contact Leopard Project Controls today for your CPM Scheduling and Construction Scheduling Project.
OUR SERVICES
CONTACT US

SEYAR AZADANI, PMP
PRESIDENT & CEO
Seyar Azadani has over 20 years of CPM scheduling and construction management experience working with general contractors and project owners, including the USACE, DOT, VA, Meta, QTS, Turner, Donohoe Construction, and Whiting-Turner company. As a Construction CPM Scheduling Consultant, Seyar has provided Primavera P6 CPM Scheduling services for government agencies and the private sector, representing owners, general contractors, construction managers, and architects.
Seyar has proven knowledge, expertise, and experience in utilizing Oracle Primavera P6, Primavera P6 Team Member, Primavera Unifier, Bluebeam, MS Project, Procore, eBuilder, Tableau, Navisworks, and Autodesk Revit. As a project controls specialist, Seyar has assisted Meta and QTS with Data Center projects, including new build projects, retrofit projects, and leased spaces.
Seyar has provided project controls services to projects ranging from civil to industrial to high-rise construction, including hospitals and healthcare facilities, roads and highways, high-rise apartment buildings, and commercial projects, utilizing Primavera and MS Project CPM scheduling tools to create and maintain the CPM schedules for his clients. With the US Army Corps of Engineers projects, as a contractor and construction manager, Seyar has built military facilities, including completing the construction of a USACE training facility, a $200+ million project in the capacity of project construction director.
Seyar has a Master of Science degree in Construction Management from New York University (NYU) in Jan of 2012 and a Bachelor of Science degree in Civil Engineering in 2004.