Primavera P6 offers an array of visual features and formatting for its project schedules. Users can benefit from changing bar labels to highlight areas in the Gantt to enhance the analysis of the project data and timeline. This article addresses several of the useful and popular visual features that you can utilize in your Primavera P6 schedules.
How to Show Text Bar Labels in the Gantt
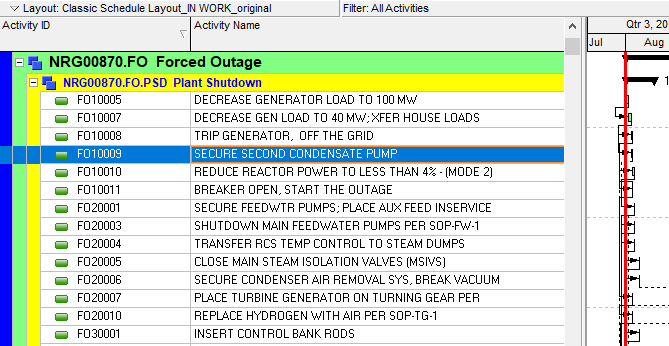
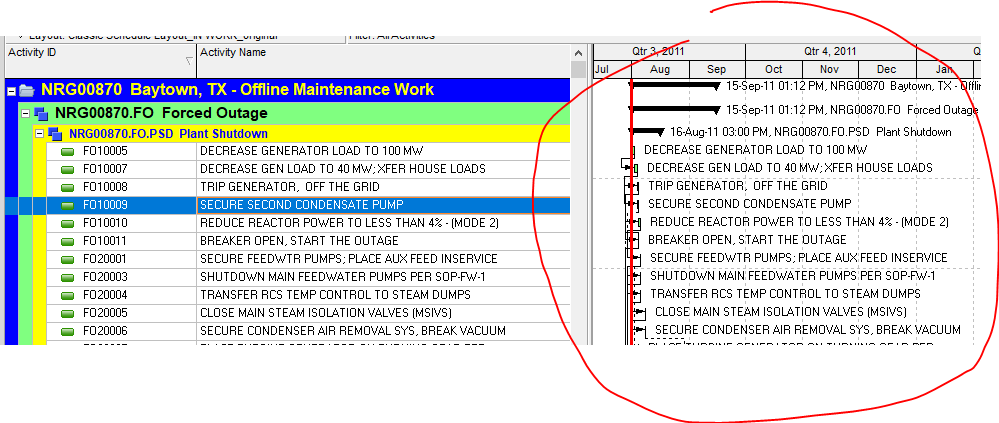
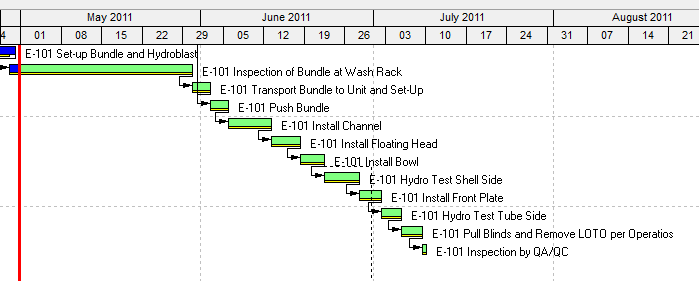
Sometimes a client wants to see the taskbar labels or text descriptions in the Gantt chart portion of the schedule. The snapshot below shows a Primavera P6 schedule without bar labels:
To show the bar labels in a Primavera P6 project schedule, you must adjust the bar settings for the Gantt. First, select the bars icon from the Primavera P6 top menu:
![]()
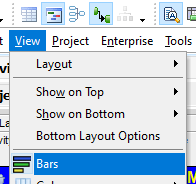
Alternatively, you can go to the View tab and select “Bars”:
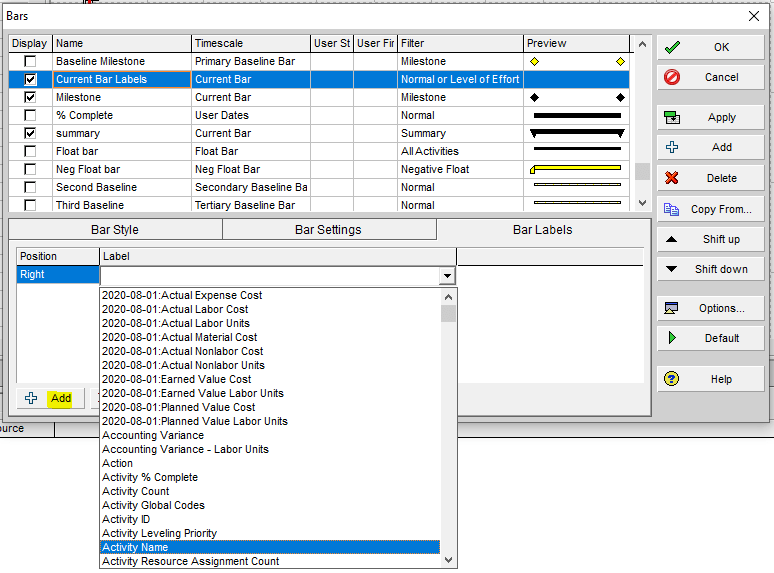
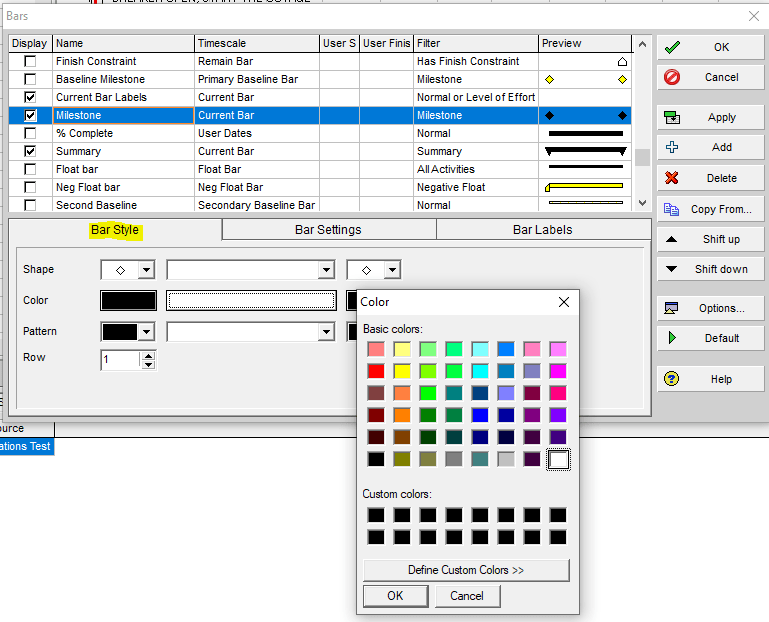
The Bars dialog box will appear. Next, click on the Bar Labels tab and select the “Add” button at the bottom portion of the dialog box:
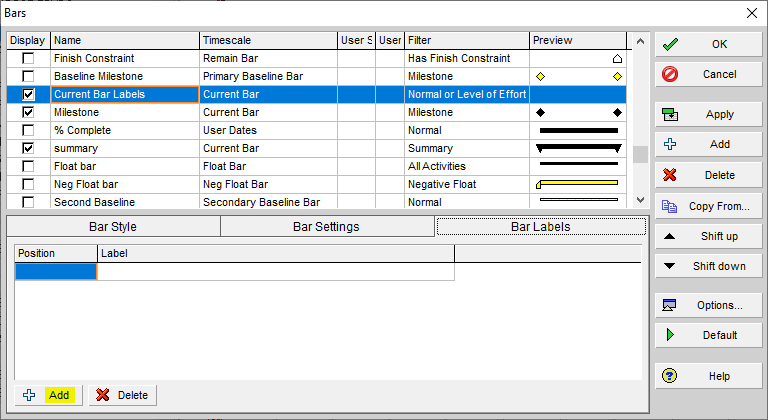
Under the Bar Labels tab, “Position” will default to “Right” and you will leave this as is. You will see options for a pull-down menu under “Label”. Select “Activity Name” from the pull-down menu:
Click “OK”:

The Gantt portion of the schedule now shows the taskbar labels. These are identical to the descriptions of each task:
Primavera P6 offers the user several options to customize the project schedule’s appearance. You may prefer to keep Primavera P6’s existing and general field settings; however, if you choose to change the bar styles in the Gantt, select the Bar Style tab of the Bars dialog box first.
You will see the options to change milestone shapes and alter the colors from a wide selection of color palettes. Ensure that you have the type of task highlighted first (such as a Milestone) and you can make your changes from there by clicking in the color box:
Alter Primavera P6 Column Headings and Update Fonts and Colors in the Project Schedule
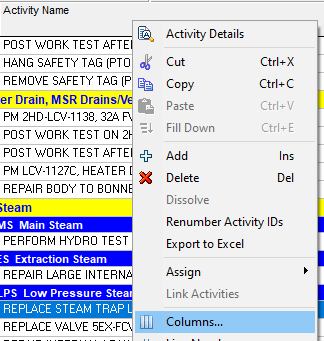
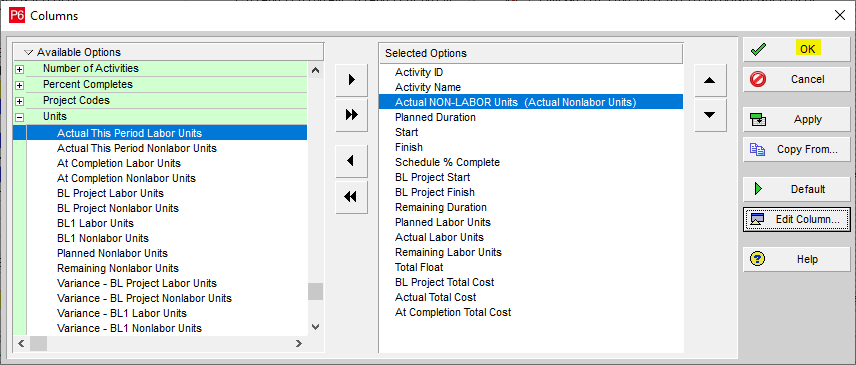
Right-click in the column headers or activities and select “Columns…”:
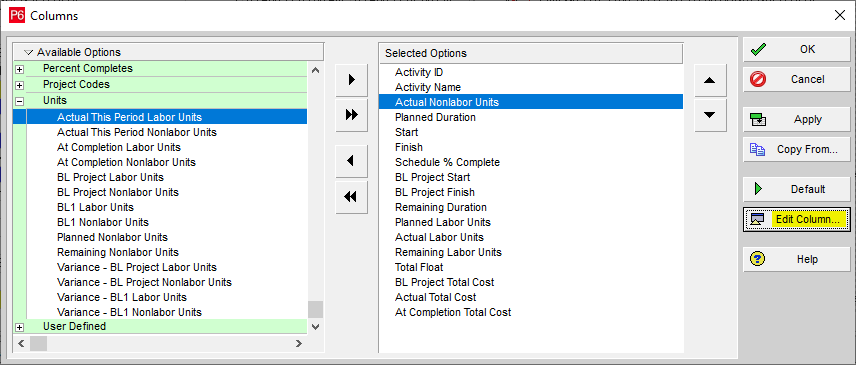
In this example, we are going to use the option of “Actual Nonlabor Units” under the Units category and move it to the right using the arrow to the Selected Options pane. From here, select the button, “Edit Column…”:
Update the New Title field to the new column heading. In this example, we will use “Actual NON-LABOR Units”. Next, click “OK”:
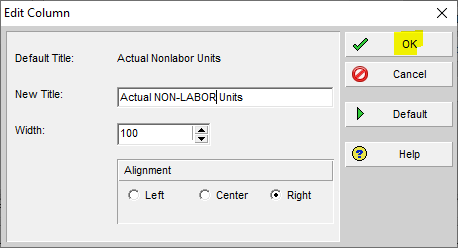
Notice that Primavera P6 does not alter the original title (in parentheses), as these standard columns maintain the defaults for future projects. Click “OK” once more:
The Primavera P6 schedule now shows the new text description in the column:

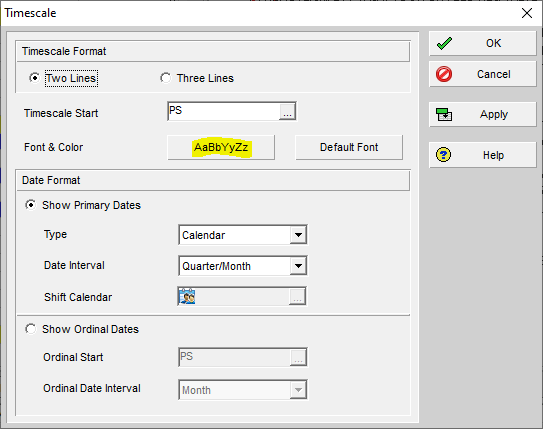
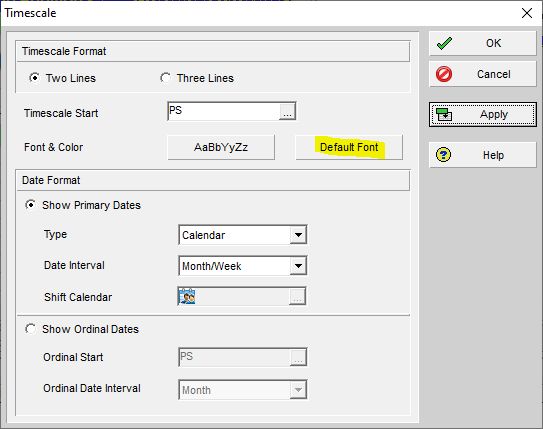
To make changes to the schedule’s font type and size, right-click in the Gantt portion of the schedule and select “Timescale…”:

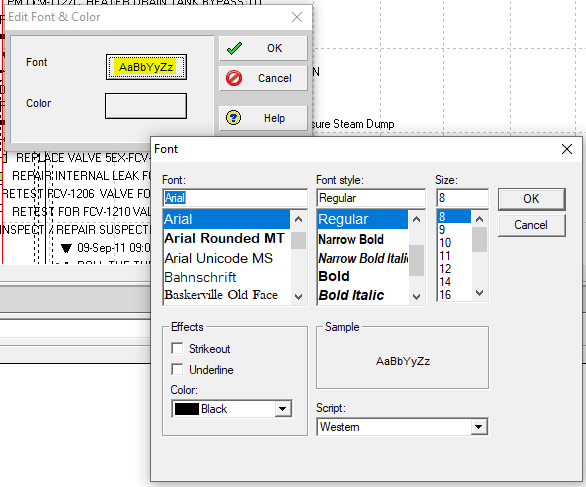
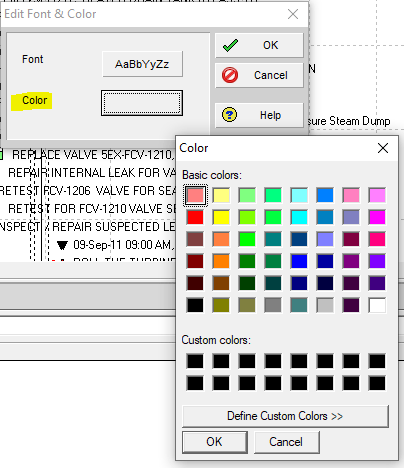
Click the button labeled “AaBbYyZz”:
You will see an Edit Font & Color dialog box with the option to change both the font and the color. Select “Font” to change the font type and then click “OK”:
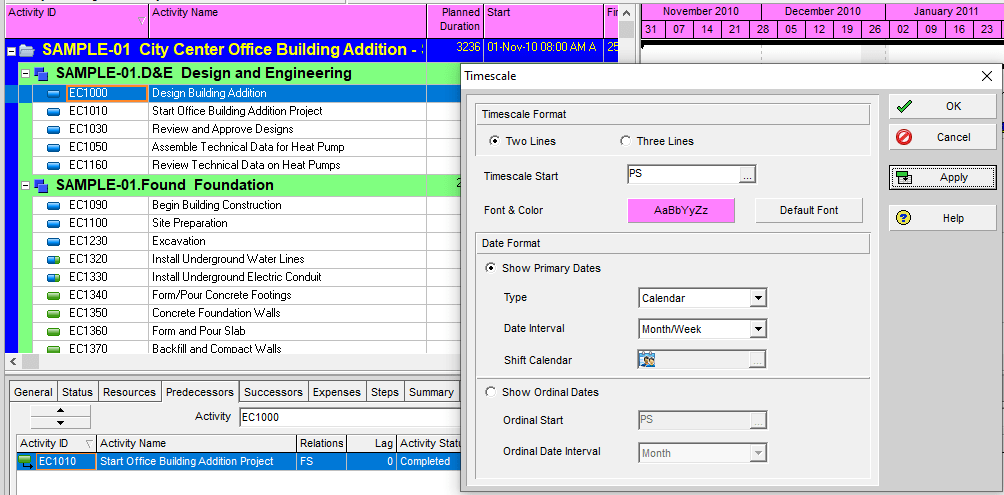
Changing the font will only change the font of the columns in Primavera P6:
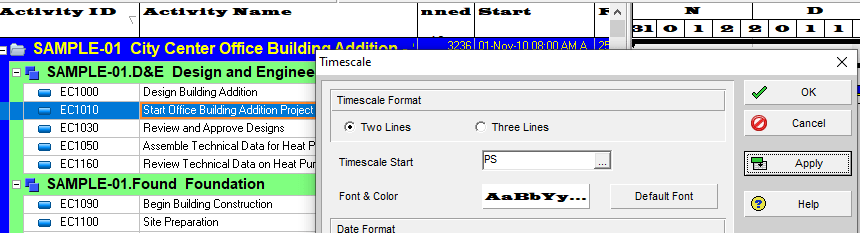
You can easily change the font back to the default setting by clicking on the Default Font button in the Timescale dialog box:
Click on the Color button in the Edit Font & Color dialog box to change the color:
Changing the color will only change the color of the top columns in Primavera P6 as demonstrated in the screenshot below:
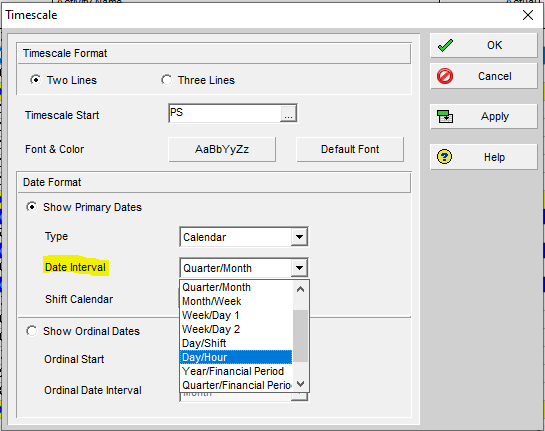
Modifying Timescale and Calendar Intervals
In the Timescale dialog box, you can also change the date interval. Use the pull-down menu next to “Date Interval” to select a different option:
You can also put your cursor in the Gantt on the calendar bar and when you get a magnifying glass icon, you can click and drag the calendar columns to stretch out the existing timeline of the schedule view:
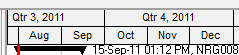
After stretching the timeline:

Removing Primavera P6 Relationships from the Baseline Bars
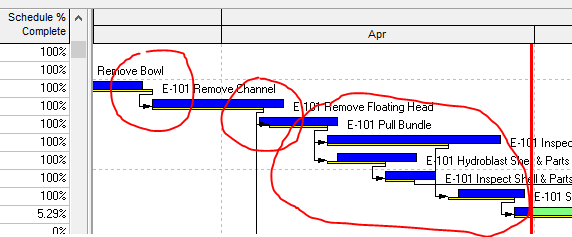
“If you have come across a situation where the relationship lines on your Gantt chart point to the baseline bars, it means that you need to change your Gantt chart options so that you can see the relationship between tasks. When a project is first baselined and progress has been entered, the relationship arrows will connect to the baseline bars instead of the current schedule bars.”
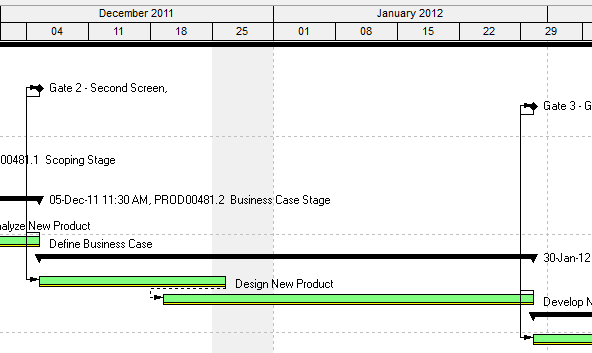
In the screenshot below, you will notice that the baseline bars are all connected between each task and not between the tasks themselves:
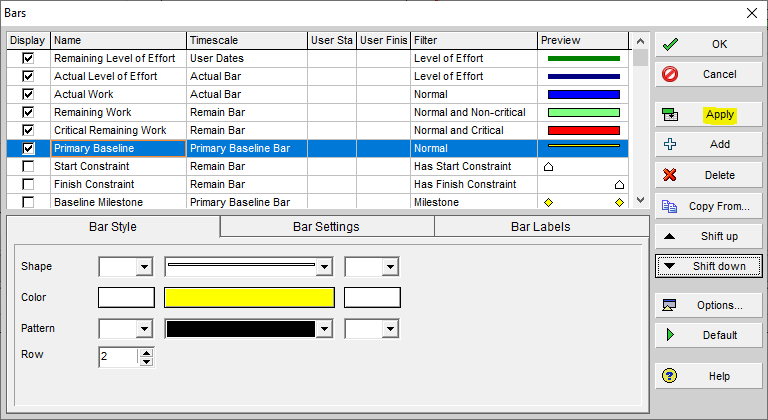
To change this view, just as before, right-click in the Gantt portion of the schedule and select “Bars…”. By default, the Primary Baseline bar is on top of the order of the other bar options, such as actual, remaining, and critical remaining work bars. Use the Shift down button to move the Primary Baseline bar below all of the other bar options:

Click the Apply button and/or “OK” to see the difference:
You can see how the relationships re-connected to show the logic arrows between the tasks (blue bars) instead of the baseline (thin yellow bars):
Adding Sight Lines in the Gantt
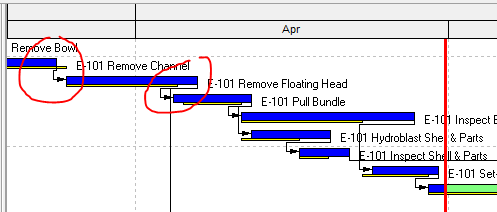
The example below shows a Gantt without sightlines in Primavera P6:
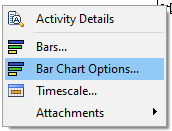
To implement sightlines, right-click in the Gantt and select “Bar Chart Options…”:
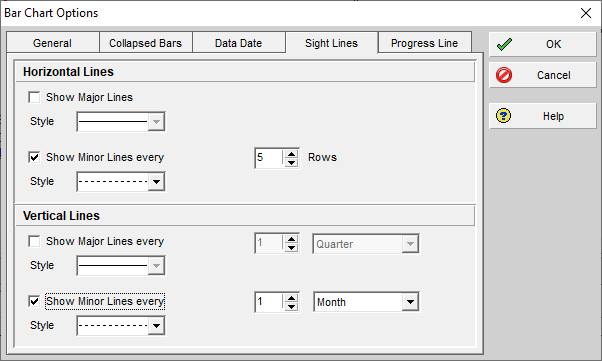
Ensure that a checkmark is on the “Show Minor Lines every” box:
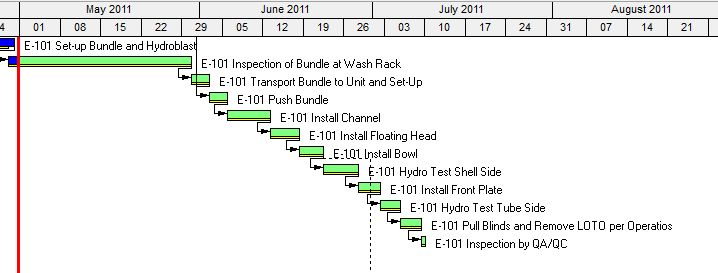
Once you click “OK”, you can see dashed lines based on the rows and time options selected from the dialog box:
Add Curtains in the Gantt Portion of the Primavera P6 Schedule
Primavera P6 allows the user to add “curtains” or shaded areas to enhance certain periods within the Gantt portion of the project schedule. The shaded portion, or curtain, in the Gantt, may depict a period in the schedule where the work is on hold or it may designate non-work time in the schedule.
The example below is the Primavera P6 Gantt without a curtain:
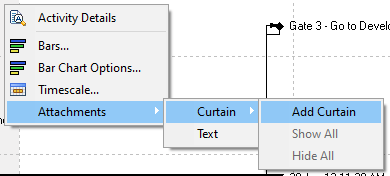
Right-click in the Gantt and select “Attachments – Curtain – Add Curtain”:
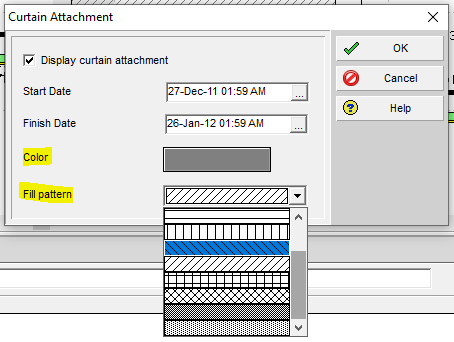
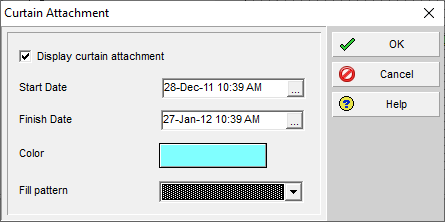
Modify the start and finish dates to specify the period for the curtain:
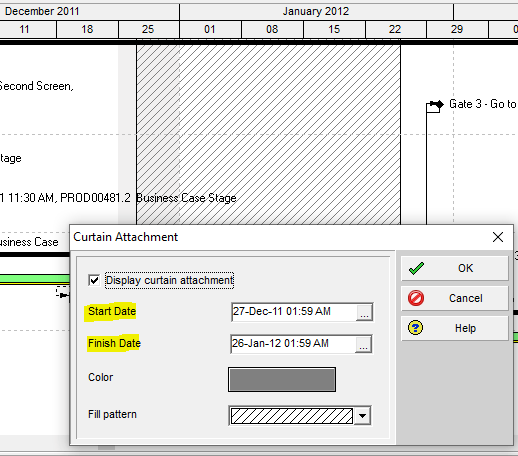
To customize the color and/or pattern of the curtain, click those selections to choose your options:
The examples below demonstrate the addition of a curtain with a color option for a designated period:
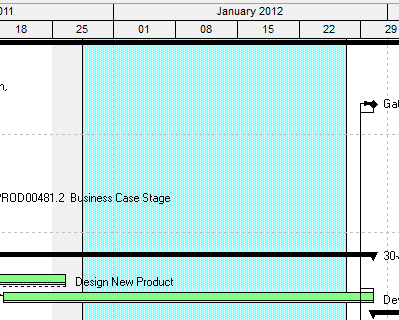
Take note that you can use your cursor on the edge of the curtain in the Gantt to modify the length of the curtain by clicking and dragging the curtain. Primavera P6 also allows the user to create multiple curtains in the Gantt as well.
Conclusion
Primavera P6 users have flexibility in how they present their project schedules. Users and clients can benefit from the visual enhancements that can be added to the Primavera P6 project schedule to assist in analyzation, tracking, and updating of status and project trends.
Contact Leopard Project Controls for CPM Scheduling and construction scheduling services. At Leopard, we know the business and technology needs of owners. We understand it takes industry-certified and experienced professionals to ensure project execution partners do the right job.
OUR SERVICES
CONTACT US

SEYAR AZADANI, PMP
PRESIDENT & CEO
Seyar Azadani has over 20 years of CPM scheduling and construction management experience working with general contractors and project owners, including the USACE, DOT, VA, Meta, QTS, Turner, Donohoe Construction, and Whiting-Turner company. As a Construction CPM Scheduling Consultant, Seyar has provided Primavera P6 CPM Scheduling services for government agencies and the private sector, representing owners, general contractors, construction managers, and architects.
Seyar has proven knowledge, expertise, and experience in utilizing Oracle Primavera P6, Primavera P6 Team Member, Primavera Unifier, Bluebeam, MS Project, Procore, eBuilder, Tableau, Navisworks, and Autodesk Revit. As a project controls specialist, Seyar has assisted Meta and QTS with Data Center projects, including new build projects, retrofit projects, and leased spaces.
Seyar has provided project controls services to projects ranging from civil to industrial to high-rise construction, including hospitals and healthcare facilities, roads and highways, high-rise apartment buildings, and commercial projects, utilizing Primavera and MS Project CPM scheduling tools to create and maintain the CPM schedules for his clients. With the US Army Corps of Engineers projects, as a contractor and construction manager, Seyar has built military facilities, including completing the construction of a USACE training facility, a $200+ million project in the capacity of project construction director.
Seyar has a Master of Science degree in Construction Management from New York University (NYU) in Jan of 2012 and a Bachelor of Science degree in Civil Engineering in 2004.