The Benefits, Elements, and Activities of a CPM Schedule
(Part 2 of Introduction to CPM Scheduling)
Now that you know what CPM Scheduling is, where it began, and how to power your project, let’s look closer. In this second part of CPM Scheduling, we are going to take a deeper dive into:
- Benefits of a CPM Schedule
- Elements of a CPM Schedule
- Activity Breakdown
In Part 2, we will discuss the benefits of using a CPM schedule and its key elements and explain what an activity breakdown in a project means. This guide is straight to the point, yet in terms that you will understand. You will be able to confidently apply CPM Scheduling to your real-world projects and experience an abundance of construction project management success.
Benefits of a CPM Schedule
We know by now that CPM scheduling is a powerful tool that helps initiate powerful and successful completed projects. We know it is a key element in helping project managers and teams plan their projects and keep things in order. CPM Scheduling is created to plan, execute, and track projects in detail. One could even say it is essential to any construction project, great or small. Here’s why:
- Produces a Clear Project Roadmap
Can anyone say ROADTRIP? Let’s say we are taking a road trip and want to go to a random place we have never been before. To get there, we need a map of some sort. This is what a CPM schedule represents in a construction project. A map outlines each road you must take to get from point A to point B, and a CPM schedule outlines each project step. Instead of showing roads, a CPM schedule will show:
- What tasks need to be completed
- When tasks should start and end
- How tasks relate to one another
A CPM schedule is better than just a flat road map, it’s more like a GPS that will tell you in detail where to turn, when to expect to turn, what lies ahead and your projected arrival time. In this case it will tell you every task that needs to be done in order. When you should be starting this task and how this task will affect other tasks before or after its completion.
- Prevents Project Delays and Cost Overruns
Do you remember the sequence of tasks that needed to be completed in Part 1, called the Critical Path? By being able to identify it, project managers can foresee potential delays and take proactive measures to prevent cost overruns. So, it’s like the GPS concept I related to CPM Scheduling. If you are going from point A to point B and there is a road closure ahead, the GPS will highlight that area and tell you about it, along with giving you an alternate route to continue if available. Within a CPM Schedule, if an essential task gets delayed, the schedule highlights the impact. This benefit allows actions to be taken to make any adjustments needed.
- Improves Resource Allocation
A schedule is only a planned-out time without the manpower, materials and equipment needed to complete the project. It’s kind of like a destination is only a plan without the vehicle, roads cut out and the pavement to drive on. A CPM Schedule helps to allocate everything needed, and helps all activities and tasks to move efficiently. Knowing which of the tasks are critical will make sure all resources are assigned to where they’re needed most.
- Enhances Team Coordination
Within a construction project, more than just one person is involved. There is a whole team that needs to be on the same page. Everyone involved, such as contractors, engineers, and suppliers, should have a clear understanding of what is happening and what time frames the project is on. Each team member needs to know their responsibilities, task dependencies, progress, and or delays.
There is nothing worse than stepping into a team effort to complete something and no one knows about it than you. It’s like driving into a hurricane and the weather station doesn’t even know it’s happening.
Having this ability to coordinate keeps everyone in the know, reduces miscommunication, ensures a smooth workflow and delivers a timely project execution. It might not stop the storm but it will announce it and the electric company is ready waiting for the first outage.
- Supports Better Decision-Making
So, from this point you can start to understand that a CPM schedule helps everyone in the project to plan each and every step efficiently. It allows projection forward to be able to identify things that are high-risk, adjust the schedule as needed and reallocate any resources in real-time as a team. Being able to collaborate at this level obviously makes better planning and decision making.
A skilled scheduling consultant ensures project timelines stay on track, minimizing delays and optimizing efficiency in CPM scheduling.
Using CPM Scheduling as a Planning Tool
So, the idea is when you begin a project you intend on performing the work to complete the project within a set amount of time. You plan through any milestones that need to be met throughout this duration.
However, as you plan the project in detail you need to be comfortable as you schedule to make sure all resources and timelines are achievable. If there are any resource constraints the master plan should reflect these constraints or delays.
You are using the schedule to model your project in present and future timelines. The schedule helps you understand the sequence of work needed for completion. It serves as the GPS of your project by coordinating all of the logistics to reflect the most efficient way to move forward.
When the sequence of activities changes, copies of the schedule should be made in order to analyze the multitude of the work flow. These changes fall as impacts on key milestones within the project affecting the project completion. Being able to fully understand these impacts will improve future decisions on the project.
Example of Impact:
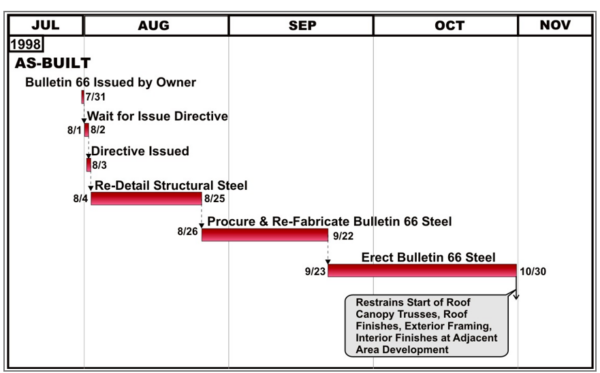
This is why using CPM Scheduling as a planning tool is essential. It is the greatest benefit of all of the Construction Management benefits. Everything is broken down to bring a visual to project managers and entire teams.
With all of the above benefits in mind, let’s see what the essential elements of a CPM schedule consist of.
Elements of a CPM Schedule
Now, we know a lot about CPM Scheduling, but to fully understand, we should know its core components. These elements will define how the schedule functions and how it keeps the project on track. First, let’s take a look at some key terms:
- Activities
The Activity is one of the most important aspects of planning and scheduling. This is what has to be done to complete the project, the building blocks in a project rather.
Every project has activities. These activities are simply individual tasks that need to be executed. Examples for a construction project would look something like this:
🔹 Site Preparation – If you were building a building and you have a lot of raw land, you would need to prep it. You would need to clear the property of any debris, grass, or trees. Then, you would need to grade it to make the landscape level and get the Site ready for the next step.
🔹 Foundation Work– After the building site is prepped and ready, now we can begin on the foundation. This is where you would begin laying your footers and concrete of a bottom foundation layer to begin your frame for your initial building.
🔹 Structural Installation – This is done when your foundation work is complete. Your structure can not begin until it has a base upon which to be set. The initial framing and outer structure of your building will happen during this stage, along with the roofing stage.
🔹 Mechanical and Electrical Work– This stage is when the “Under the Hood” type of work happens. The insides of the building start to become the project intended. Interior work, plumbing, electrical, drywall, and finishing.
Each activity within a project is assigned a start and finish date and placed interconnectedly within the project schedule.
- Durations
Just like every project has an activity, every Activity has a duration. A duration is simply an estimated time it will take to complete the task. Knowing how long a task will take helps with planning. This step answers how much labor hands will be needed and what material will be required to meet a completion timeframe.
Example:
- Site Prep = 5 days
- Foundation Pouring= 10 days
- Structural Steel Installation = 15 days
- Electrical Work = 20 days
- Plumbing = 10 days
So, as you see according to the above example the project can be projected to be near or at a finishing stage within 2 months of the beginning of the Site preparation stage. This of course is projected without any delays filtered in at this point.
- Dependencies
Dependencies are simply task relationships and can be defined in how activities are linked together. This means that some tasks must be completed before others begin. In an example, you cannot lay the foundation without the land being cleared or you cannot put the roof on without the frame in place. Each one of those tasks depend upon the other’s completion before starting.
There are four main types of dependencies:
- Finish-to-Start (FS) – The finish to start type is the most common. Task A must finish before Task B starts. As above the foundation must be complete before the framing or structure work can begin.
- Start-to-Start (SS) – Task A and Task B start simultaneously. This means that two tasks can operate at the same time. An example would be the electrical work can be taking place at the same time as the plumbing work.
- Finish-to-Finish (FF) – In this scenario a task must complete before the other can finish. So, task A must finish before task B can be completed. A simple example of this would be the Office furniture can not be completed until the painting is completed.
- Start-to-Finish (SF) – Even though this dependency is rarely used it happens. In this scenario Task A must start before Task B can finish. An example of this could be shutting down a water pump station only after the new one is up and running.
- The Critical Path
When you identify your Critical Path, which is the longest sequence of activities in the project, the duration can then be determined. However, if any task on this path is delayed, the entire project will be delayed.
In example:
- Project:
Building an office building.
Tasks:
- A: Clear and Grade Lot (4 days)
- B: Dig foundation (3 days)
- C: Pour foundation (2 days)
- D: Build Frame (5 days)
- E: Build Walls (5 days)
- F: Roof Installation (5 days)
- G: Window Installation (5 days)
- H: Door Installation (3 days)
- I: Landscape Finish (3 days)
Dependencies:
- B depends on A
- C depends on B
- D depends on C
- E and F depend on D and C
- G depends on D, E and F
Critical Path:
A 🡪 B 🡪 C 🡪 D 🡪E🡪F🡪 I
- This path (A, B, C, D, E, F, I ) has the longest total duration (4+3+2+5+5+5+3 = 27 days).
- If any task on this path (A, B, C, D, E, F, I) is delayed, the project completion date will be delayed.
This is why it is so important to identify the Critical Path. Long delays bring more cost and deadline over runs. These reasons are some of the priority reasons to implement a CPM schedule.
Non-Critical Path:
The non-critical paths are the tasks that have room to maneuver or float/slack time. This means in laymen’s terms that it is okay if they are delayed as long as they are completed by the project’s deadline. This delay can occur without affecting the project’s overall completion date.
Identifying the Non-Critical Path:
If the critical path is:
- A 🡪 B 🡪 C🡪 D🡪 E 🡪 F🡪 I with a duration of 27 days.
The remaining tasks, G and H, should be analyzed as follows:
- G is the “Window Installation” and depends on D, E, and F to be completed, but it is not included in the critical path.
- H is the “Door Installation” and does not directly impact the project completion date, so it is not part of the critical path.
So, there for the non-critical path is G🡪H and will look like this:
- G: Window Installation (5 days)
- H: Door Installation (3 days)
G +H has a total duration of 8 days.
You can understand this is the Non-Critical Path because G and H are simply not the longest path. They are not part of the orderly steps that project the build duration. Both G and H have time to be initiated during the critical path tasks. They can actually happen simultaneously depending upon crew availability. This allows these tasks float/slack time.
So, task G can start after the sequences D, E, and F are finished. Task H depends upon G and will have float/slack time because G is not part of the critical path. So, as long as G and H are finished by the projected end date of day 27, there is room to maneuver these two tasks.
- Float (Schedule Flexibility)
As you can see from the above example, Float, or slack time, simply means the ability to be flexible within the schedule without causing delay in the completion. Float terms are as follows:
- Zero Float = This means that the task is in fact, on the Critical Path and cannot be delayed without affecting the completion date and slowing the whole project. There is no maneuvering room.
- Positive Float = This means the task is not on the critical path, and it has some flexibility before affecting deadlines. It does have a maneuvering room.
- Negative Float = This means that the task is already behind schedule and needs to be completed immediately.
The examples above are part of the Activity within the project. Let’s take a closer look:
Activity Breakdown – Office Building Project
When starting a construction project, you want to break down each Activity as much as you can to get a more precise step-by-step project projection. This allows you to find your critical path and project a project’s completion date. To better understand how CPM scheduling is applied, let’s walk through an activity breakdown for constructing an Office Building.
Example Activity Breakdown in CPM Scheduling for an Office Building Project
A Critical Path Method (CPM) schedule for constructing an office building needs to be broken down into phases or stages. Each phase will have multiple detailed activities. Below is an activity breakdown example We are assuming that the build will be a mid-rise office building. It will have a steel frame, glass curtain walls, and a concrete foundation. Since it is a mid-rise building, it will have multiple stories.
Let’s begin:
We will be breaking this Activity down into 6 major phases. Keep in mind each step is a phase and it will have tasks to complete and duration times.
1. Pre-Construction
This is the beginning phase and where all permits must be obtained along with any type of soil testing and prepping the Site for mobilization.
A-Project Start & Pulling Permits (10 days)
🡪Submit for construction permits. (5 days)
🡪Obtain zoning approvals. (5 days)
B-Site Survey & Soil Testing (15 days)
🡪Site surveying (5 days)
🡪Geotechnical soil testing. (10 days)
C-Site Mobilization (20 days, overlaps with permits)
🡪Set up temporary fencing. (5 days)
🡪Construction trailers and utility installation. (10 days)
🡪Safety measure set-up. (5 days)
10+15+20= Total Duration Time: 45 days
2. Foundation & Substructure Phase
This phase is done in a certain sequence of operations, such as clearing and grading Site and prepping to pour concrete slab.
Site Preparation (10 days)
🡪Clear and grade Site. (5 days)
🡪Excavate for the foundation. (5 days)
Foundation Work (30 days)
🡪Form and pour footings. (10 days)
🡪Cure concrete (7 days)
🡪Install foundation walls. (10 days)
🡪Waterproof and backfill. (3 days)
Concrete Slab on Graded Ground (20 days)
Overlaps foundation work.
🡪Install vapor barrier and rebar. (10 days)
🡪Pour and finish concrete slab. (5 days)
🡪Cure slab (5 days)
10+30+20=Total Duration:60 days
3. Superstructure
This phase will begin with the steel forming, more concrete forming, and pouring along with roof installation and will overlap foundation curing.
A-Structural Steel Erection (45 days)
- Fabricate and deliver steel. (15 days, off-site)
- Erect steel columns and beams. (20 days)
- Install metal decking. (10 days)
B- Concrete Floor Slabs (30 days, staggered per floor)
- Install rebar and forms. (10 days per floor)
- Pour concrete (5 days per floor)
- Curing and form removal. (5 days per floor)
C-Roof Installation (15 days after structural steel)
- Install steel roof framing. (5 days)
- Install insulation and membrane roofing. (10 days)
45+30+15=Total Duration: =90 days
4. Building Enclosure Phase
The exterior wall build begins here, along with all mechanical, electrical, and plumbing tasks. The rough-in tasks will run parallel to one another, and there will be a superstructure overlap, reducing duration days here. However, you want to allow for the timelier tasks, so allow time in the schedule here for the longer duration. You can allow just 25 days, making the total days 75 instead of 100. We will keep this phase at 100 days for the sake of this breakdown.
A-Exterior Walls & Glazing (50 days)
🡪Install curtain walls & windows. (30 days)
🡪Install exterior insulation & finishes. (20 days)
B-MEP Rough-In (Mechanical, Electrical, Plumbing) (50 days, parallel work)
🡪Install ductwork and HVAC risers. (20 days)
🡪Rough-in plumbing & drainage. (15 days)
🡪Rough-in electrical conduits & wiring. (15 days)
50+50=Total Duration:100 days
5. Interior Build-Out Phase
This is the phase where the interior is completed. All framing, drywall, ceilings, floors, electrical, plumbing, and HVAC installation and testing are completed. This phase will overlap with the enclosure phase.
A-Interior Framing & Drywall (40 days)
🡪Frame interior partitions. (20 days)
🡪Install drywall & tape joints. (20 days)
B-Ceilings & Flooring (20 days)
🡪Install suspended ceilings. (10 days)
🡪Install carpet & tile flooring. (10 days)
C-Final MEP Installation (30 days)
🡪Install HVAC units & testing. (10 days)
🡪Install plumbing fixtures. (10 days)
🡪Install electrical panels & lighting. (10 days)
40+20+30=Total Duration:90 days
6. Commissioning & Closeout Phase
This is the last phase where all final inspections, deficiencies corrections and documents are completed. This phase will overlap interior build-out. This is the end zone to the project.
A-Final Inspections & Testing (15 days)
🡪Conduct final building inspection. (5 days)
🡪Perform HVAC balancing & electrical testing. (10 days)
B-Punch List & Correction (10 days)
🡪Fix deficiencies. (10 days)
C-Owner Turnover & Move-In (5 days)
🡪Hand over keys and documents. (5 days)
15+10+5=Total Duration: 30 days
Critical Path Identification
If you are using CPM scheduling, the breakdown above shows that there are key critical activities that will determine the project’s completion. The critical path will be the following:
The Foundation completion 🡪Structural steel erection🡪 Roof installation🡪 Exterior enclosure 🡪Interior drywall 🡪Final MEP installation🡪 Final inspection
The above scenario is a structured approach to performing an office building construction schedule. Implementing an Activity Breakdown method will ensure your project’s efficiency and will identify the project’s dependencies.
By breaking down each Activity into small manageable tasks you will be able to predetermine a better schedule that will be crystal clear to all who are involved and be able to manage and focus on smaller areas. This effort provides a more organizable situation without causing unmanageable delays and costs.
Need expert Primavera P6 CPM scheduling? Leopard Project Controls delivers top-tier solutions for government and private sector projects, representing owners, GCs, CMs, and architects. Contact us today to streamline your schedule!
OUR SERVICES
CONTACT US

SEYAR AZADANI, PMP
PRESIDENT & CEO
Seyar Azadani has over 20 years of CPM scheduling and construction management experience working with general contractors and project owners, including the USACE, DOT, VA, Meta, QTS, Turner, Donohoe Construction, and Whiting-Turner company. As a Construction CPM Scheduling Consultant, Seyar has provided Primavera P6 CPM Scheduling services for government agencies and the private sector, representing owners, general contractors, construction managers, and architects.
Seyar has proven knowledge, expertise, and experience in utilizing Oracle Primavera P6, Primavera P6 Team Member, Primavera Unifier, Bluebeam, MS Project, Procore, eBuilder, Tableau, Navisworks, and Autodesk Revit. As a project controls specialist, Seyar has assisted Meta and QTS with Data Center projects, including new build projects, retrofit projects, and leased spaces.
Seyar has provided project controls services to projects ranging from civil to industrial to high-rise construction, including hospitals and healthcare facilities, roads and highways, high-rise apartment buildings, and commercial projects, utilizing Primavera and MS Project CPM scheduling tools to create and maintain the CPM schedules for his clients. With the US Army Corps of Engineers projects, as a contractor and construction manager, Seyar has built military facilities, including completing the construction of a USACE training facility, a $200+ million project in the capacity of project construction director.
Seyar has a Master of Science degree in Construction Management from New York University (NYU) in Jan of 2012 and a Bachelor of Science degree in Civil Engineering in 2004.