Microsoft Project is a powerful project management tool that enables users to plan, track, and manage complex projects. One of its most useful features is the ability to create sub-projects, which are smaller projects that are part of a master project. In this article, we will discuss how to create and manage multiple subprojects within a Master project using MS Project.
What are Sub-Projects?
A sub-project is a smaller project that is part of a master project. sub-projects are useful when you have a large, complex project that is broken down into smaller, more manageable pieces. Each sub-project can have its own timeline, tasks, resources, and budget. Subprojects can also be managed independently or as part of the master project.
Creating sub-projects within a master project
To create a sub-project within a master project in MS Project, we need to create a master project and multiple sub-projects shall be added to the master project. To do this the following procedures shall be followed.
Creating a master project
For instance, we will create a new project file in MS Project and save it as “Residential projects” which is a master project.
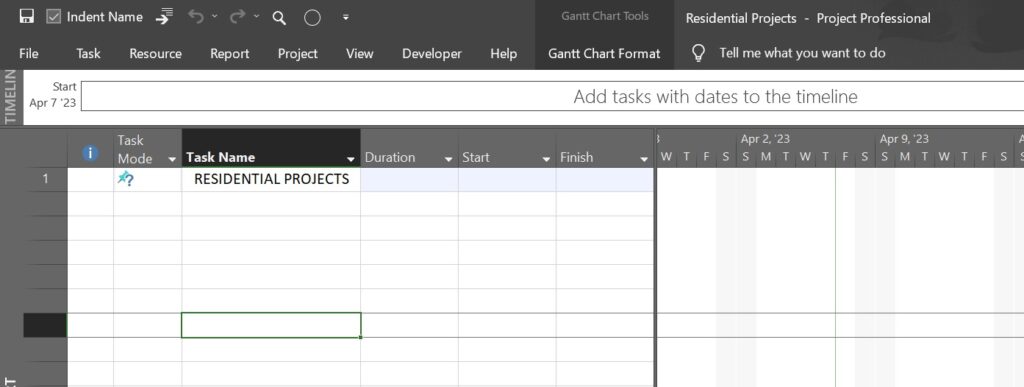
Adding a Sub-Project into a Master-Project
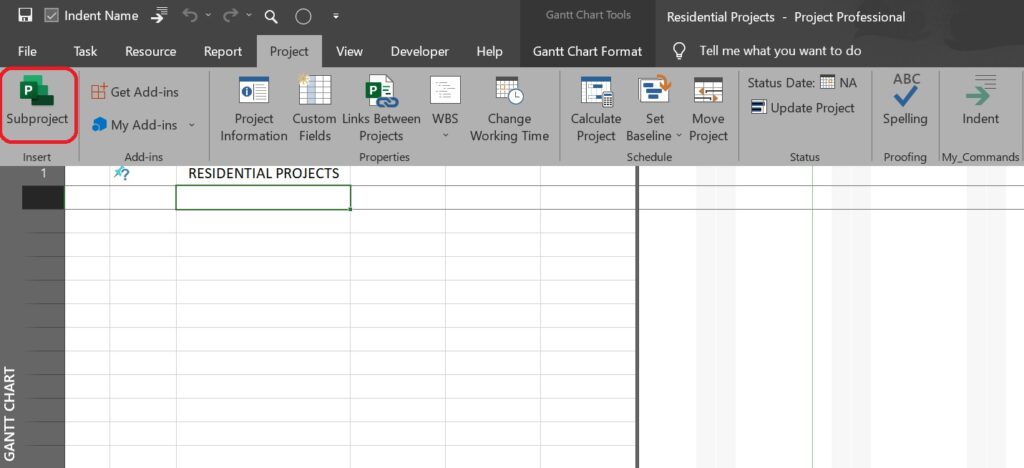
Now we will add a sub-project to the master project. We will click “Project” in the menu bar and click “Subproject” to insert a sub-project. Then we will select an existing MS Project file as a sub-project
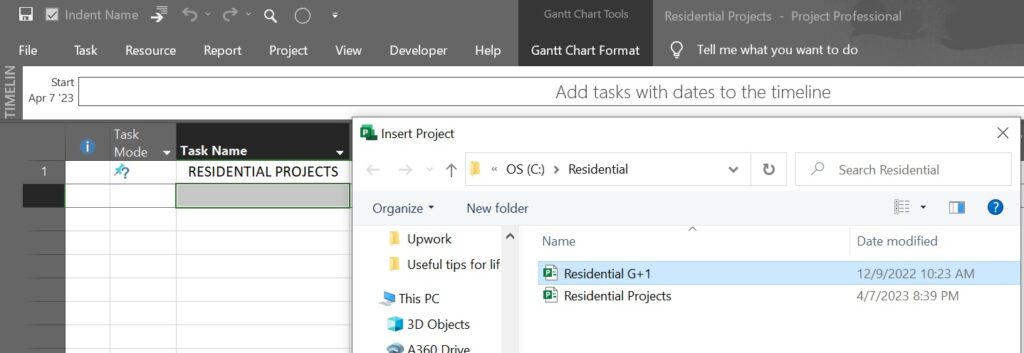
Once a sub-project is inserted into a master project, the sub-project will be displayed as shown in Figure 4 below.

Then we will select the sub-project, click the “Task” in the menu bar, and click the “indent task” right arrow as shown in figure5 below. Now the “Residential G+1” is a sub-project under the master project “Residential Projects,” and linked to the individual project which is saved as an independent project.

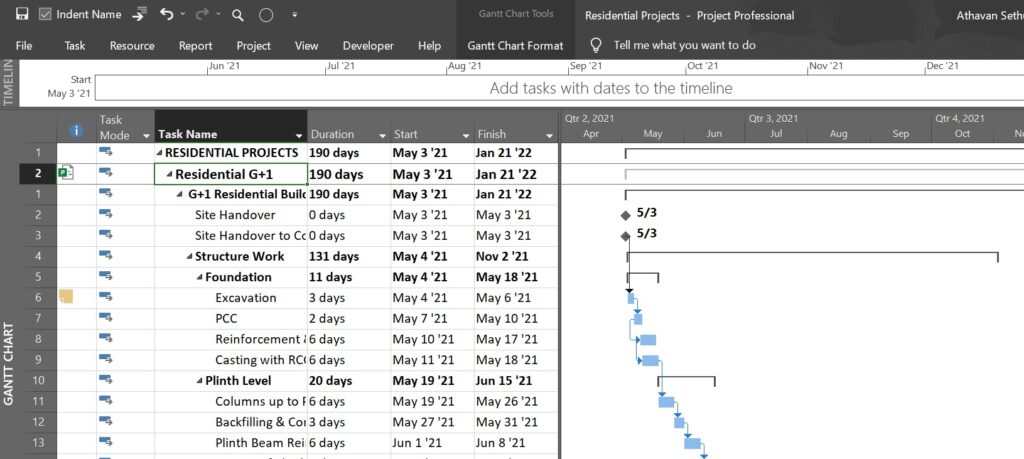
To view all the tasks in the sub-project, click “view” in the menu bar and click “All Subtasks” as shown in Figure 6 below.
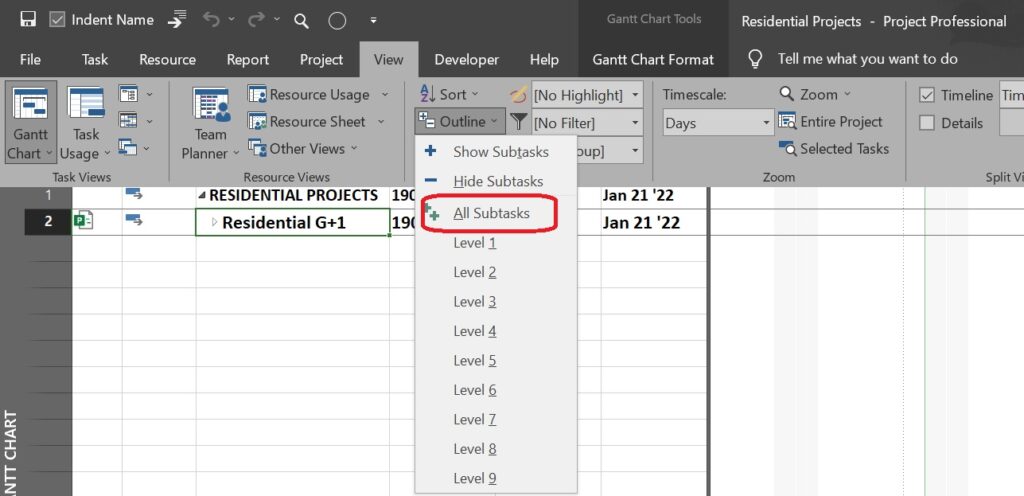
Once we click “All Subtasks” all the sub-tasks in the sub-project will be displayed as shown in the figure below. Note that the “Project Start” and “Project Finish” dates of the sub-project and master project are the same since we added one sub-project only.
Navigate the complexities of MS Project with our breakdown of Project and Task Calendars, essential for managing sub-projects.
Adding one more Sub-Project into a Master-Project
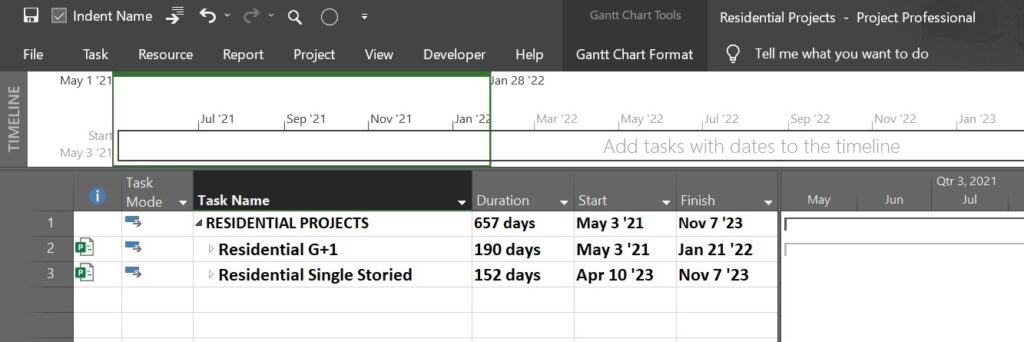
Now we will insert another sub-project “Residential Single Storied” under the main project “Residential Projects” by following the above-mentioned steps. Note that once we added sub-project 2, the “Duration” and the “Finish” of the main project are changed as per the total “Duration” and “Finish Date” of all sub-projects.
Managing the Sub-Projects
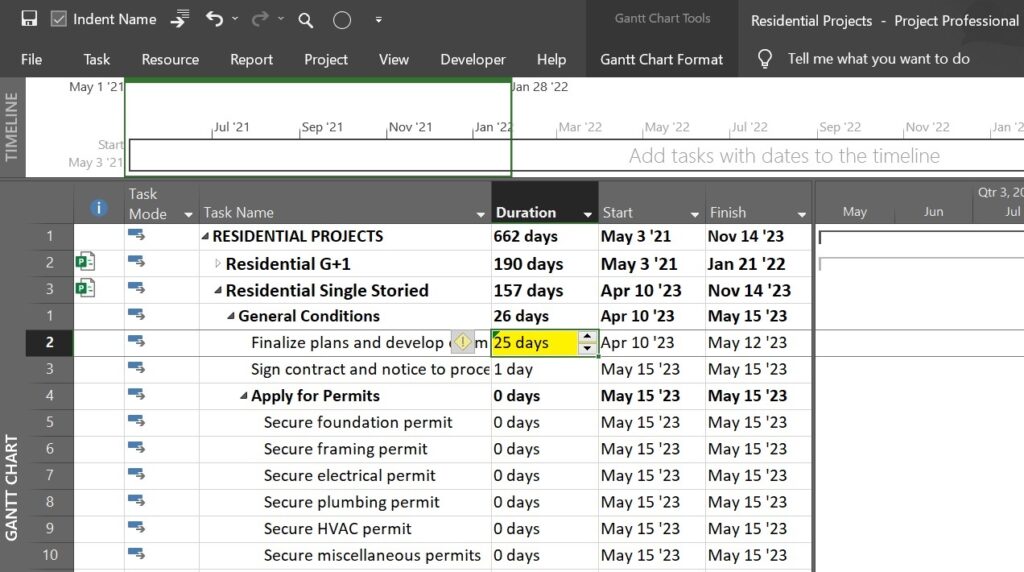
The sub-projects added to the master project are now linked to the “MS Project” files of the respective independent project. Any changes in the master project will reflect in the respective sub-project which is saved as an individual project in the folder. For instance, we will change the “Duration” of activity in sub-project 2, “Finalize plans and develop an estimate with owner, architect” to 25 days instead of 20 days in the original schedule. Now the “Duration” of sub-project 2 is changed to 157 days instead of 152 days in the original schedule. The “Duration” and “Finish” of the master project “RESIDENTIAL PROJECTS” are also changed with respect to the changes in sub-project 2.
Now we will save the master project and open the individual project “Residential Single Storied” which is saved as a sub-project within the master project “RESIDENTIAL PROJECTS.” We can observe that the changes in the duration are automatically updated in the individual project as well since the project is linked to a master project. The “Duration of the project is changed to 157 days instead of 152 days in the original project. The “Finish” date of the project is also changed to “Nov 14 ’23” instead of “Nov 7 ‘23” in the original project.
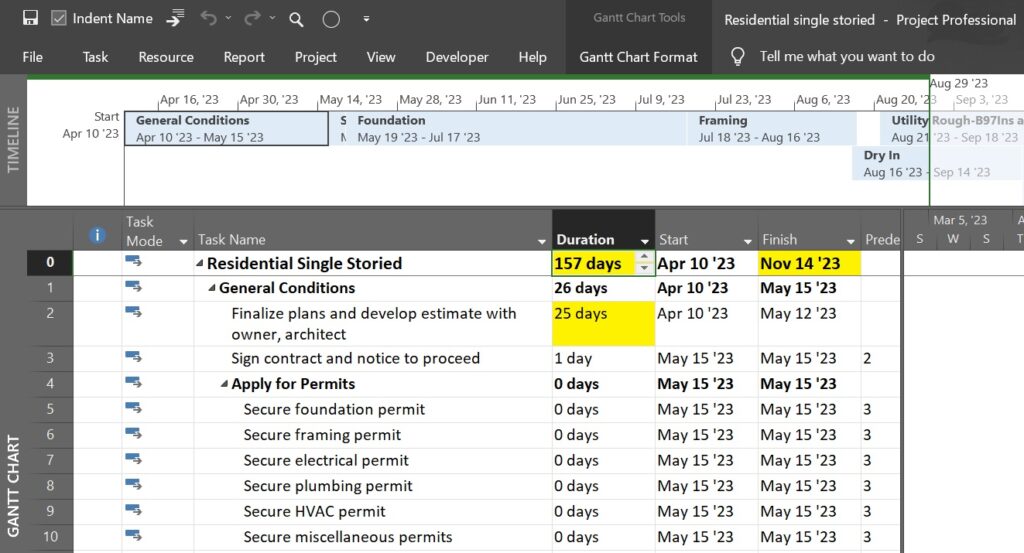
As explained above, all the sub-projects linked to a master project shall be managed in a master project rather than opening each individual project file and changing the parameters.
Contact Leopard Project Controls for your next Construction Scheduling Project.
Conclusion:
Sub-projects are a useful feature in MS Project that can help us to manage large, complex projects more effectively. By breaking down the project into smaller pieces, we can better manage tasks, resources, and budgets. Creating and managing sub-projects in MS Project can be done by following the steps outlined in this article.


