The Cost loading for Primavera P6 Schedule requires Budgeted Total Cost for the activities as per the Bill of Quantities. Generally, the Budgeted Total Cost is entered manually for the activities in the Primavera P6 schedule. Instead of manually entering the Budgeted Total Cost for each activity, the values shall be imported from the Excel file to the Primavera P6 schedule. To do this we need to follow the steps as follows.
Step 1:
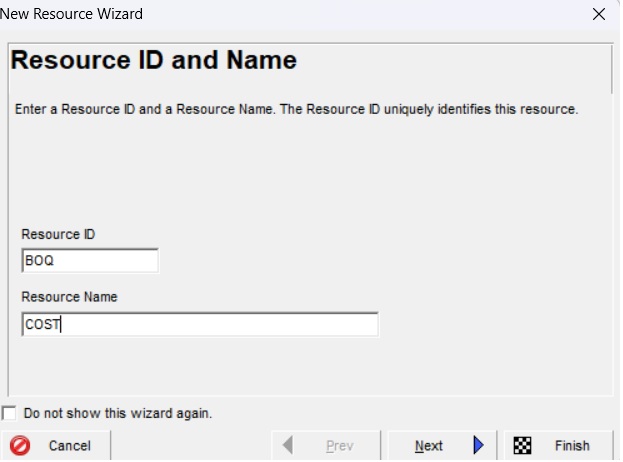
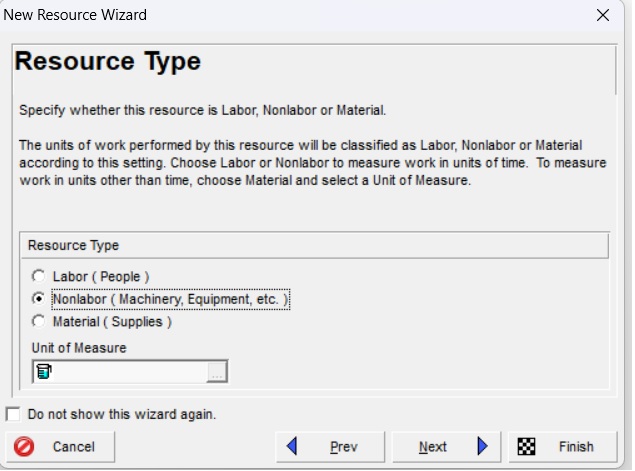
We need to create a new “Resource” for “Budgeted Total Cost” in the Primavera P6 schedule to transfer the values from the Excel file to the resource. To do this we will click “Enterprises” and “Resources.” In the “Resources” window, we will click “Add,” enter “Resource ID,” and “Resource Name,” as “BOQ,” and “Cost,” respectively, and click “Next.” In the “Resource Type” window, we will select “Nonlabor” as “Resource Type,” and click “Finish.”

Step 2 :
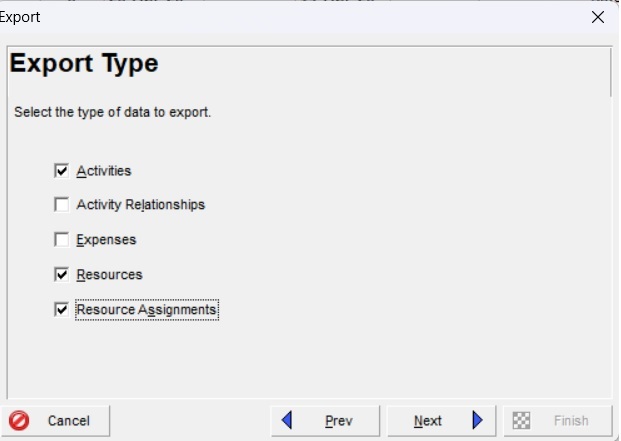
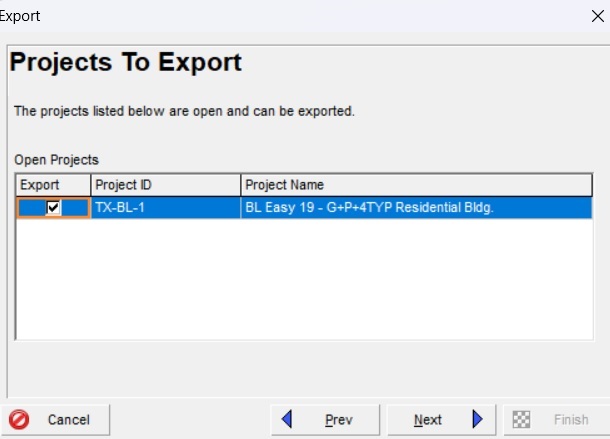
We need to export the Primavera P6 Schedule to Spreadsheet (XLSX) format, with the column for the Budgeted Total Cost. To do this we will click “File” and click “Export” to open the “Export Format” window. In the “Export Format” window we will select “Spreadsheet-(XLSX)” and click “Next.” In “Project Type” we will select “Activities,” “Resources,” and “Resource Assignments” and click “Next.” Then in the “Projects to Export” window, we will select the current project and click “Next.”

Step 3:
We need to create a new template to export the required data to an Excel file. To do this we will click “Add” in the “Select Template” window. In the “Modify Template” window we will type “Cost” as “Template Name,” and select “Resource Assignments” as “Subject Area.”

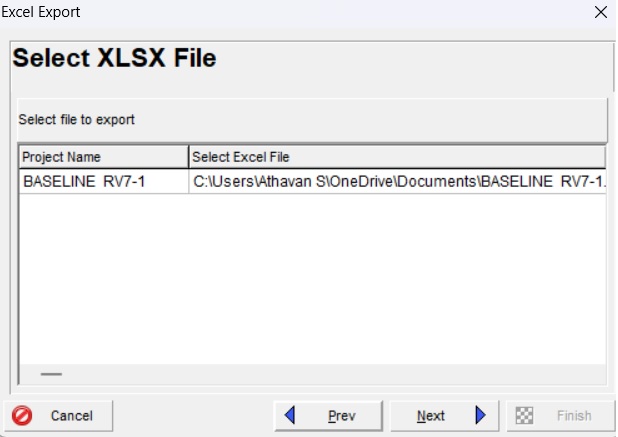
In the “Modify Template” window we will select “Budgeted Total Cost” from the “Available Options,” click the “Add to list” arrow, and click “OK” to move it to the “Selected Options,” In the “Select Template” window we will select the aforesaid new template and click “Next.” Then in the “SELECT XLSX File” window we will select the path to save the Excel file, and click “Next.” When the “Summary” window appears, we will click “Finish.”


Step 4:
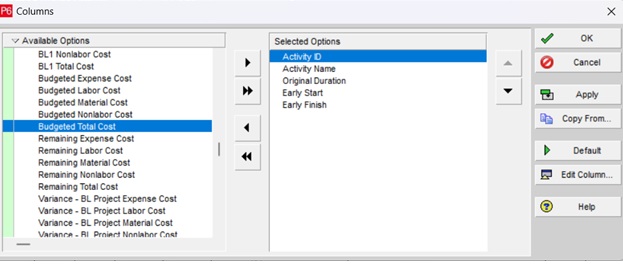
We will click “Columns”, in the “Columns” window, select “Budgeted Total Cost” from “Cost” in “Available Options” and move it to “Selected Option,” We will save the Layout as “BOQ Cost.” Note that the “Budgeted Total Cost “will be displayed as $0, before importing the values from the Excel file as shown in the figure 12 below.

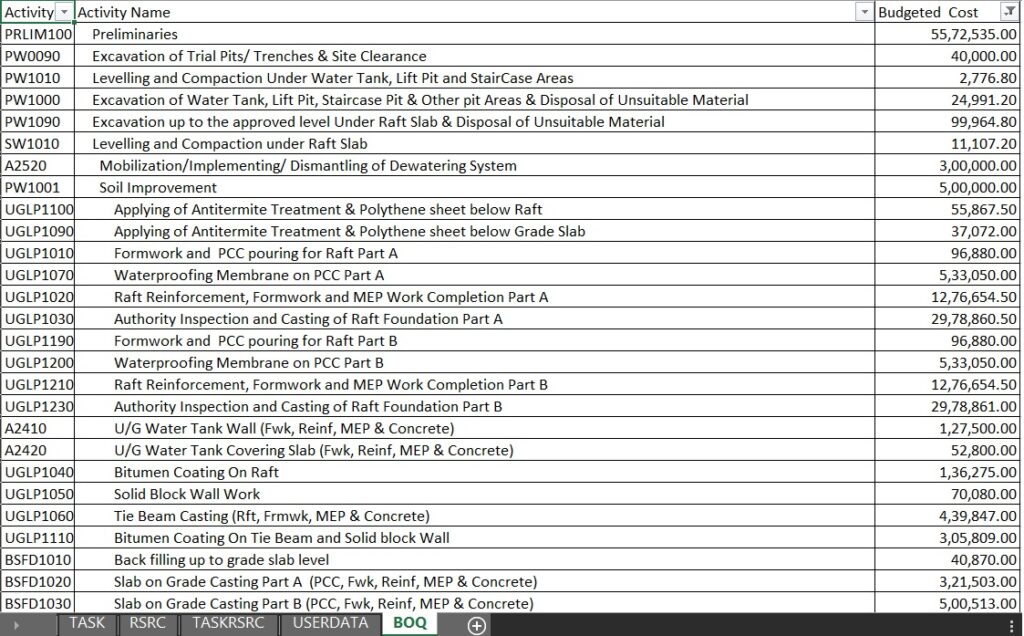
We will prepare BOQ (Bill of Quantities) in Excel as per the activities in the Primavera P6 schedule. Then we will open the exported Excel file from Primavera P6 and add a new sheet named “BOQ.” We will copy the Activity ID, Activity Name and Budgeted Total Cost from the BOQ prepared in the Excel file and paste the values in the new sheet named “BOQ” in the exported Excel file.
Then we will transfer the values of “Budgeted Total Cost” from column number 3 of the “BOQ” sheet to column number 9 of the “TASKRSRC” sheet of exported Excel file using the “VLOOKUP” formula. Then we will drag the formula to all the rows in column number 9 of the “TASKRSRC” sheet.
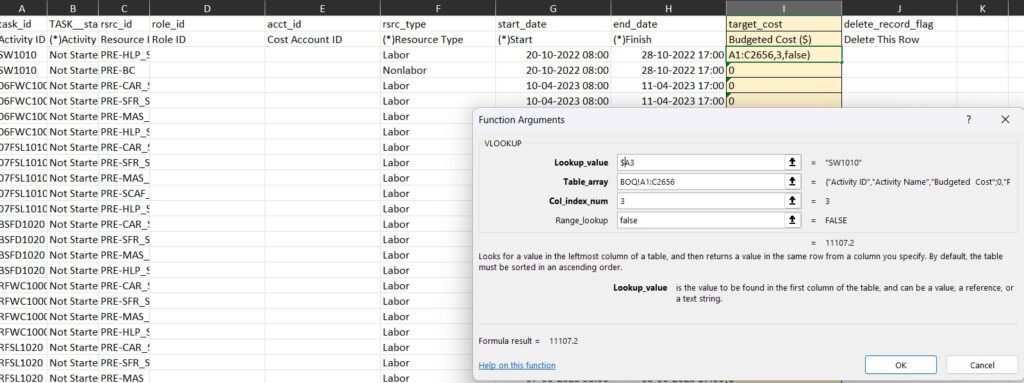
Once the values for “Budgeted Total Cost” are transferred to column number 9 of the “TASKRSRC” sheet, we will save the Excel file and close it.
Step 5:
To import the Excel file with values of “Budgeted Total Cost” to Primavera P6 schedule, we will click “File,” “Import,” select “Spreadsheet (XLSX)” as “Import Format” and click “Next.” In the “Import Type” window we will select “Project” and click “Next.” Then we will select the exported Excel file saved with values of “Budgeted Total Cost” and click “Next.”
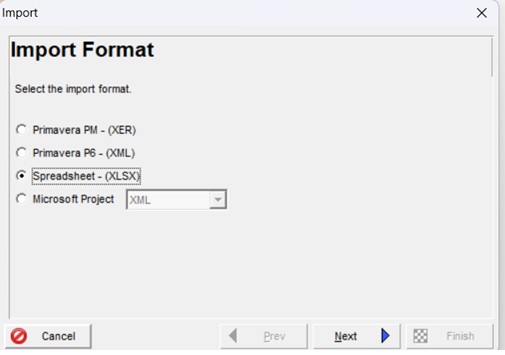

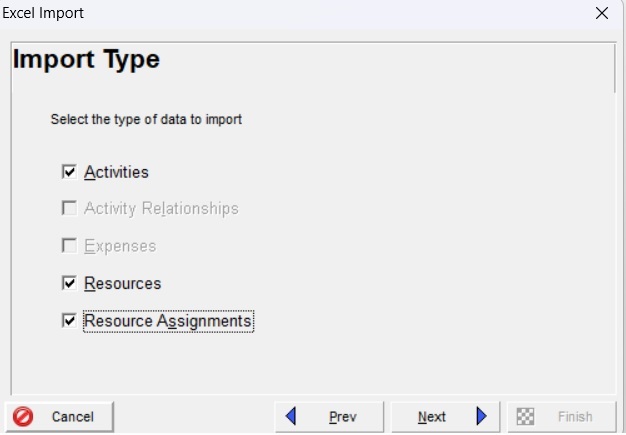
Once, we select the Excel file and click “Next,” the schedule navigates to a new window “Import Type,” wherein we will select “Activities,” “Resources,” “Resource Assignments,” and click “Next.”
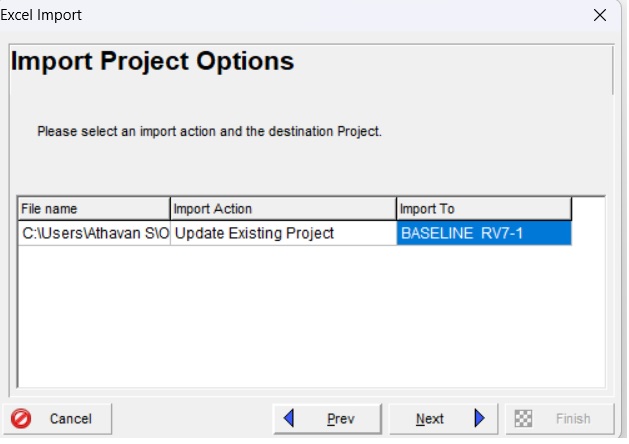
In the Next window “Import Project Options” we will select the Primavera P6 schedule which is open in the “Import To” column and click “Next.” The Primavera P6 navigates to the next window “Summary” and we will click “Finish.”
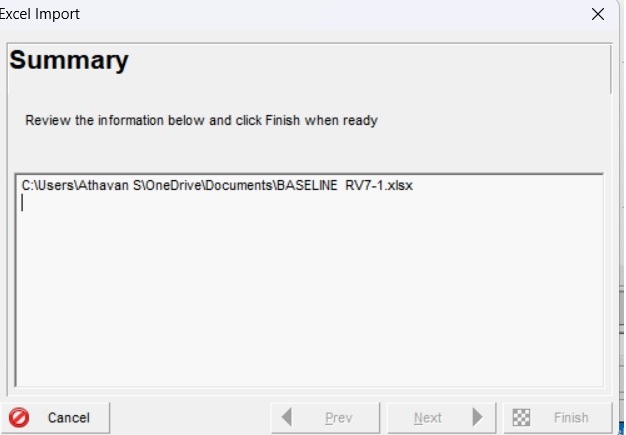
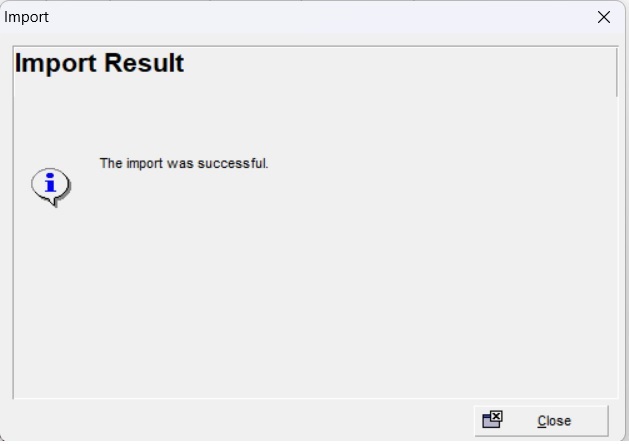
The final window “Import Result” will appear with the message “The import was successful” and we will click “Close” to end the import process.
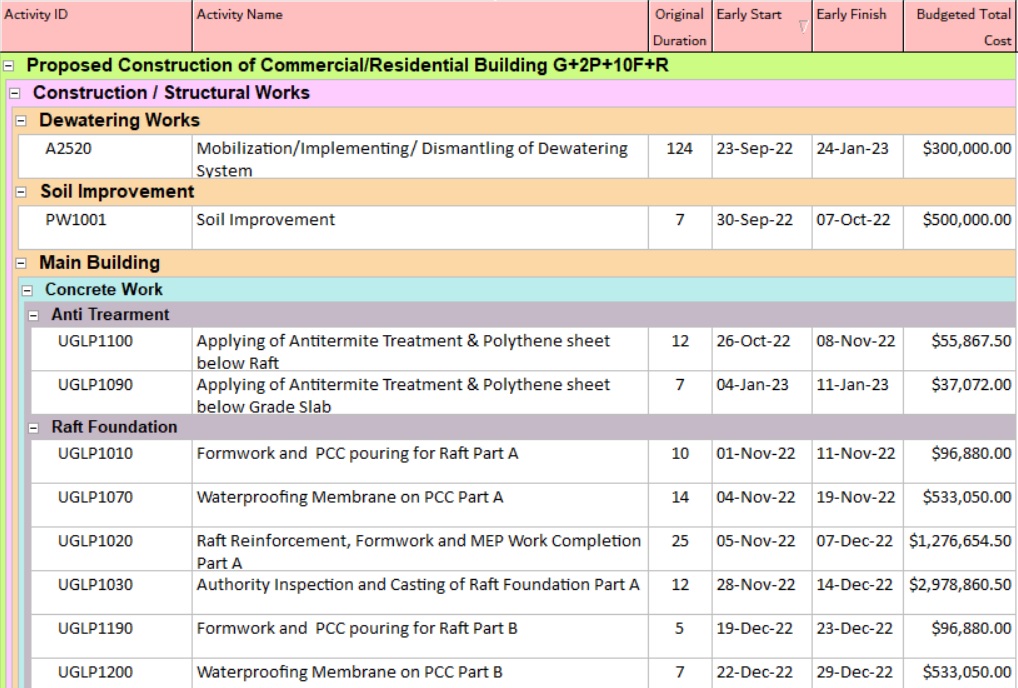
After the import process, we will open the Primavera P6 Schedule with a layout saved as “BOQ Cost.” The “Budgeted Total Cost” values are now available in the schedule for the respective activities as shown in the figure below.
Conclusion:
This process of importing Budgeted Total Cost from an Excel file is a useful technique requiring less time than manually entering the values for each activity in the Primavera P6 schedule.


