Primavera P6 is a comprehensive project management software that enables project managers to plan, manage, and control their projects efficiently. In addition to the built-in indicators, Primavera P6 also allows users to create their own user-defined indicators to measure specific project metrics. In this article, we will discuss creating a user-defined field for critical indicators and how to assign the indicators for critical activities in Primavera P6.
What is User Defined Field in Primavera P6?
A user-defined field in Primavera P6 is a custom field created by a user to capture specific data points relevant to their project or business needs. These fields are created by the user and are not a part of the software’s default fields. Users can create user-defined fields to track project-specific metrics or capture additional data points unavailable in the default fields.
User-defined fields in Primavera P6 can be of different data types, such as number, integer, text, cost, indicator, start date, and finish date. Users can also define custom formulas using these fields, which can be used to calculate and track custom metrics that are not available in the software’s default fields.
Creating a new User Defined Field for Critical Indicators in Primavera P6.
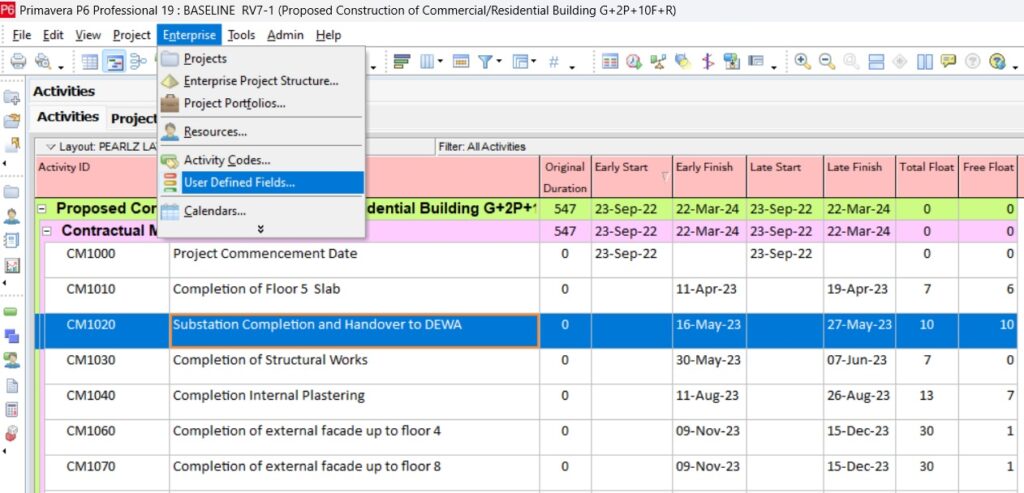
To create a new user-defined field for critical indicators in Primavera P6, we will click” Enterprise,” and “User-Defined Fields.”
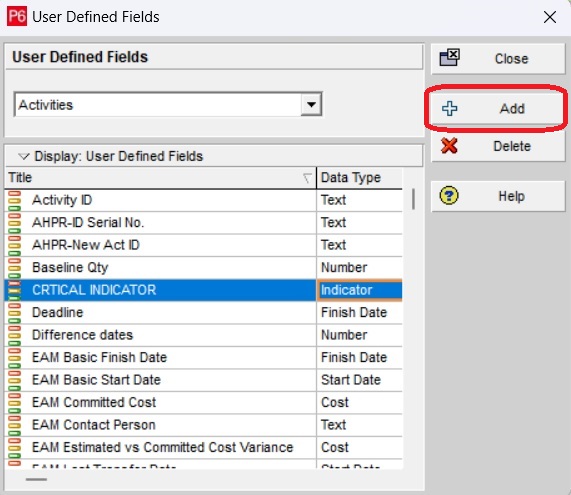
In the “User Defined Fields” window we will click “Add” to create a new user-defined field. We will enter the “Title” for the new user-defined field as CRITICAL INDICATOR and select “Data Type” as “Indicator” as shown in the figure below. Then we will click “Close” to save the entered values and exit the “User Defined Field” window.
Adding a new column in the layout for Critical Indicators.
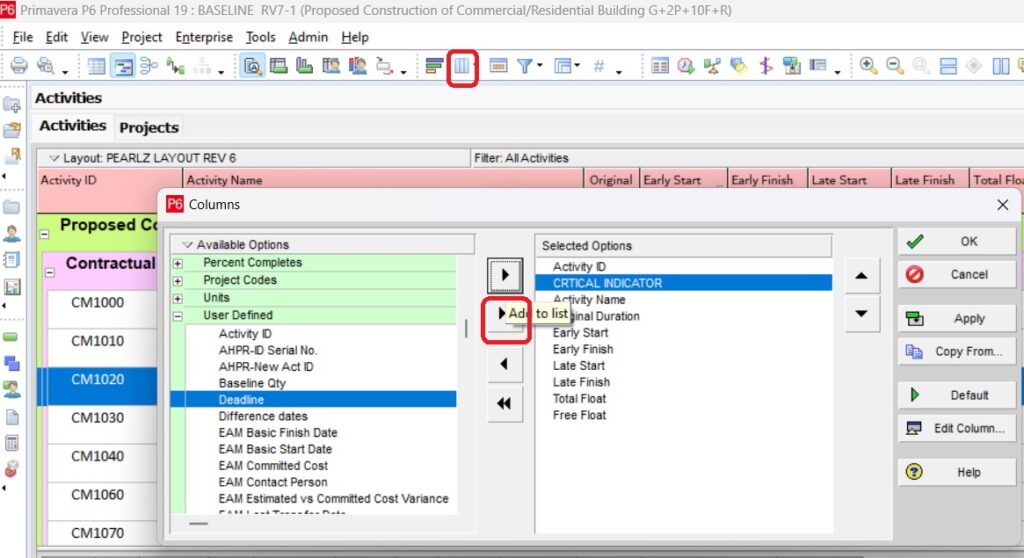
To create a new column for the critical indicators, we will click “Columns,” and in the “Column” window we will select “CRITICAL INDICATOR” from the “User Defined” and click “Add to List,” to move the critical indicator to “Selected Options.” Once the “CRITICAL INDICATOR” field moves to the “Selected Options,” we will click “OK” to save the changes and exit the window.
Assigning Critical Indicators to activities.
We need to create a new “Global Change” with the required parameters to assign critical indicators to all the activities in the project schedule. To do that we will click “Tools” and “Global Change.” In the “Global Change” window, we will click “New” to create a new “Global Change.”

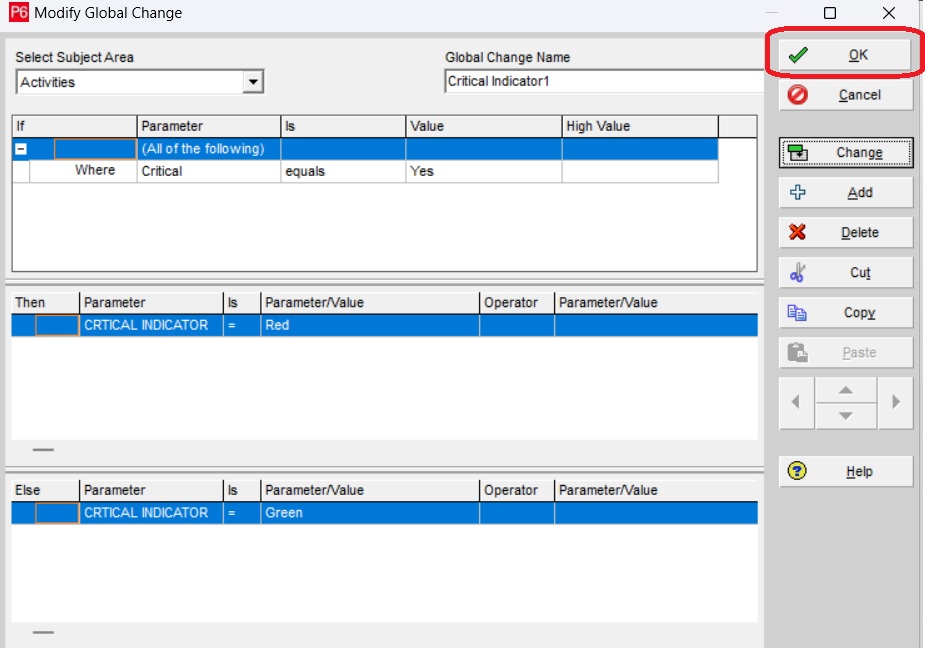
Once we click “New” in the “Global Change” window, the “Modify Global Change” window will appear wherein we will enter the “Global Change Name” name as “Critical Indicator1” and assign a red color indicator for critical activities and a green color indicator for non-critical activities as “Parameter/Value” as shown in the figure below.

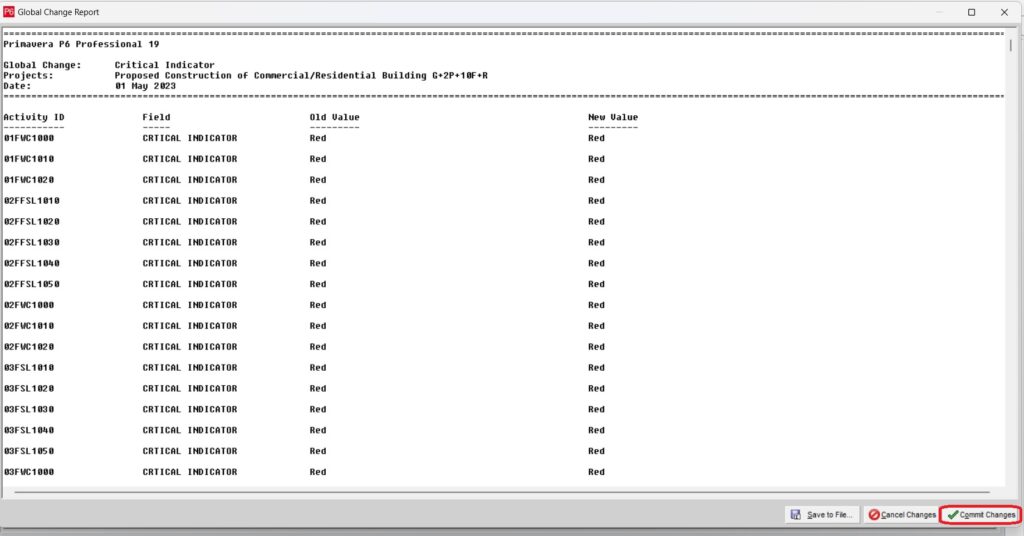
Once the “Parameters/Values” are entered in “Global Change,” we will click “Change” and in the “Global Change Report,” we will click “Commit Changes.”
Then we will click “OK” in the “Modify Global Change” window and “Close” in the “Global Change” window to save the assigned parameters/values and close the windows.
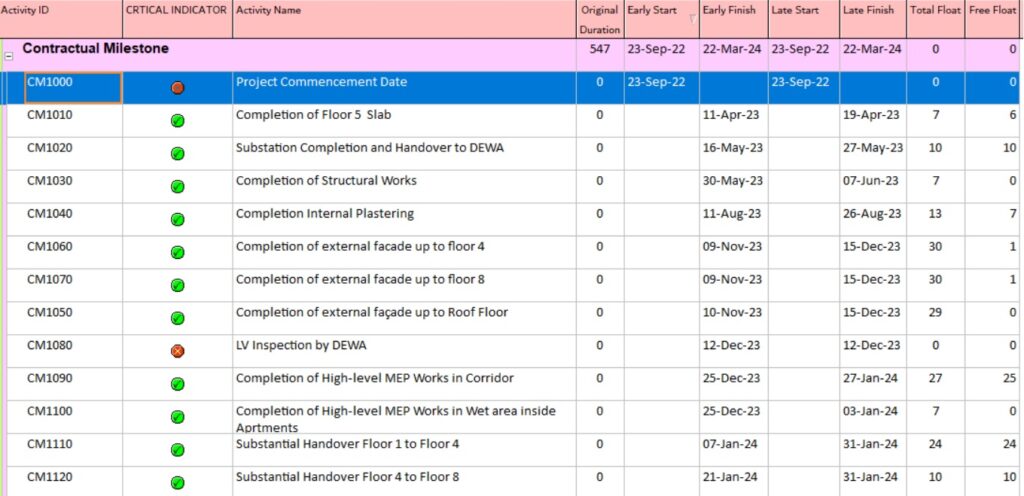
Now we can notice that the critical indicators are displayed in the project schedule layout, for all the activities with red color for critical activities and green color for non-critical activities as shown in the figure below.
Conclusion:
In conclusion, creating a user-defined field for critical indicators in Primavera P6 is a simple process that can help project managers to measure specific project metrics. By following the above-mentioned steps, we can create user-defined fields for critical indicators, add them to the project layout, assign parameters, and calculate the values based on specific criteria. With critical indicators, we can gain a deeper insight into the project metrics and make more informed decisions about how to manage the projects effectively.


