Activity codes in Primavera P6 are custom fields that allow users to classify and organize project activities based on specific criteria.
The “Activity Codes” can be classified into three different types such as “Global Activity Codes,” “EPS Activity Codes,” and “Project Activity Codes.” The procedure to create new “Activity Codes” for each type and to assign it to activities shall be as follows:
Creating “Global Activity Code” and Adding Values
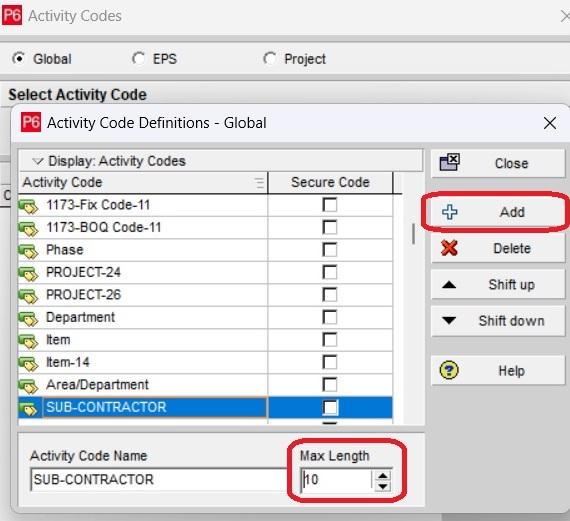
To create a new “Global Activity Code” we will click the “Enterprises” tab and “Activity Codes.” Then we will select “Global” in the option button and click “Modify” to create a new “Global Activity Code.”

Then we will click “Add” in the “Activity Code Definitions- Global” window. For instance, we will add “SUB-Contractor” as a new “Global Activity Code.” To set a maximum number of characters for the new “Global Activity Code” we will click the top arrow in “Max Length,” and click “Close.”
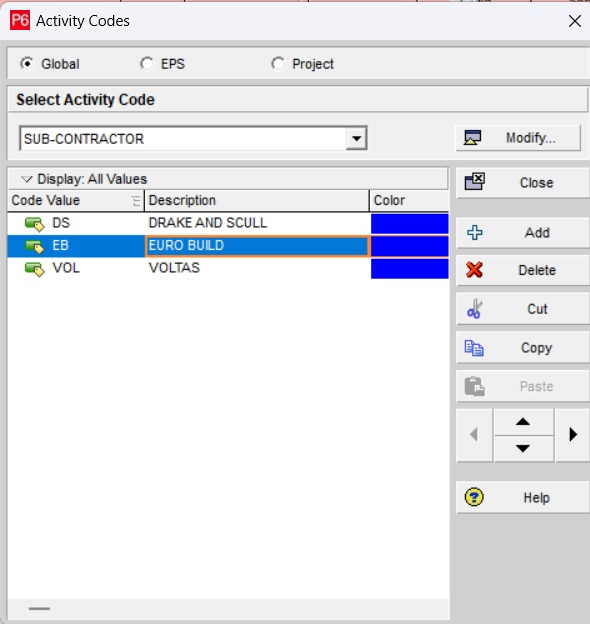
To add values, we will click the pull-down menu in “Select Activity Code” and select SUB-CONTRACTOR. After that, we will add “Code Value” and “Description” for the selected “Global Activity Code,” as mentioned in the figure below.
Assigning “Global Activity Code” to activities
For instance, we, will select Mechanical drawings submission activities and assign DRAKE AND SCULL as sub-contractor. To assign “Global Activity Code” we will select activities, right-click then select “Assign” and click “Activity Code.” Then we will type DS in “search,” to get the sub-subcontractors name in “Description” and click the assign button. Now the selected activities are assigned with the new “Global Activity Code.”

Filtering activities with “Global Activity Code”
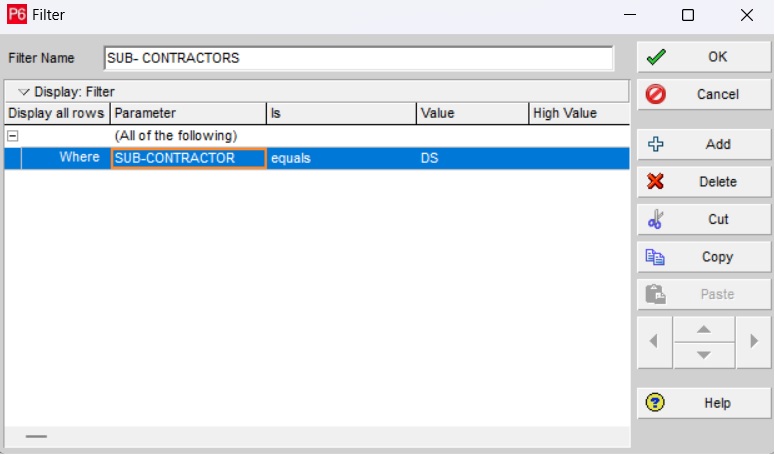
To filter activities with a specific value of “Global Activity Code” we will click “Filter,” in the menu bar and click “Add” in the “Filter” window. In the filter window, we will add the parameter as shown in the figure below.
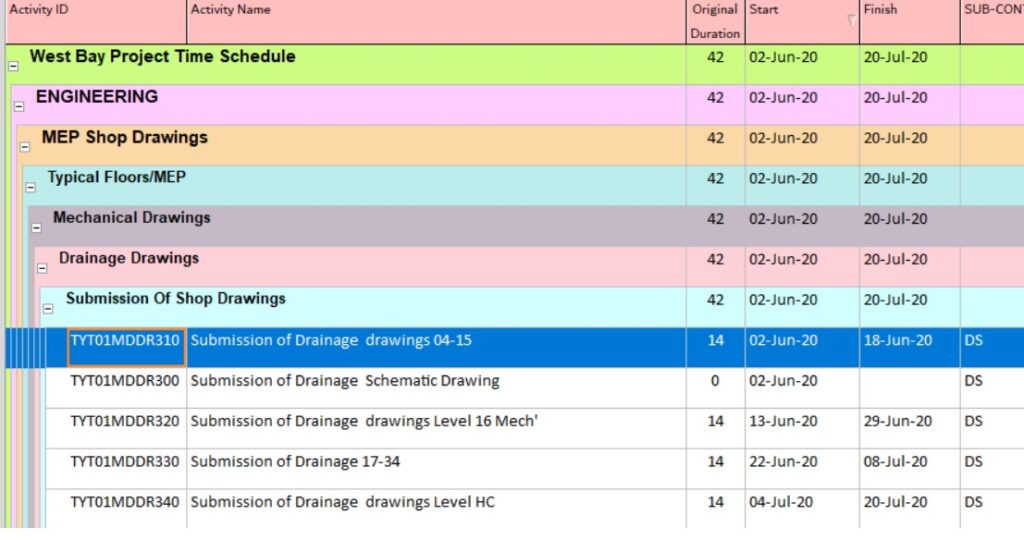
After adding the parameters, we will click “OK,” and “Apply.” The filtered activities with assigned “Global Activity Code,” will be displayed as shown in the figure below.
Creating “EPS Activity Code” and Adding Values
To create a new “EPS Activity Code” we will click the “Enterprises” tab and “Activity Codes.” Then we will select “EPS” in the option button, click “Modify,” and “Add” to create a new “EPS activity Code.” For instance, we will select an EPS with the name “EDC ENGINEERING CONSULTANTS,” Then we will add “CLIENT” as a new “EPS Activity Code.” To set the maximum number of characters for the new “Global Activity Code” we will click the top arrow in “Max Length” and click “Close.”
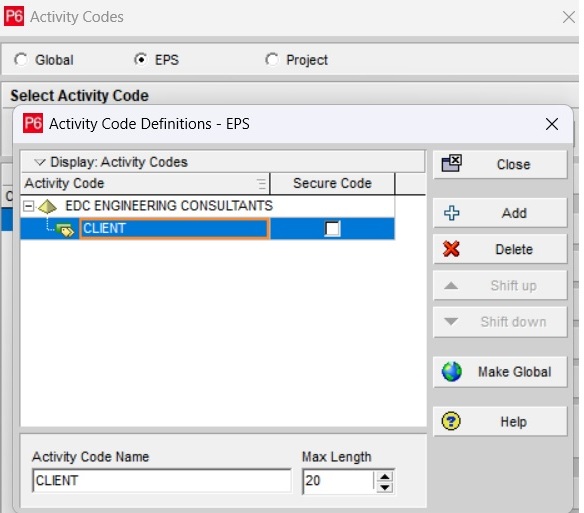
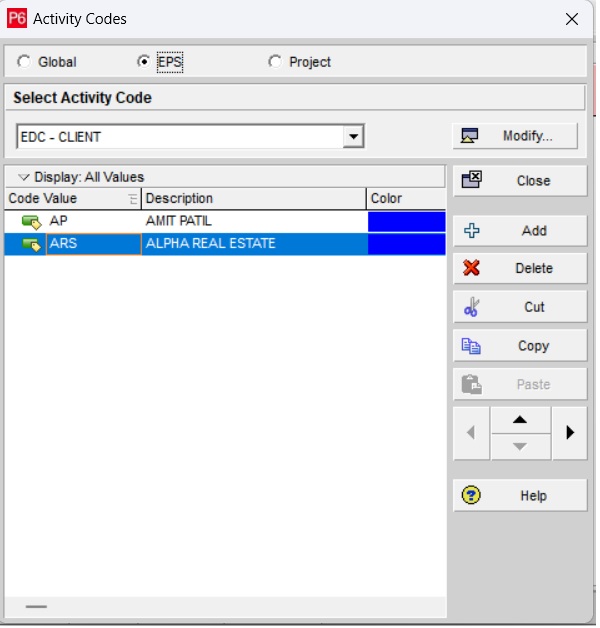
To add values to an “EPS Activity Code” we will click the pull-down menu in “Select Activity Code” and select “CLIENT”. After that, we will add “Code Value” and Description” for the selected “EPS Activity Code,” as mentioned in the figure below.
Assigning “EPS Activity Code” to a Project
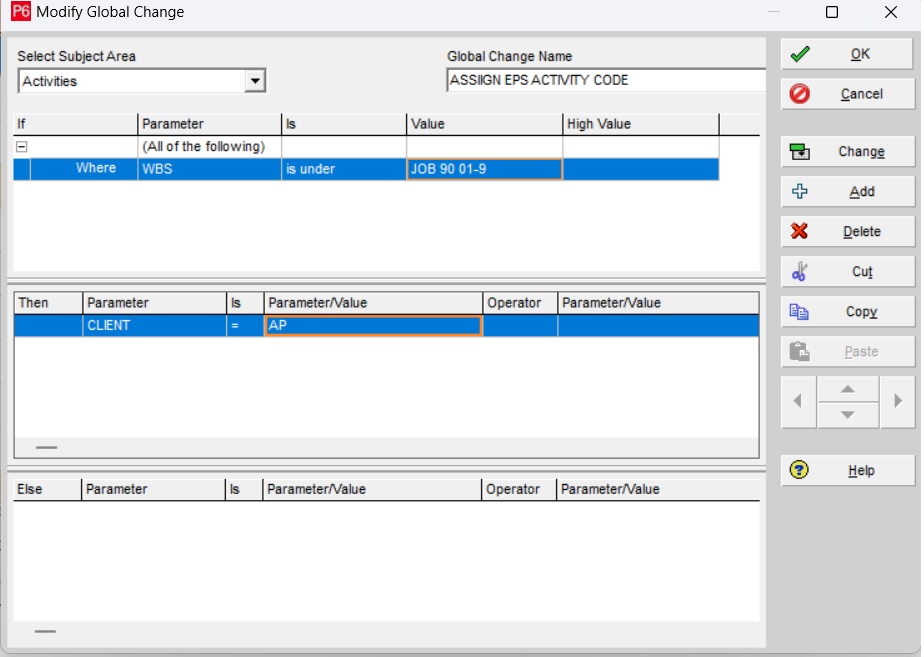
For instance, we will assign “Amit Patel” as a client for a project. To do this we will open the project, click “Tools,” “Global Change,” and create a new “Global Change”. We will select the project “WBS,” add parameters for “Global Change,” as shown in the figure below, and click “OK.”
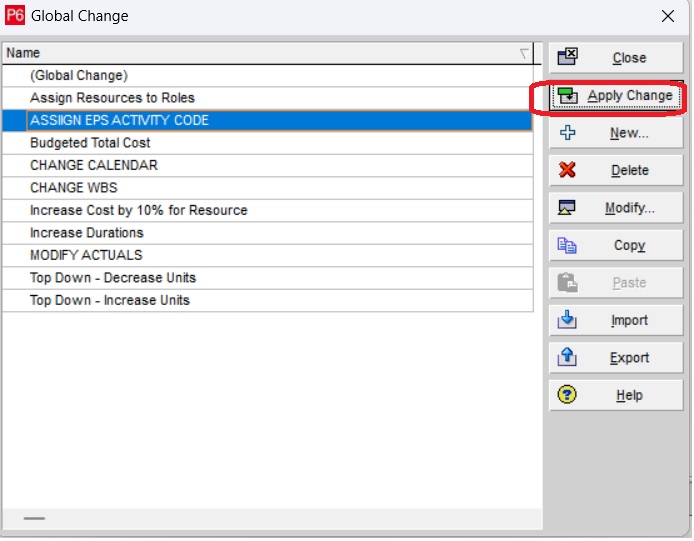
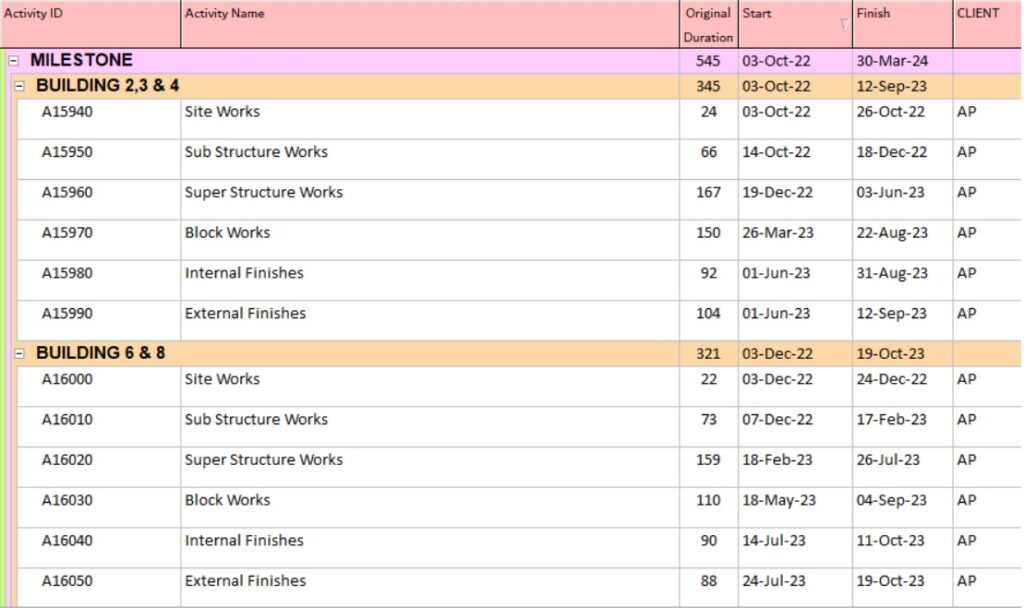
Then will click “Apply Change” and when the message box appears we will click “OK,” to apply the global change for the activities in the project. Once the “Global Change” is applied all the activities in the project are assigned with the selected “EPS Activity Code.” To view this will click “Columns” from the menu bar and click “Activity Codes-EPS,” from the “Available Options,” select “CLIENT,” and click the right arrow to move it to “Selected Options.” After that we will click “OK” and we can view the assigned “EPS Activity code” for all the activities as below.
Creating “Project Activity Code” and Adding Values
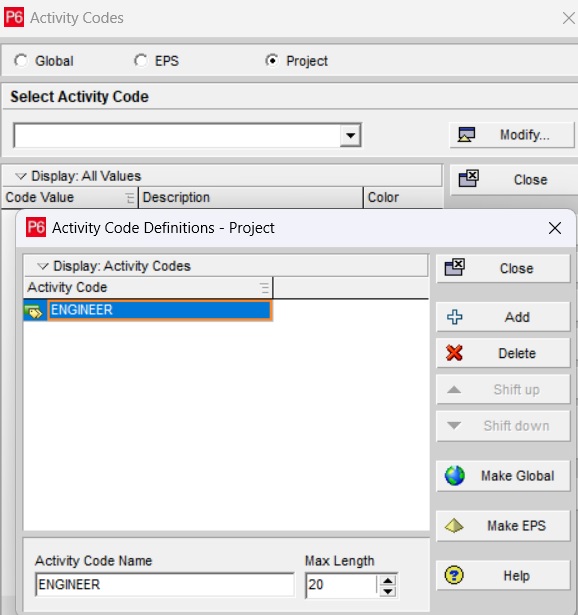
To create a new “Project Activity Code” we will click the “Enterprises” tab and “Activity Codes.” Then we will select “Project” in the option button and click “Modify” to create a new “Project Activity Code.” For instance, we will create “ENGINEER” as a new “Project Activity Code.”
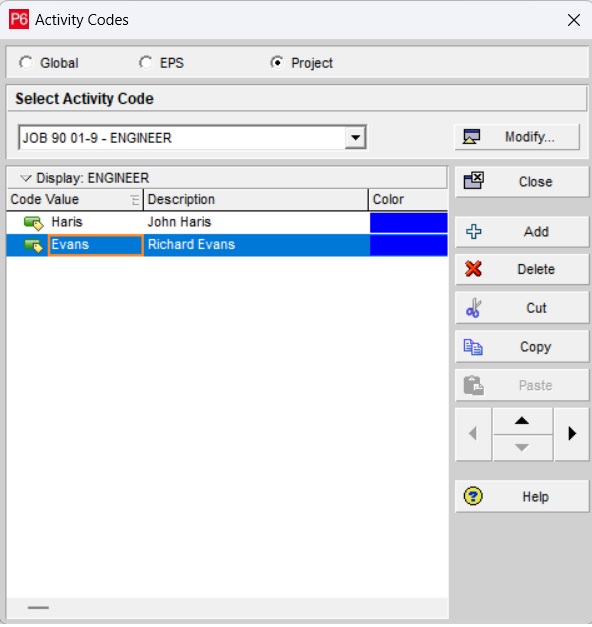
To add values to a “Project Activity Code” we will click the pull-down menu in “Select Activity Code” and select “ENGINEER.” After that, we will add “Code Value” and “Description” for the selected “Project Activity Code,” as mentioned in the figure below.
Assigning “Project Activity Code” to activities
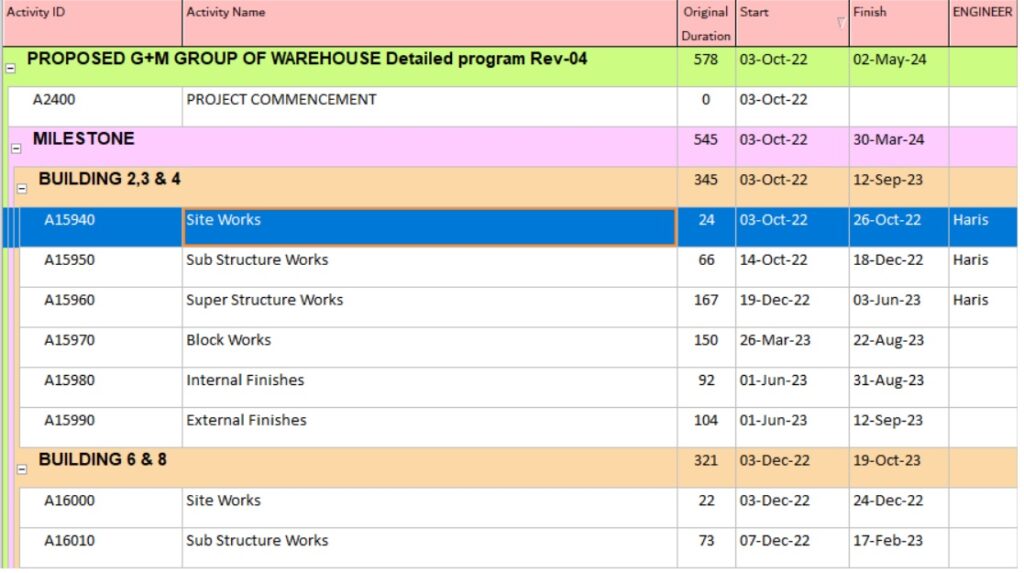
For instance, we will assign Engineers for the selected activities in the project. To do that we will select activities, right-click, select “Assign” and click “Activity Code.” Then we will select “Project” in the option button, select “Haris,” and click “Assign.”
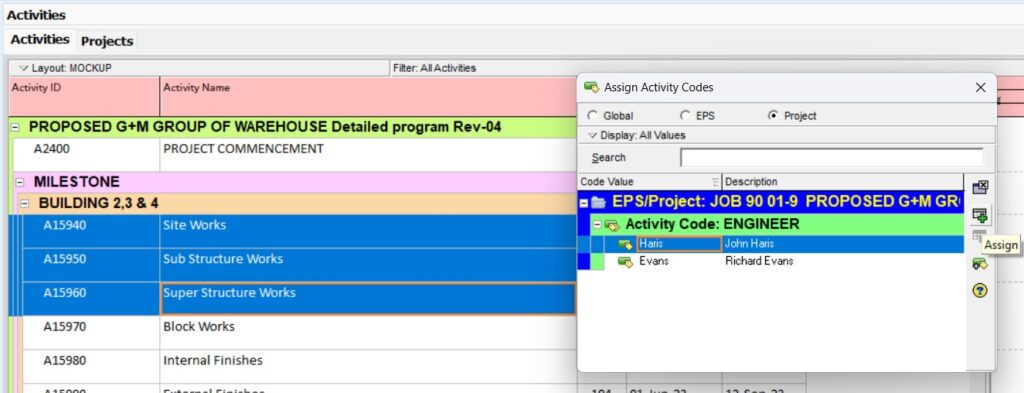
After assigning “Project Activity Codes,” we will add an “Activity Code” column in the layout to view the values of the “Project Activity Code” for the activities.
Filtering Activities Assigned with Specific “Project Activity Code
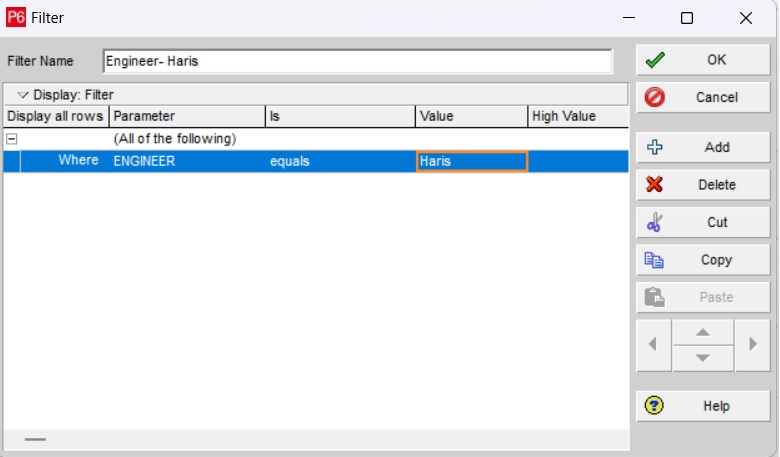
The activities assigned with a specific value of “Project Activity Code” shall be viewed using the filter in Primavera P6. For instance, we will create a new filter named the “Engineer- Haris”, and enter the parameter as shown in the figure below, click “OK,” and “Apply.”
When the aforesaid filter has been applied the activities assigned with the specific “Project Activity Code” will be displayed as shown in the figure below.

Learn about activity steps in Primavera P6 to streamline your project management tasks. Activity Steps can add detailed structure to your activities.
Conclusion:
The “Activity Codes” are a powerful feature of Primavera P6 that can enhance project management in a variety of ways. Project managers can easily filter, sort, and report project activities, by assigning activity codes based on their specific attributes. The project managers can use the activity codes feature to improve project visibility, streamline project management, enhance communication, and improve decision-making.


