Introduction to Primavera P6 Schedule Lag
When scheduling and planning to utilize scheduling best practices, one of the subjects that the project team will try to avoid is the subject regarding schedule lag. Positive schedule lag should be used sparingly, and although the Defense Contract Management Association (DCMA) allows limited positive lags in the project schedule, no more than five percent of these positive lags should exist. DCMA provides contract administration services for the Department of Defense (DoD) and other federal organizations and international partners. The organization is a key part of the acquisition process from pre-award contracts throughout project life cycles. DCMA standards and its 14-point assessment is considered part of the official guideline for scheduling and planning best practices.
Lags can often be avoided by building out additional tasks in the schedule that define time-lapse tasks such as construction drying or curing durations. The lag percentage in the project schedule is calculated by determining the number of logic links containing lags divided by the total number of logic links multiplied by 100.
On the other hand, negative lag is never acceptable and it is forbidden according to DCMA. A negative lag can occur in the project schedule if a successor activity with a finish-to-start relationship is started before the completion of its predecessor activity. Negative lag can distort a project schedule’s flow and wreak havoc on the critical path. Negative lag can be avoided by carefully planning activities in the proper sequence and by employing start-to-start relationships where necessary.
If you have adopted a project schedule that is riddled with lags, there is a relatively simple method to identify these lags. This article will demonstrate how to identify schedule lags in Primavera P6.
First Method: Quick Identification
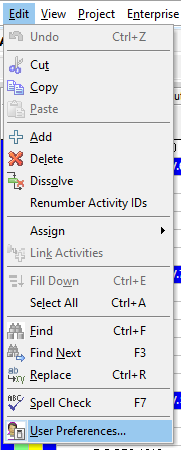
For this first method to operate correctly, you will need to ensure that your user preferences match the correct setting. Go to the Edit tab and select “User Preferences…”:
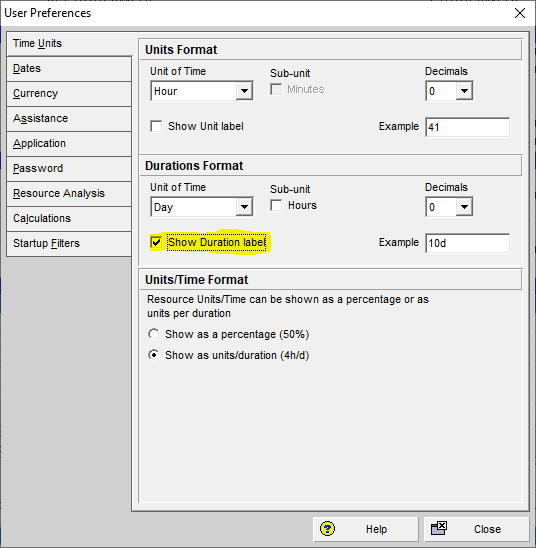
Next, under the Time Units tab, ensure that “Show Duration label” is selected with the checkmark:
When you view the Primavera P6 project schedule, right-click in the columns and add both “Predecessor Details” and “Successor Details”. You will notice that any tasks containing lags will show up with the numerical number of days next to the relationships:

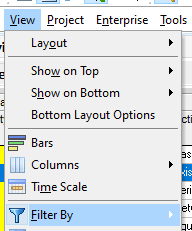
Go to the View tab in your open Primavera P6 schedule and select “Filter By” from the pull-down menu:
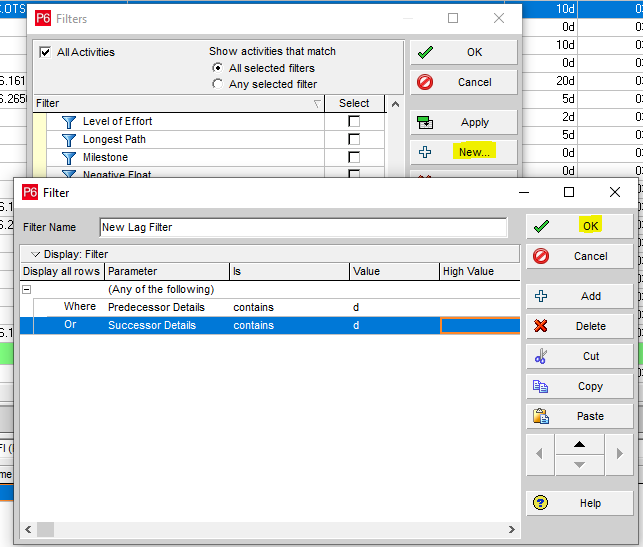
The Filters dialog box will appear. Select “New” on the right side of the dialog box to create a new filter. In this example, we will name the filter “New Lag Filter” for easy identification and select “Predecessor Details” under the Parameter, “contains” under the ‘is’ selection, and put the letter “d” under the Value column as indicated in the graphic below. Use the Add button to add another entry to the filter with the variable “Or” and enter the successor parameters as indicated below. Next, select “OK”:
Your new filter will show up under the User-Defined section of the Filters dialog box. Ensure that you highlight the selection for “Highlight activities in the current layout which match criteria” and click “OK”:
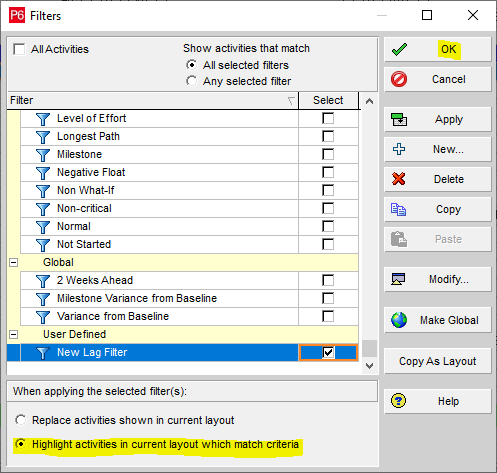
All of the Primavera P6 schedule activities that contain lag are highlighted:

Second Method: Using the Primavera P6 Report Wizard
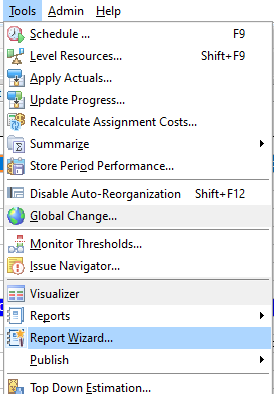
To create a lag report in Primavera P6, go to the Tools tab and select “Report Wizard…”:
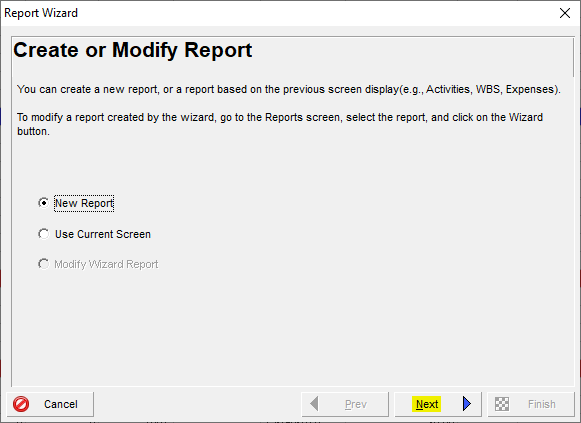
Select “New Report” and then “Next” when the Report Wizard dialog box appears:
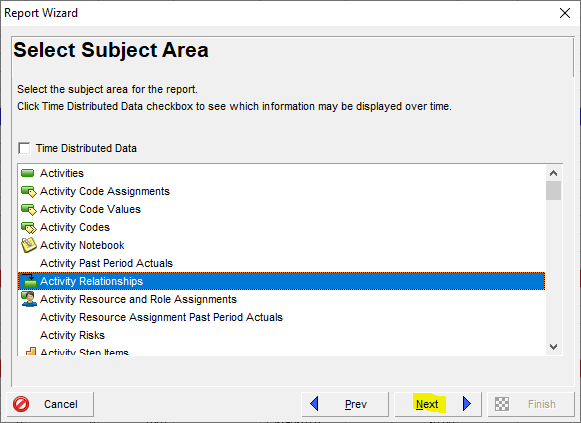
Select “Activity Relationships” and then “Next”:
Move the selection for “Activity Relationships” to the Selected Subject Areas and select “Next”:
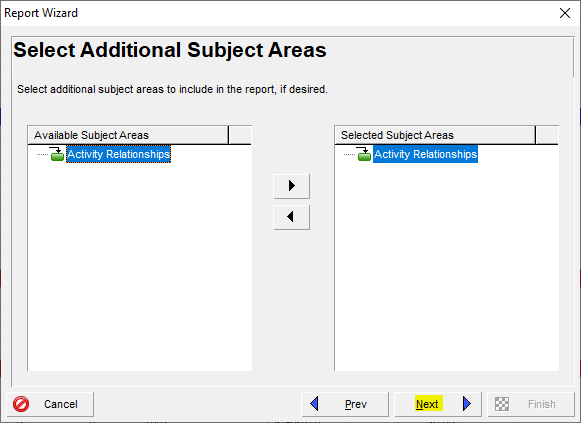
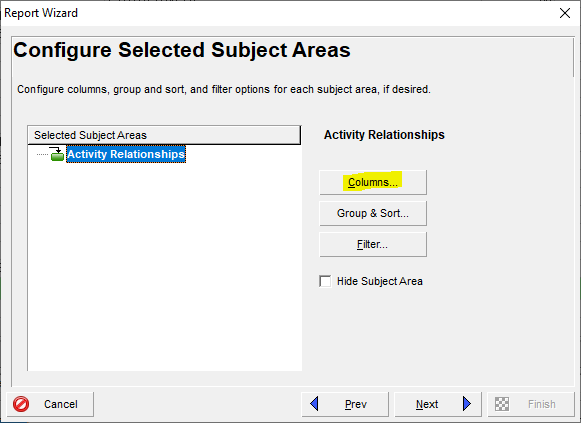
Select “Columns”:
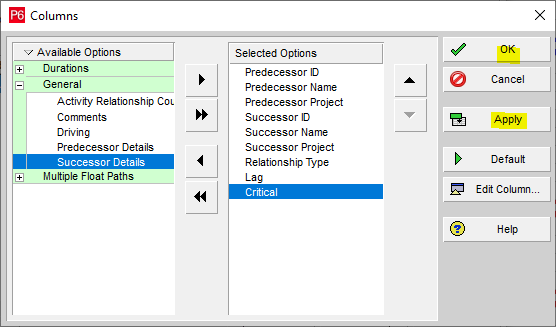
You can choose your preferred columns from the Available Options menu and move these to the Selected Options for your report:
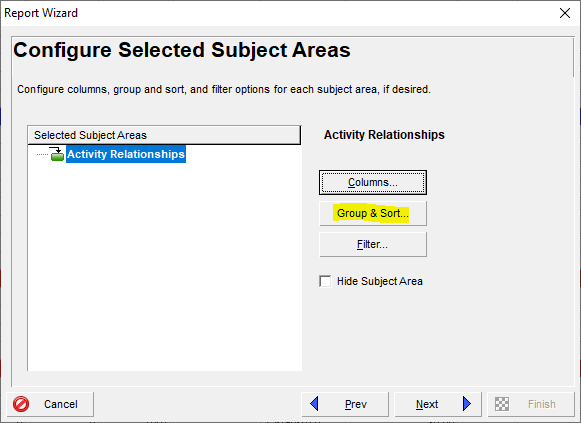
Next, select “Group & Sort…” from the Report Wizard dialog box and then “Next”:
Select “None” from the pull-down menu and then click “OK”:

Choose “Filter…” from the Report Wizard dialog box:
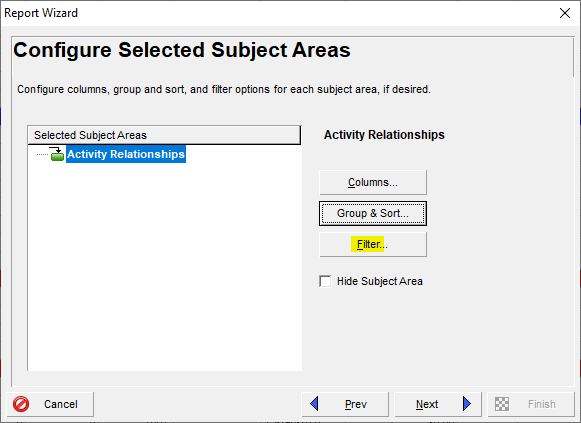
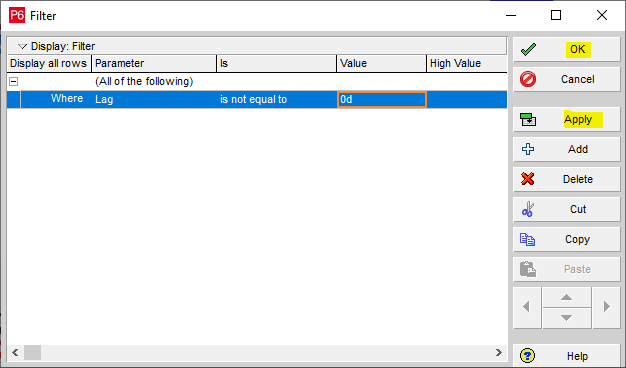
Use the parameters as indicated below and click “OK”:
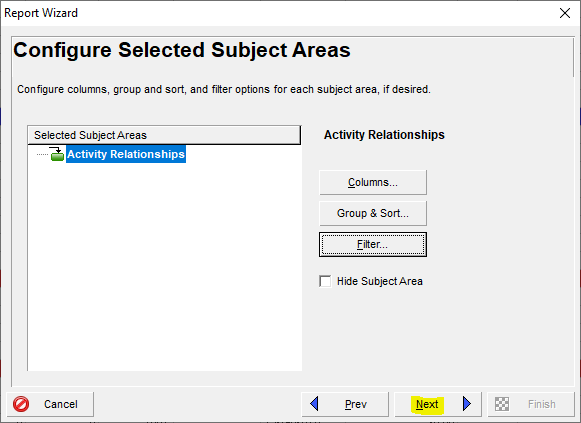
Click “Next”:
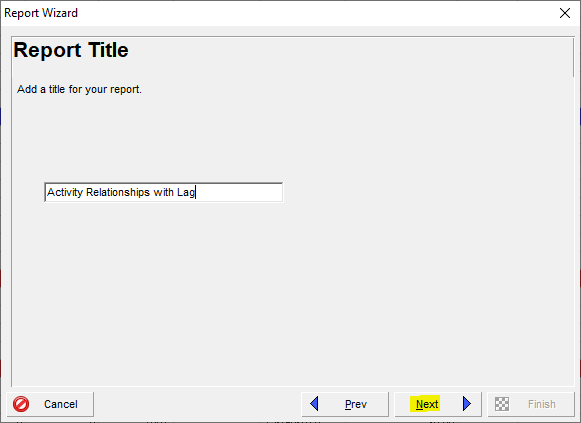
Type in a name for your new lag report and select “Next”:
Select “Run Report…”:
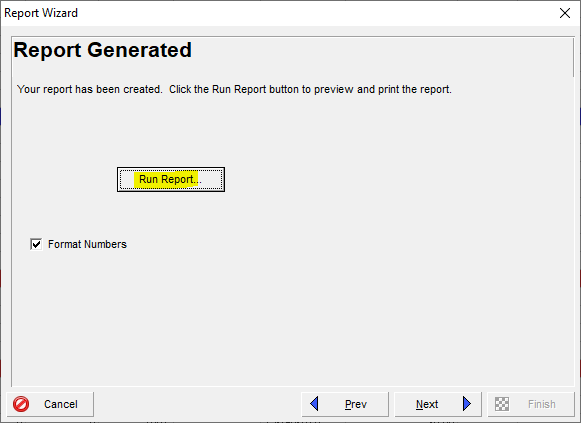
You will be able to generate a print preview of the report:
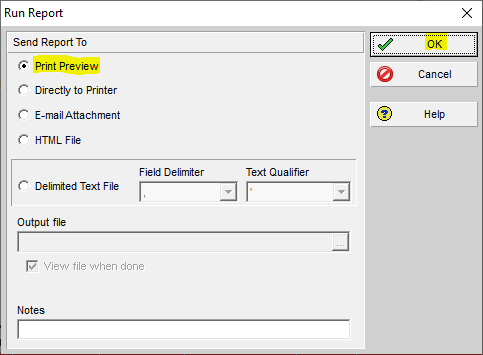
The report will show any task relationships containing lag in Primavera P6:

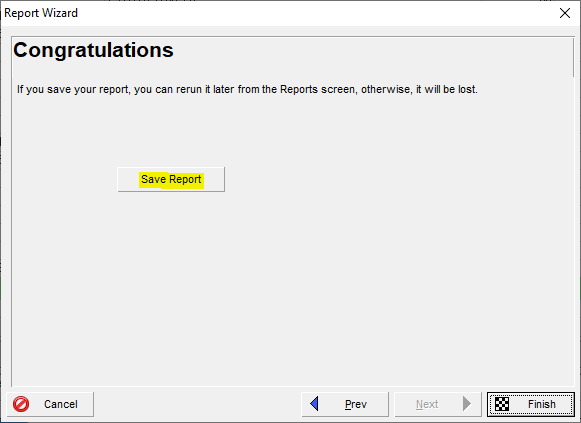
You can also save your Primavera P6 lag report for future use:
Conclusion
Properly identifying schedule lags in the Primavera P6 schedule is a simple and quick process, as defined in the detailed steps in this article. Finding the lags quickly allows the project team to evaluate and correct unnecessary lags, and by saving the parameters of the Primavera P6 schedule lag report, the project team can use the report for other projects as well.
Wondering what a CPM scheduling consultant can do for your project? Discover how Leopard Project Controls can optimize your schedules and enhance overall efficiency.


