
Introduction
Primavera is one of the strongest tools in planning, it has an easy and simple interface that anyone can use to make his schedule, recently it became very urgent to finish the scheduling process in the minimum possible time, especially in mega projects, a manual way can be used to add WBS and activities but it can be very time-consuming if we are facing a large number of WBS but no worries here is a way of making things faster and easier, all we need is Excel and the windows notepad.
How to Add WBS in Primavera P6 Using Excel and Notepad
Step 1:
Start Primavera P6 and log in to your project management account.
After creating a project, (here I made a new one), go to the Project tab then choose WBS.
Adding a project will be as follows:
Enterprise then from the menu chooses a project, on the rightmost side press the (+) to add a new project.
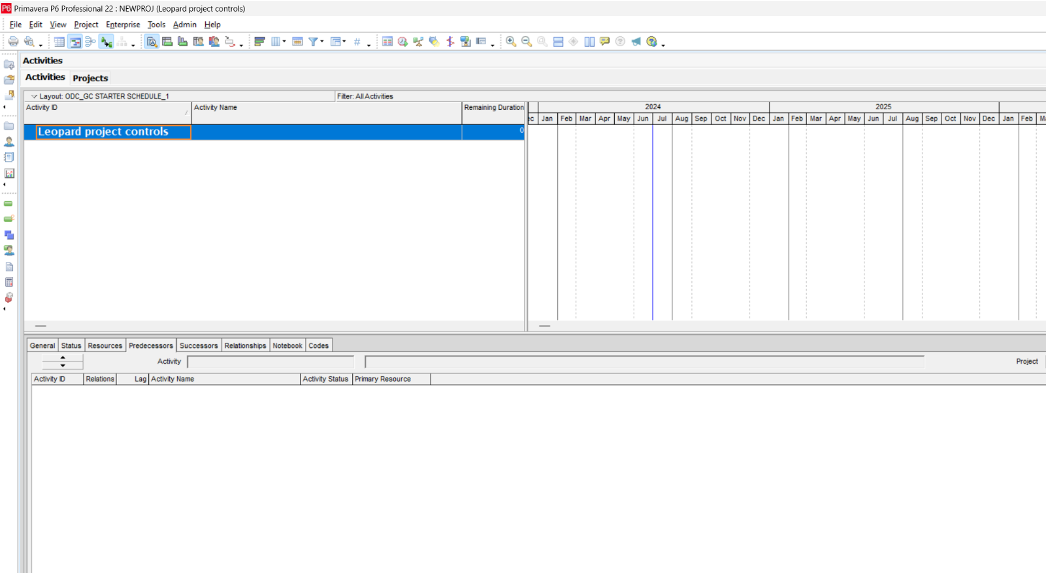
We need to add a new WBS that we will use later on, to do this follow this sequence project then WBS, and finish the helping wizard.
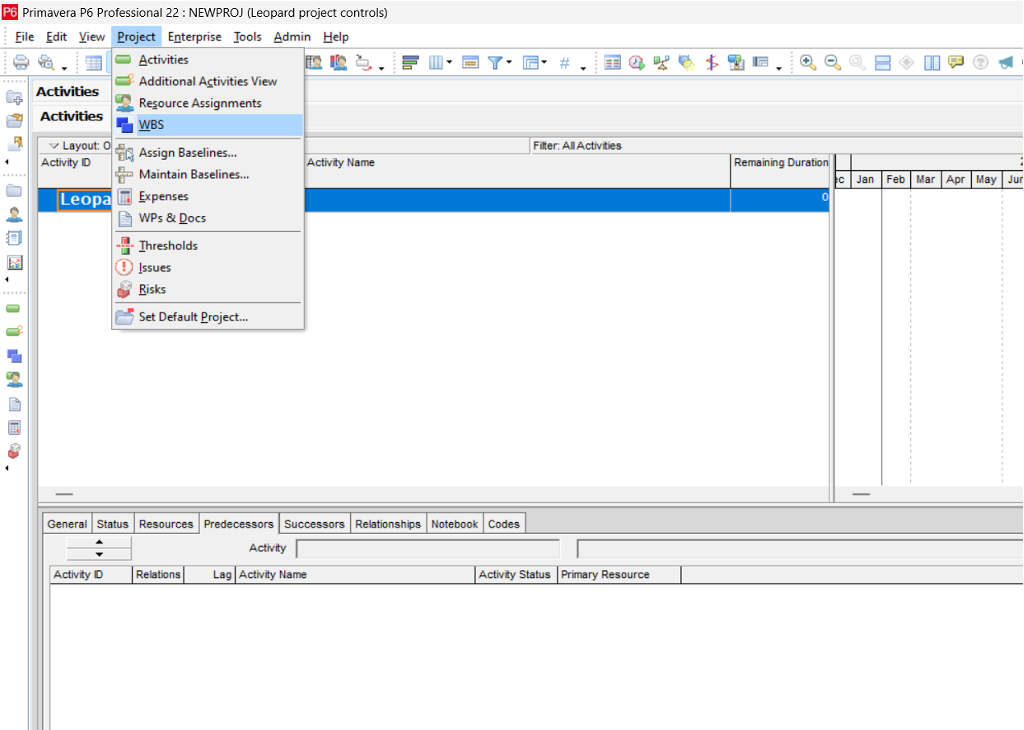
After completing the helping wizard, you will end up in a situation like this.

Now we need to export this project in the form of an XER File
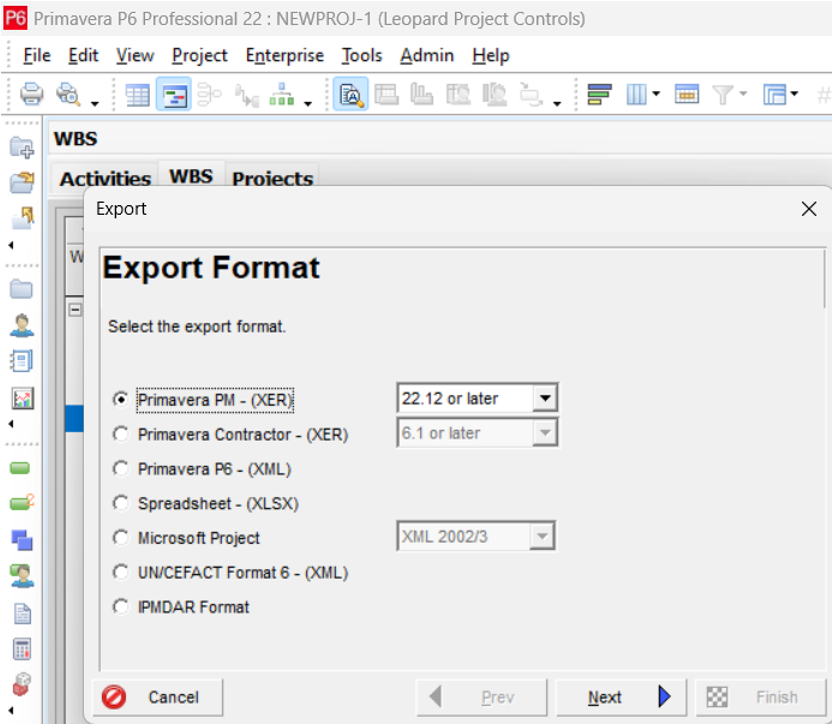
Choose the P6 version that you want to export to.
We must export the entire project, so we must choose a Project.
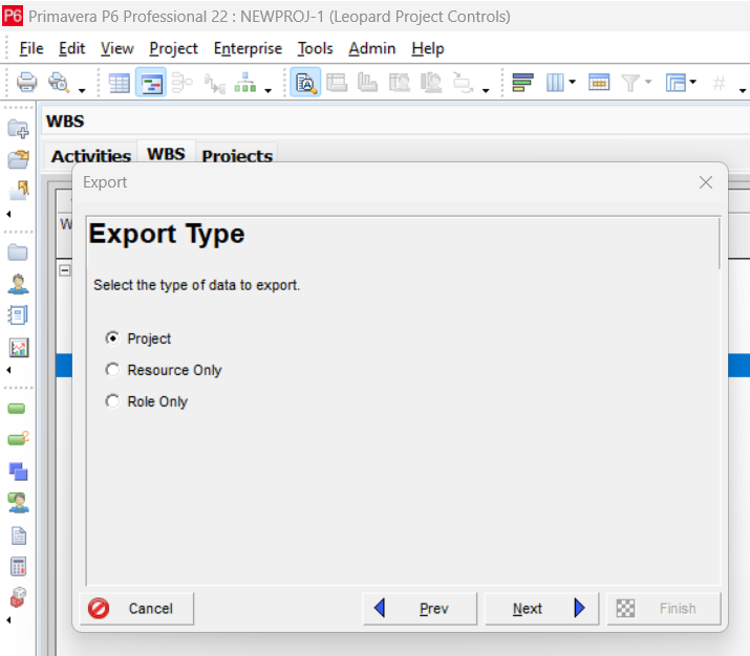
Choose the project name and tick the box under Export
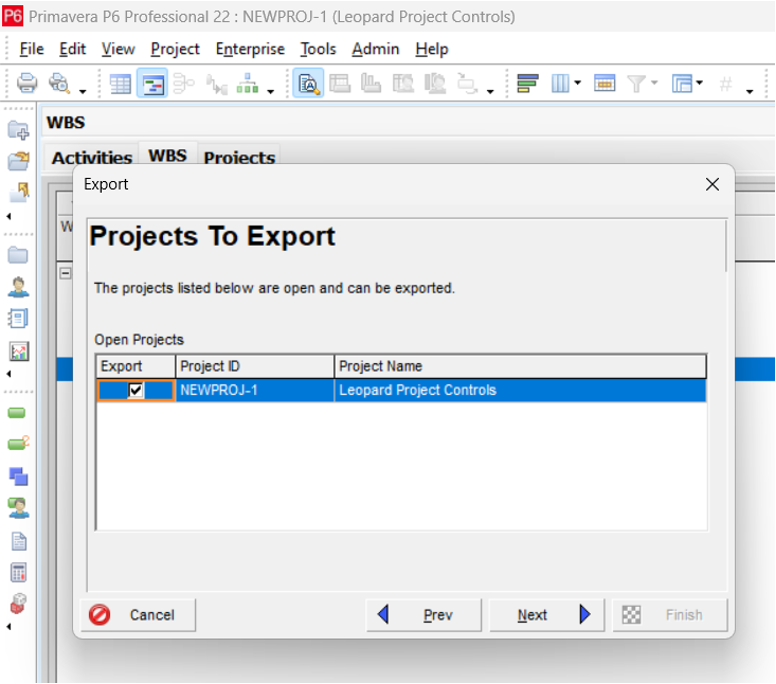
Choose the export file location and press finish.
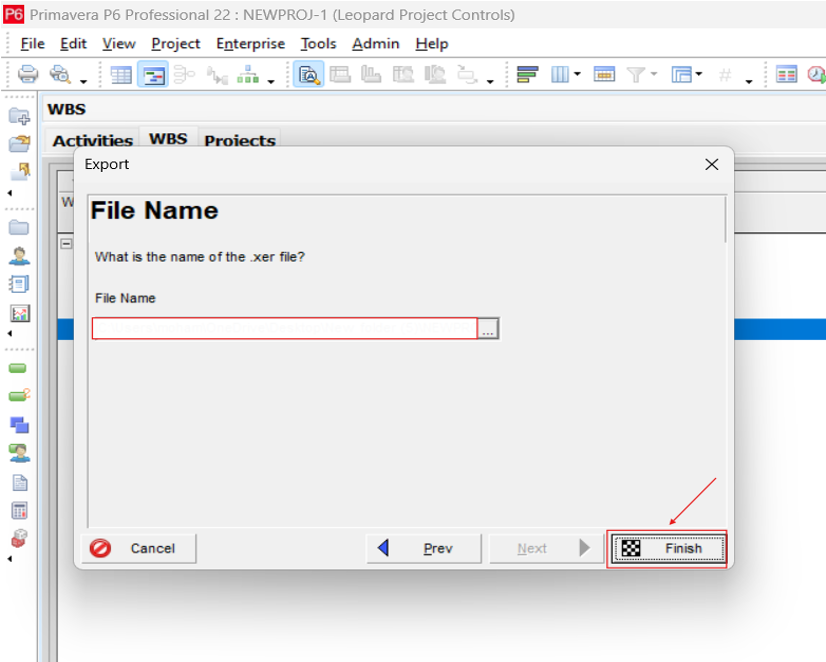
Step 2:
After finishing with exporting, go to the location where the exported XER is saved, and then right-click on the file and open it with Notepad.
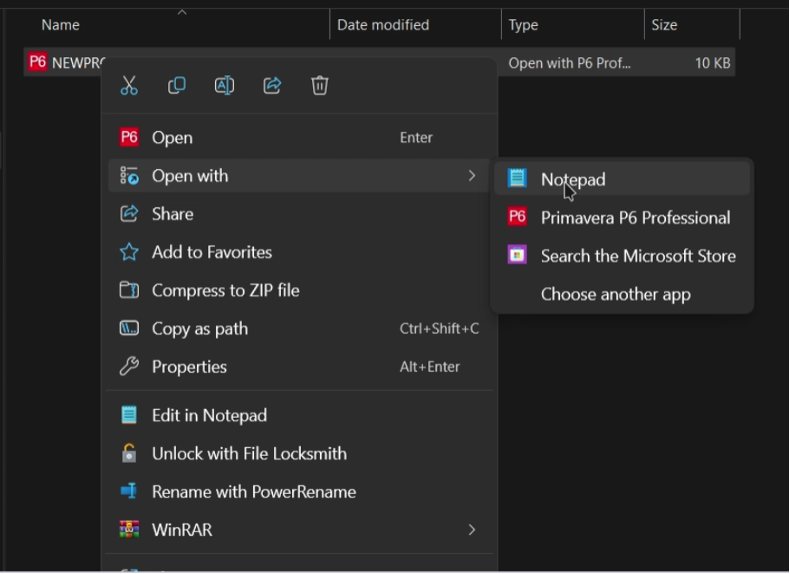
When the Notepad is opened, scroll down till you get to the highlighted part and then copy it.

Step 3:
- Open a New Excel sheet that will be used to add the WBS names, ID, and parent ID
- We then need to paste the copied data from the notepad to the excel.
- But first, we need to keep the following in mind:
- WBS ID: A unique number identifying each WBS element.
- WBS Name: A description indicating each WBS element.
- Parent WBS Code: Identifies the parent element for hierarchical relationships.
- Adding your new WBS data will be as the following:
- We add %R as we go and the last value in the column should be %E


Column B is related to the WBS ID, Add the WBS ID as you need, but don’t change the first 2 values.


Columns C, D, G, H, & I are some fixed values related to how P6 identifies the project relating to the project ID, the OBS, and the Enterprise that the project exists under, you need to keep them as they are, so just copy & paste them as you go.


Add these values (E, F & J) in sequence starting from the 2nd value in the column and stop the sequence with the last WBS you add.


Here (J) you can add the short name for the WBS.
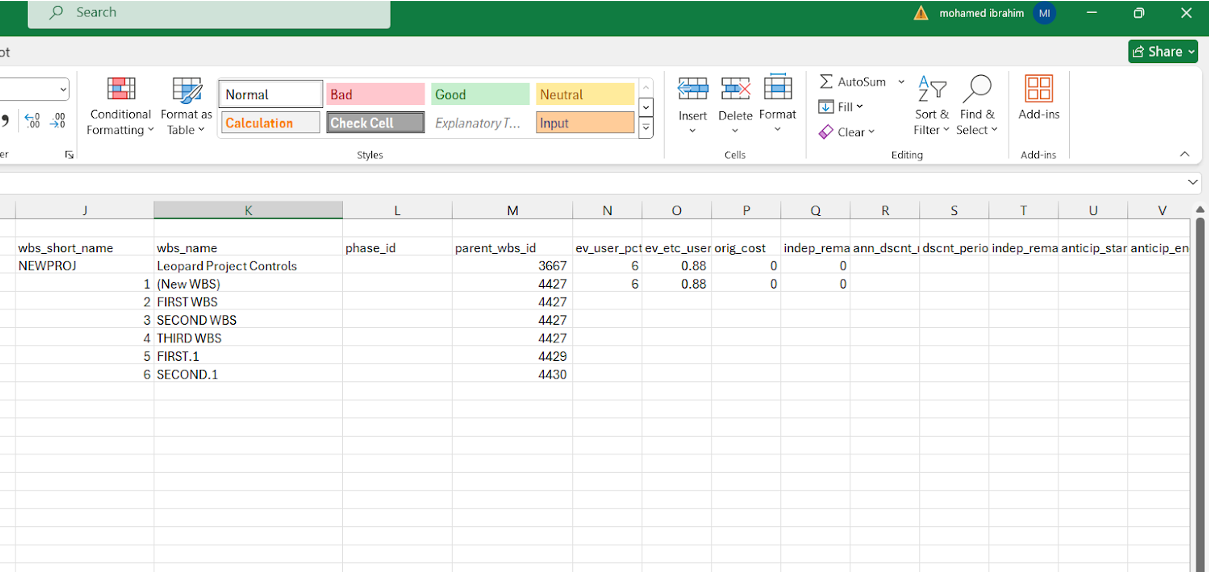

Here (K) you can add the name for the WBS.
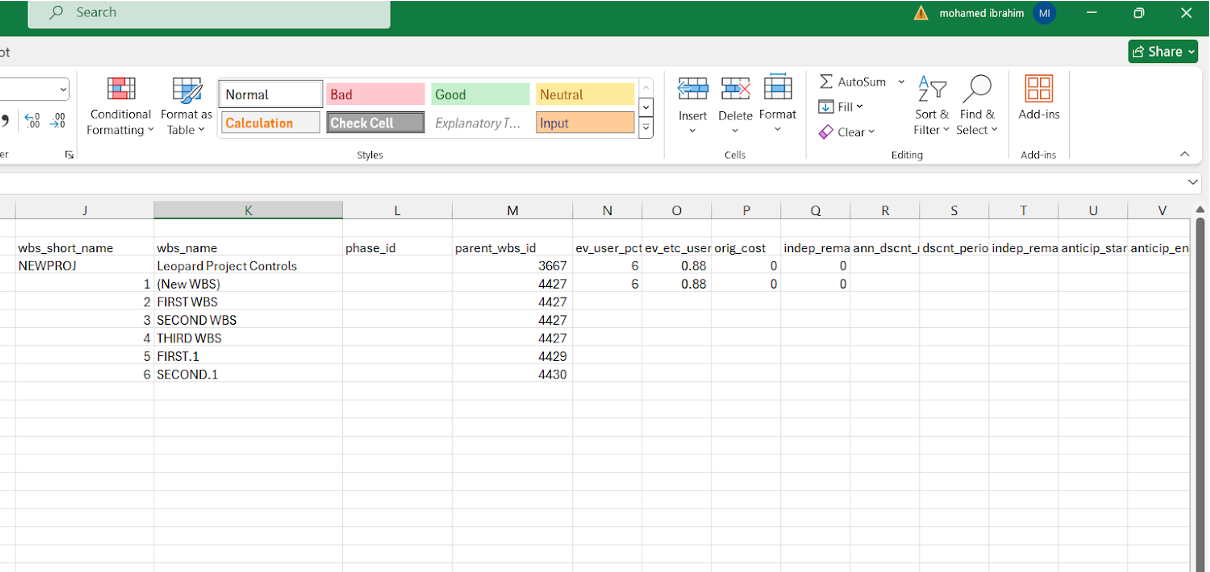

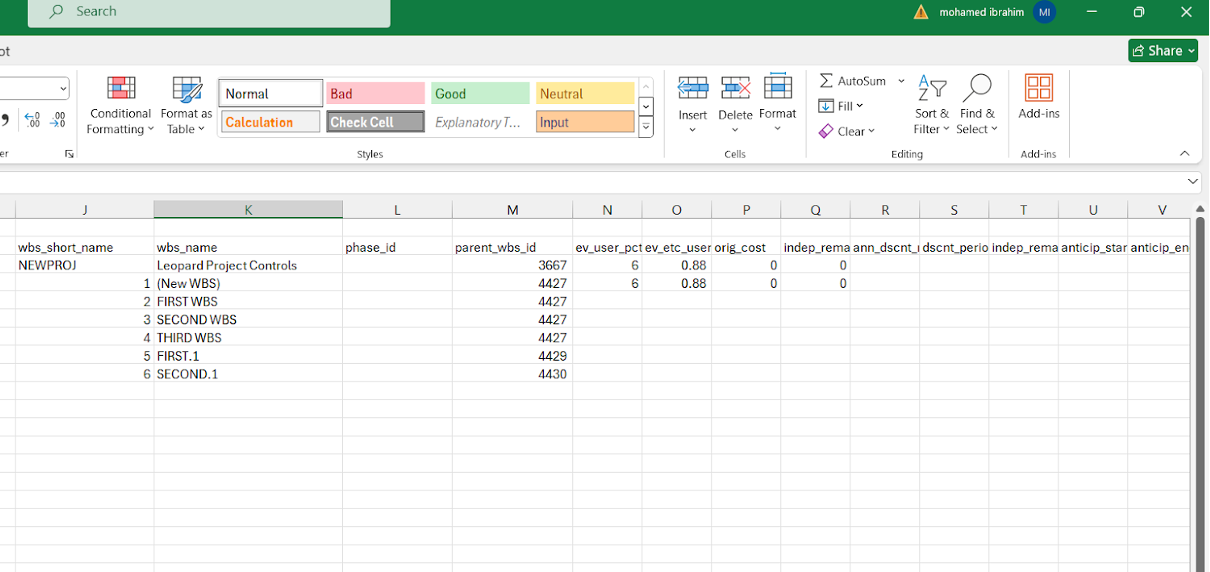
The remaining values (N to U) are also fixed so you can just copy and paste them
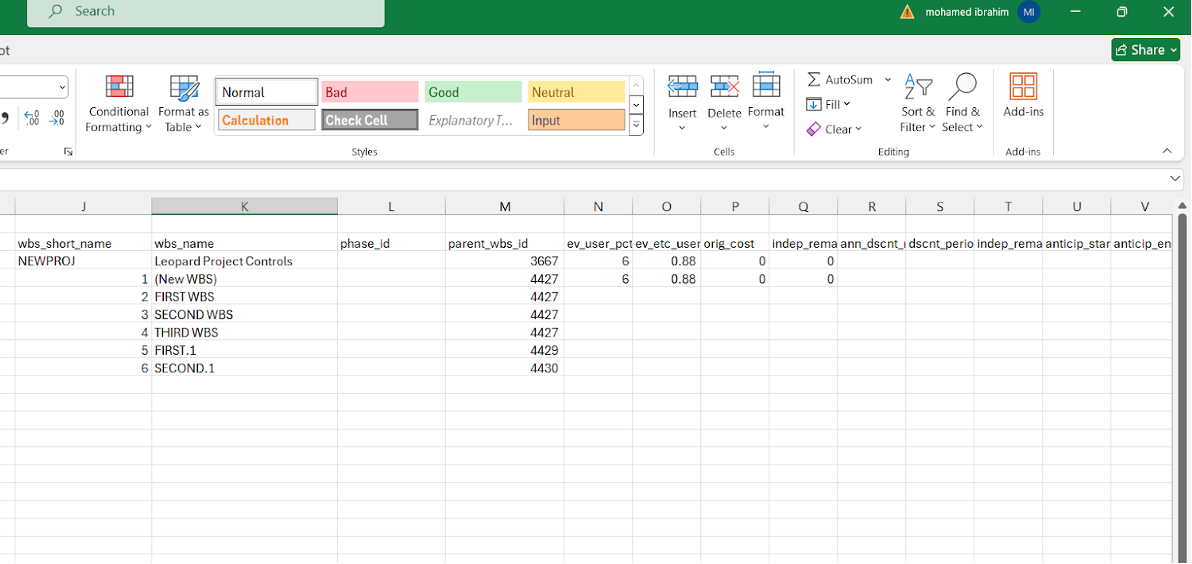

Here (M) you can add the parent WBS ID for the WBS you want to form the hierarchy, notice that the first ID is always the project ID so keep it.
Review the entered WBS hierarchy for accuracy and make necessary adjustments or refinements to ensure alignment with project requirements.

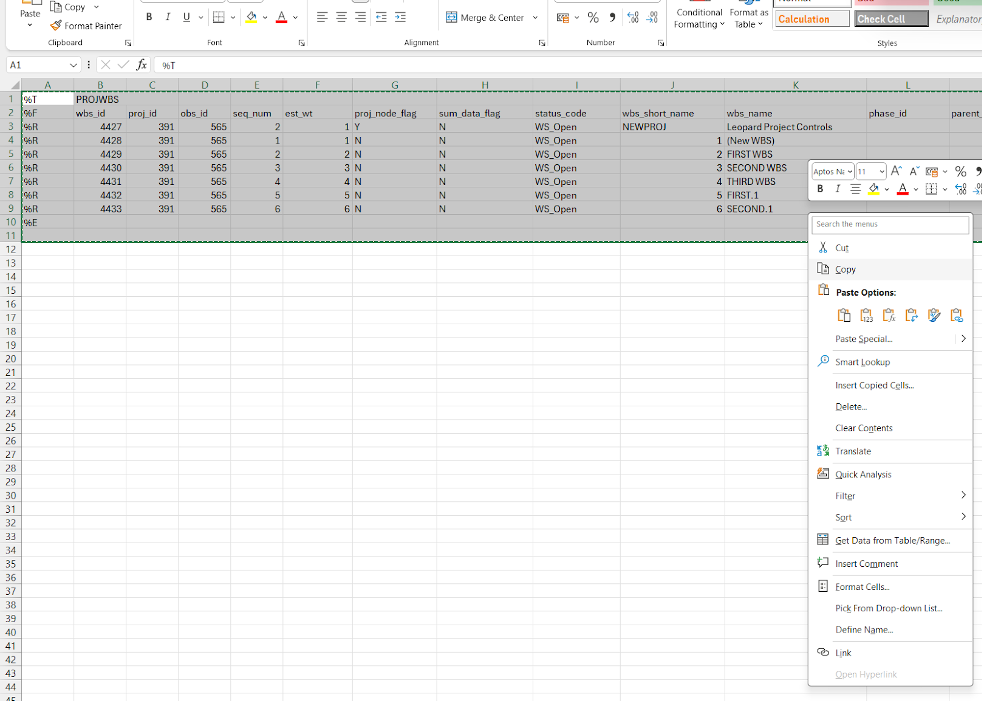
Finally, after checking that everything is right in place, select and copy all the table after filling it with the values and paste them in the notepad again replacing the part that was highlighted in the previous screenshots.
Step 3:
Import the XER file to the P6, so choose the XER file format.
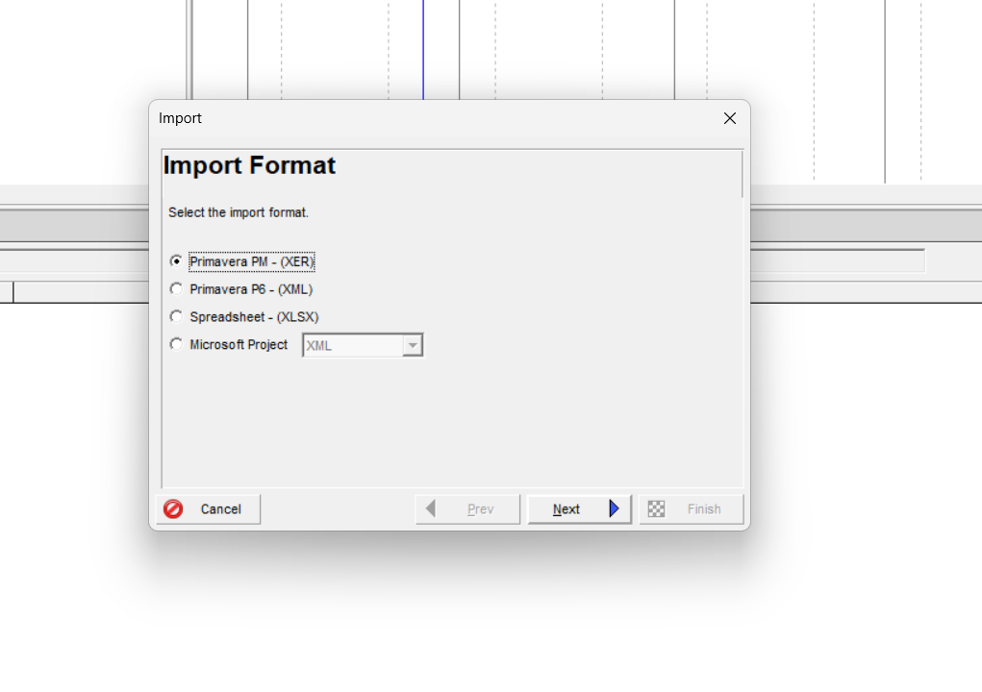
Choose the XER directory and select the XER file.

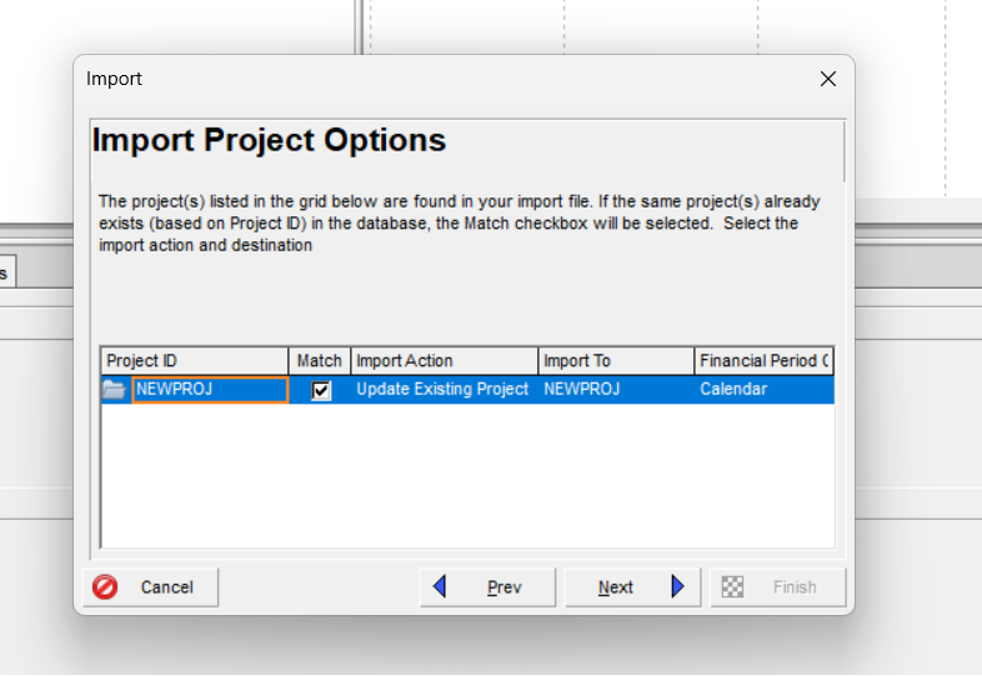
we need to use the XER file as an update to the one already existing in P6, so let it update the existing project by choosing “update existing Project” from the import action tab.
Finally, after completing the helping wizard, congratulations! You will end up with this:
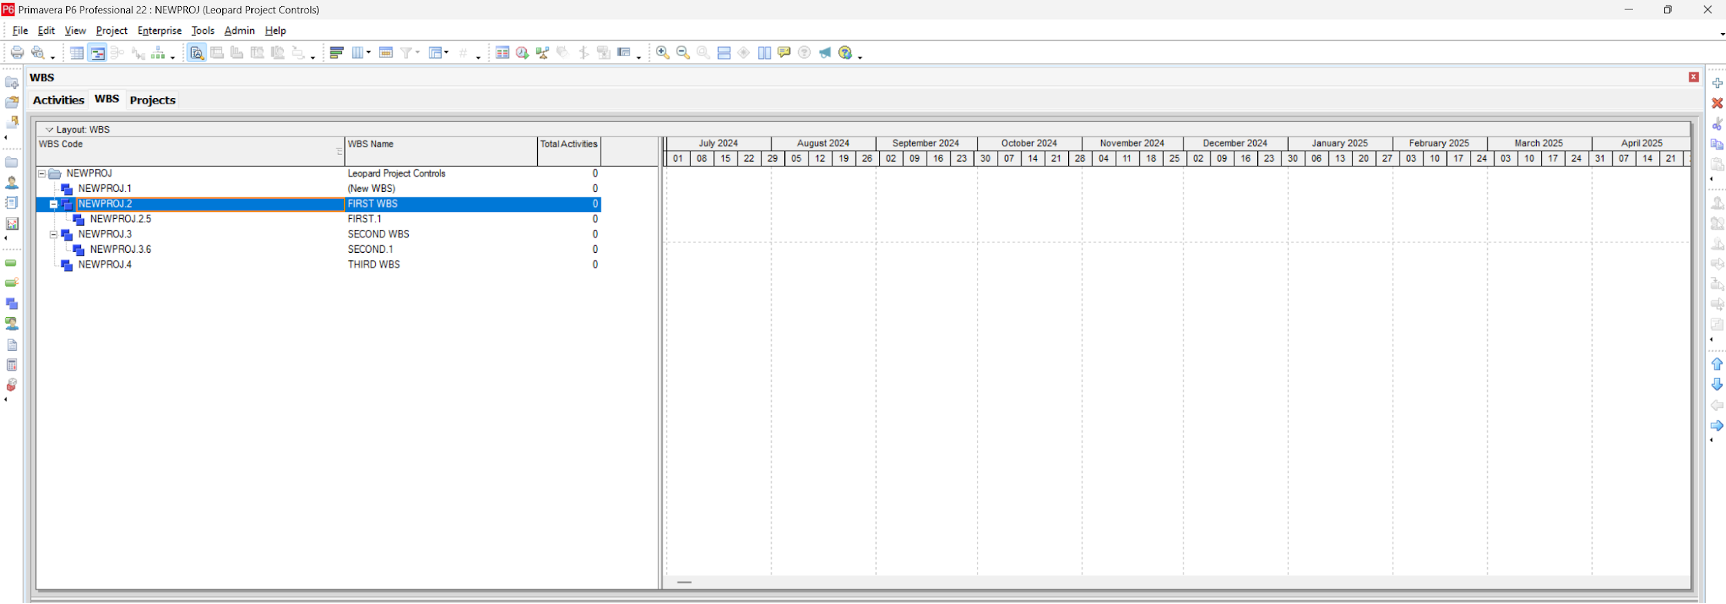
Conclusion:
This method can be very helpful in creating a large number for Work breakdown structure (WBS) in literally no time especially if you have prepared a sheet with all WBS you will be adding and their logical hierarchy and then you can just add them at once to P6 also it can be very useful in detecting and correcting mistakes than doing it by the manual method.
With all the mentioned benefits there are some drawbacks to this method, it can be very challenging and complicated for some users to understand the way p6 code is written that is shown in the notepad, making one mistake or forgetting any of the values that are essential for p6 to identify or recognize the project will make you end up with errors or missing data or even a corrupted XER file, also a wrong parent ID or WBS ID will mess up the entire WBS hierarchy, fixing such errors can be more time consuming than just adding WBS manually.
Creating a detailed construction schedule is crucial for ensuring that your project stays on track and meets all deadlines.


