Precedence Diagram Method (PDM)
While handling complex projects with stringent multiple deadlines, the Project Manager may underestimate or even ignore the criticality of some aspects towards the achievement of a milestone and, ultimately. the final milestone of project completion. To avoid a dire situation like this, the Precedence Diagram Method (PDM) was developed.
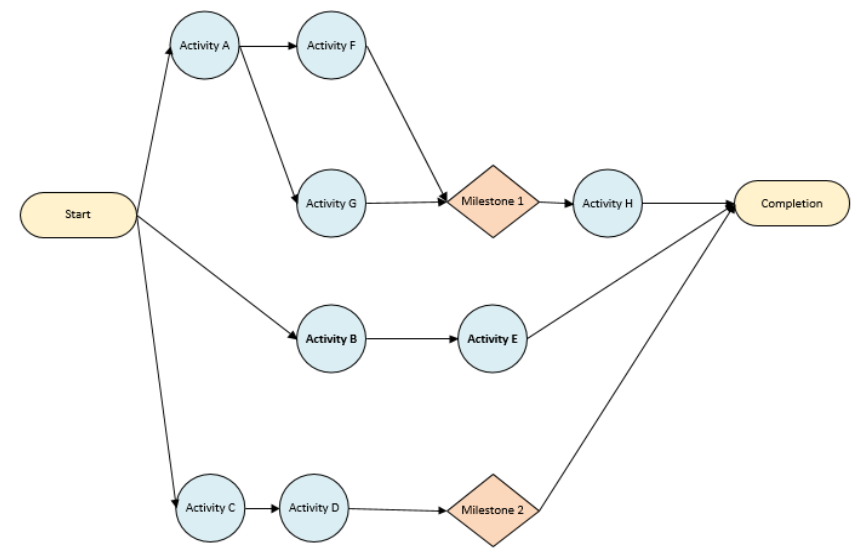
Initially, the Project Managers used to draw an empirical schedule as the PDM as shown below.
Program Evaluation and Review Technique (PERT)
In the late 1950s, PDM evolved into Program Evaluation and Review Technique (PERT) as a similar but more effective technique that focused on schedule and cost simultaneously. In this technique, the duration of activities (or tasks) was also assigned, and it was now possible to forecast project completion.
This technique also gave birth to a new term called Critical Path. As the name suggests, a Critical Path is a path composed of the critical activities (having the potential of delaying a project) from the start till the completion of the project. Knowledge of critical activities made reducing project duration possible at the expense of additional cost. Cost-benefit analysis has to be done in order to decide whether the project should be expedited by incurring more cost or cost should be saved by compromising on milestones or project completion date.

In this small example (Fig.2) we can easily see critical activities (red boxes) and the Critical Path (indicated by arrows in red).
Gantt Chart
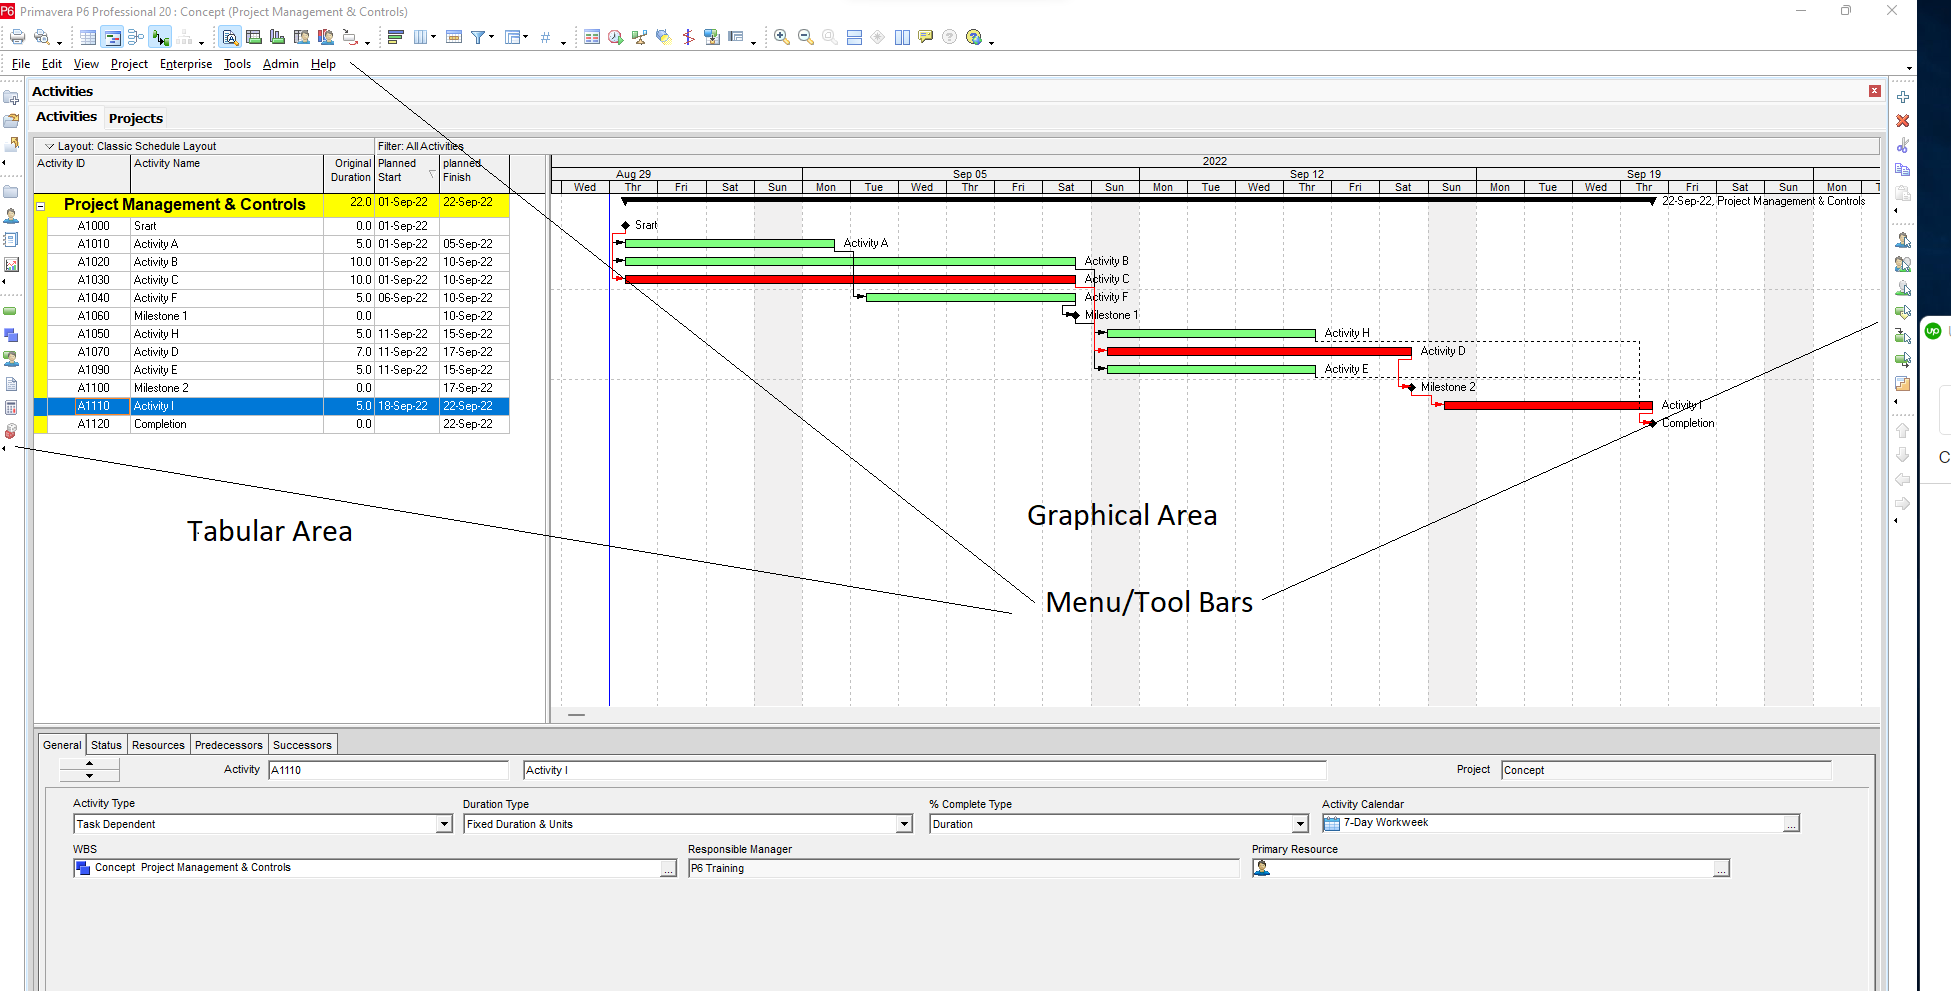
Gantt Chart is an improved representation of a PERT Chart. Although both of them represent more or less the same information, Gantt Chart offers better visualization and flexibility of presenting the information, making it more user-friendly.
In the Tabular Area (on the left side) you can choose from a variety of information to display. Similarly you can customize the Graphical Area as per your requirements and you can achieve all of this using the menu/toolbars on the top, left, and right side of the screen.
How to create PERT, CPM and Gantt Charts in Primavera P6?
Following steps are to be followed in order to create PERT, CPM and Gantt Charts for construction scheduling in Primavera P6.
- Creating or selecting an existing Enterprise Project Structure (EPS)
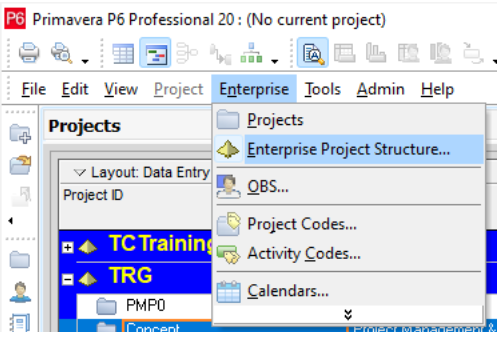
- Click on Enterprise in the Menu Bar and then on Enterprise Structure.
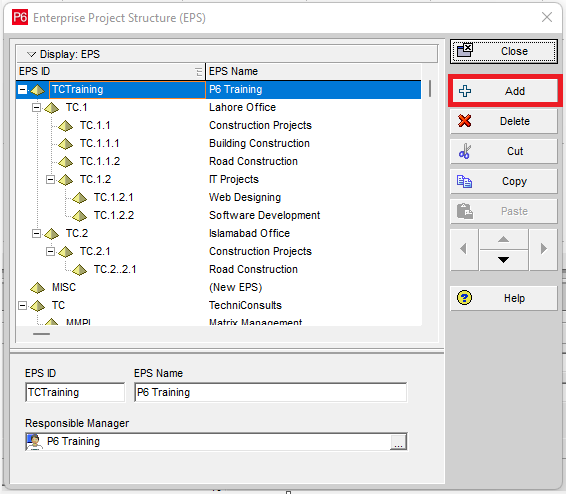
- The following dialog (Fig. 5) box will appear. You can select an existing EPS or create a new EPS by clicking on the Add button.
- After selecting or creating an EPS, you need to create a project. Click on the Enterprise in the Menu Bar and then on Projects:
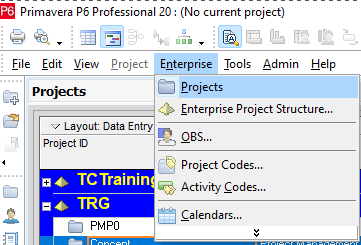
- The following screen will appear:
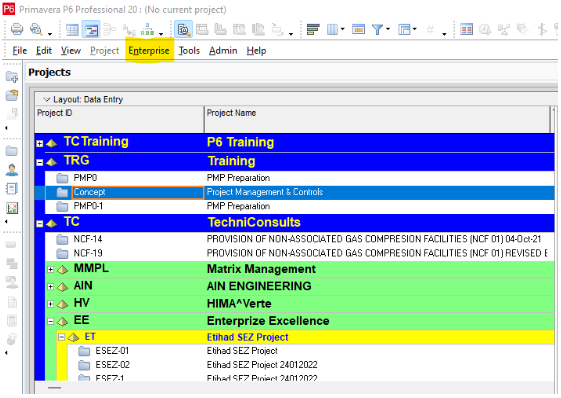
- To add a new project click on the icon on the sidebar (on the left side) for creating a new project:

- A series of dialogue boxes will appear asking for basic attributes of the project for example:
- EPS under which the project is to be created
- Project ID and Name
- Planned Start date and Must Finish By Date (Optional)
- Name of Responsible Manager
- Rate Type (Choose Price/Unit)
Click on Finish and a new project will be added under the EPS which you created/selected.
- Now open the project by right clicking on it and then selecting Open
- To add activities to this newly created project, click on the “+” icon on top of the sidebar (on the right side).

- To enter activity details, you need to display the Details section as explained in Fig. below:
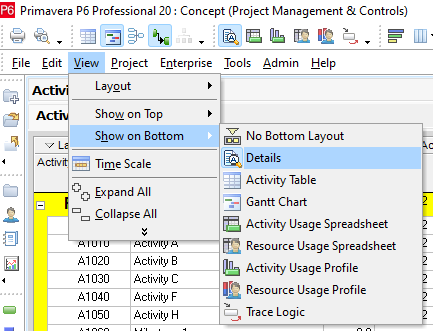
- In the Details section, you need to add the following information as a minimum:
- General Tab
- Activity Description
- Activity Type
- Finish Milestone
- Level of Effort
- Resource Dependent
- Start Milestone
- Task Dependent
- WBS Summary
- General Tab
Task Dependent, Start Milestone and Finish Milestone are the most used types of Activity. Refer Fig. below:
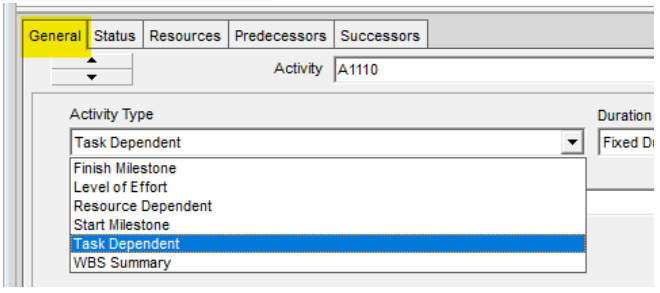
- Suitable Activity Calendar as indicated in Fig. below:

- Status Tab
- Original Duration
- Insert Constraints (if any) from the following available options as per suitability:
- As Late As Possible
- Finish On
- Finish on or after
- Finish on or before
- Mandatory Finish
- Mandatory Start
- Start on
- Start on or after
- Start on or before

Add all the activities you want by repeating the same steps explained in Section 3 and Fig. 9.
- Now you need to add relationships or dependencies between the activities.
- There are four types of Dependencies:
- Finish to Start (FS) – Successor activity can only start after completion of the Predecessor activity. This is the most commonly used type of relationship/dependency.
- Finish to Finish (FF) – Successor activity can only finish after completion of the Predecessor activity.
- Start to Start (SS) – Successor activity can only start after Predecessor activity has started.
- Start to Finish (SF) – The finish of the Successor activity depends on the Predecessor activity’s start This type of relationship is rarely used.
- There are two methods of assigning the relationships:
- In first method, which is more straightforward, you bring your mouse pointer near start or end of the Predecessor Activity (depending upon the type of relationship you want to assign), until the pointer changes its shape to
 . Now press the left mouse button (LMB), drag to the right end of the Successor activity (again, depending on the relationship you want to assign), and release the LMB. The relationship is shown in the form of an arrow starting from the appropriate end of the Predecessor activity and terminating at the appropriate end of the Successor activity.
 - The other method of assigning relationships or dependencies is through the Details pane.
- First click on the Activity in the Tabular Area to which you want to assign a relationship(s).
- In the Details window click open the Predecessor or the Successor tab.
- In first method, which is more straightforward, you bring your mouse pointer near start or end of the Predecessor Activity (depending upon the type of relationship you want to assign), until the pointer changes its shape to
- There are four types of Dependencies:
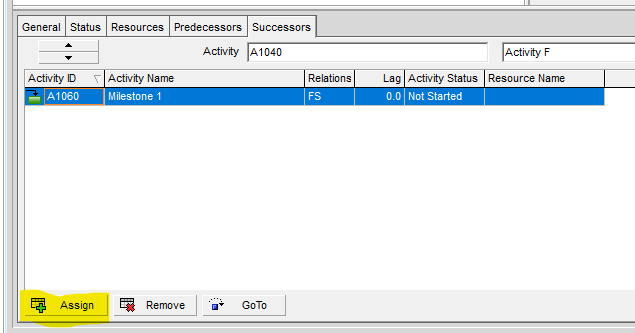
- Click on Assign. A new window will open from where you can select Successor (if you are in the Successors tab) or the Predecessor (if you are in Predecessors tab).
- After adding activities and assigning relationships/dependencies, you need to Schedule your project by clicking on the
 icon in the toolbar at the top, and the following window will open:
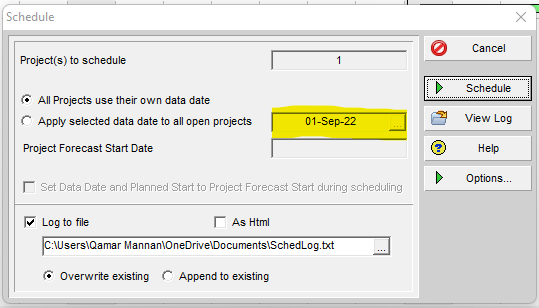
- Do not forget to change the Data Date while scheduling. Initially, Data Date will be the same in the Planning phase as the project start date until you enter into the monitoring phase.
- Primavera P6 can calculate various attributes of activities and the project. For example:
- Early start and Early finish dates of activities.
- Late start and Late finish dates of activities
- Floats for each activity
- Critical activities
- Critical Path
- Forecasted finish date of the project
- And much more
- Now your PERT, CPM, or Gantt Chart is ready, and you can look into their various factors to manage your project effectively.
Conclusion
PDM, PERT, and Gantt charts play a critical role in the successful completion of the project. Primavera P6 has made it convenient for Project Managers to use these techniques to manage the project effectively.


