Oracle
Primavera P6 is the leading Project Portfolio Management (PPM) provider for project-intensive industries. It provides the best solutions addressing critical PPM requirements of key vertical industries such as construction & engineering, manufacturing, utilities, public sector, aerospace, defense, oil & gas, high-tech, and IT services. This article shows you how to do project planning in Primavera P6 step by step as if you are a newcomer.
Follow the following steps to create a new project.
The first and foremost step is to create Enterprise Project Structure (EPS) elements to display the hierarchical positions of all projects in your database. You can create fraternal EPSs to show them hierarchically similar ones, or subordinate EPSs to those subordinates. EPS are hierarchical nodes where we can create and store projects. Imagine EPS representing a directory and projects representing files in a Windows file system. Each folder can contain multiple files. Likewise, each EPS can contain multiple projects.
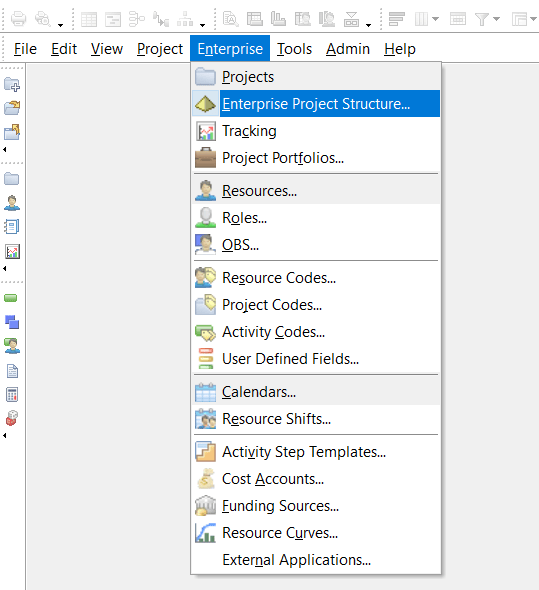
Click Enterprise> Enterprise Project Structure (EPS) in Primavera P6 as per the following figure.

Now add a new EPS to your new Project according to the chart below.

Click File> New in Primavera P6 (or press Ctrl + N on your keyboard).

The “Create a new project” dialog box appears. Select EPS by clicking the browse button next to the Select EPS text box. Select EPS by double-clicking the required EPS and clicking the Next button. It is necessary to define/update your EPS database as steps 1 to 2 first.

The “Project Name” window appears. Enter project ID and project name (e.g. “RD001” as ID and “10 km road Construction” as project name). Click Next.

The “Project Start and End Dates” dialog box appears. Entering the project start date is mandatory. The project end date is not mandatory and can be entered later. To enter a date, click the Browse button next to the Project scheduled start text box and select the desired date (for example, July 1, 2020) from the calendar. To change the month in a row, click the arrow sign on the calendar and randomly select year and/or month, click the month name that appears in the calendar (for example, July 2020 in our case). After selecting the desired date, click the Select button in the calendar. Click Next.

The “Responsible Manager” dialog box appears. Like EPS, select the desired responsible manager and click the Next button. Before assigning a responsible manager, make sure it is first defined in the database.

The “Assign Rate Type” dialog box appears. Select the desired rate. In most cases, select the Standard rate. Click Next and then Finish.

Discover Primavera P6’s full potential in our feature highlight post, Unveiling the Powerhouse of Project Management Solutions.
Then go to main Enterprise> Projects and click on it. Now, you can see the created project ID as RD001. So right-click on this ID and open it.

Enhance your project planning by checking out our guide on 5 Ways Oracle Primavera P6 Can Boost Your Business.
Now you will see the following window. Then go to the top right corner and click the Add button.

Then the following window will appear to enter job information. For example, activity names can be written as “Mobilization”. Activity ID is created automatically. Then click on Next.

This window helps you to assign a predefined work breakdown structure. Then click Next.

Now you can select the activity type. Then click on Next.

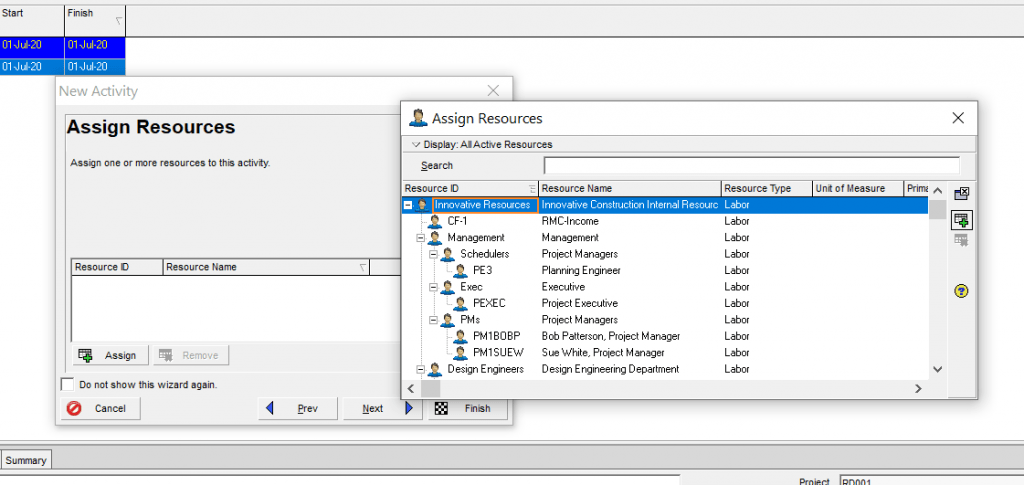
At this point, you can easily assign predefined resources. Now click on next.

Now you can choose the duration type. Once you have chosen according to your requirements, click Next.

Enter the activity detail as the following display. The duration of the activity is, for example, 14 days, 10 units of Labour and 50 units of Non-labour. When you are done entering this section, click the next.

Now you can decide if this activity depends on others. If not, click No. Get on to the next step. Otherwise, click “Yes, I want to configure conditions now”. Then click on Next.

If you want to allocate more data, such as project costs, activity codes and work products and documents, you can select Yes, continue to configure activity information. Otherwise, click No, please.

Congratulations! you performed your activity almost perfectly by creating a part of Primavera P6. Now click Finish.

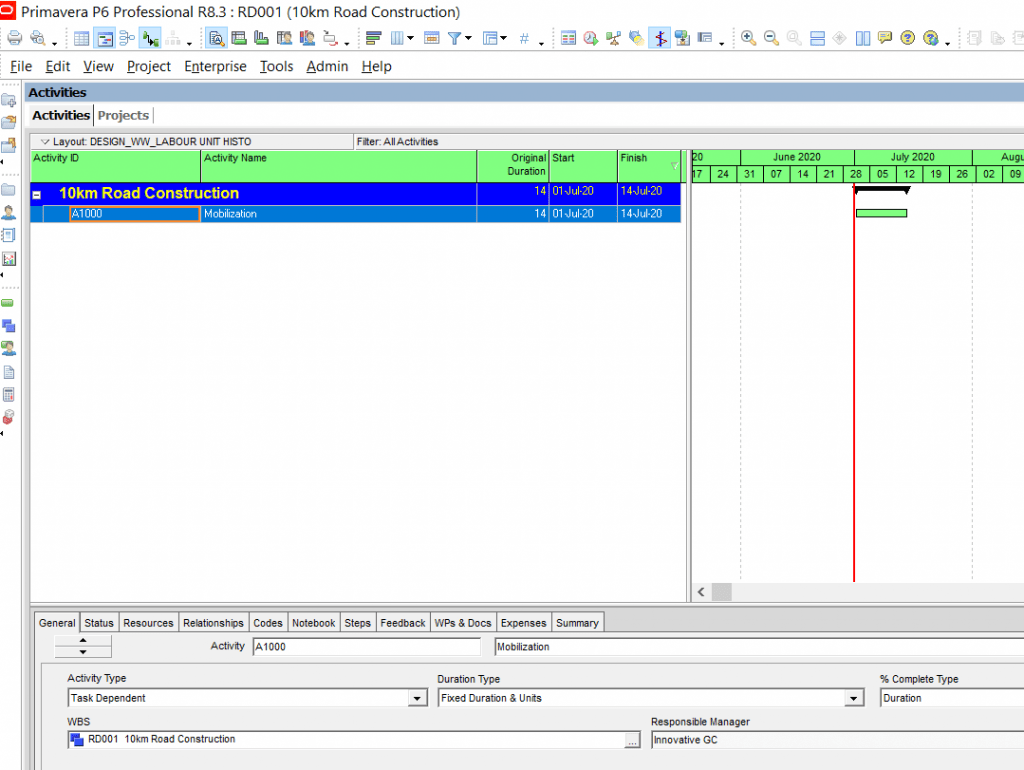
Now you can view the activity as follows. Then continue with the same process to your balance project activities.

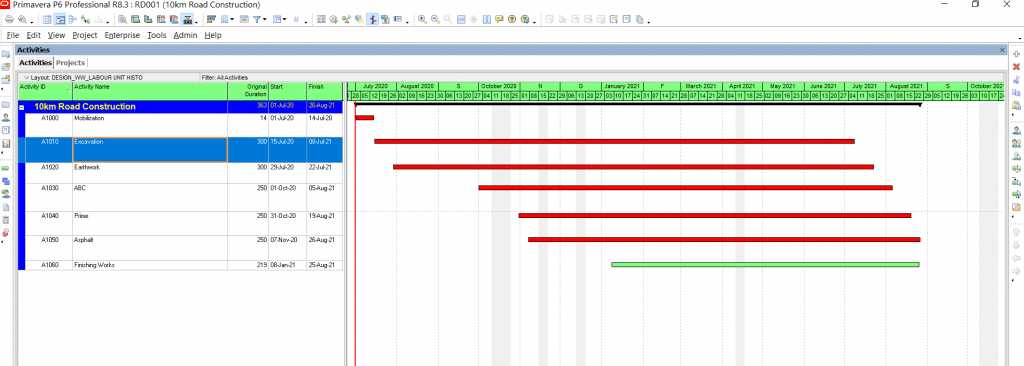
Finally, you get the created schedule as the following example.

For more detailed steps on how to add a new project in Primavera P6 Professional, check out our comprehensive guide on How to Add a New Project in Primavera P6 Pro.
CONCLUSION:
We recommend creating the project planning activity in Primavera P6 with the steps mentioned above. When you repeat these steps in your current project activities, you will be familiar with the steps and expedite the preparation process for your next Project. Finally, this helps you to track and update your Project and get the most out of valuable reports using filter facilities in Primavera P6.
Contact Leopard Project Controls for Construction Scheduling services. Leopard Project Controls, LLC is an active registered entity with The Federal System for Award Management (SAM), and a certified SWaM Business with The U.S. Small Business Administration (SBA).


