Introduction
In today’s world efficient project management is the rock of success in any project, but it has always been a challenge to transfer data across multiple platforms. Especially when using different specialized software tools. in the planning and scheduling field, there are two main tools used worldwide: Primavera P6 Professional and Microsoft Project. They are used to plan project execution from start to finish and track progress.
While both are widely used, they operate on different file formats. Primavera P6 uses XER format, while Microsoft Project relies on MPP format, which makes sharing data across platforms not a smooth process.
The need to convert XER files to MPP format occurs when project teams across different departments or organizations work on the same project while using different tools, here’s where efficient data transfer is crucial to minimize the risk of data loss, miscommunication that leads to project delays, budget overrun, and reduced project efficiency.
In this article, we will walk through how to convert the Primavera P6 XER file into Microsoft Project MPP format step by step, ensuring seamless project data transfer without any data loss. We will also discuss challenges during this conversion process.
Difference between Primavera P6 and Microsoft Project
Before walking through the conversion process, let us understand the potential of each tool. Primavera P6 is famous for its ability to manage large, complex projects, especially in industries like construction, as it offers advanced scheduling, resource and cost allocation, and progress tracking features. But it is somehow more difficult to deal with and needs training. On the other hand, Microsoft Project is easier to deal with and integrates well with Microsoft Office applications. It is a more flexible tool, so it is often used by a wider range of industries. It is used for smaller to medium-sized projects with less complexity.
Even though they are the most used tools in project management, they do not allow data exchange directly, so project teams need a conversion process to ensure that important project data such as WBS, Activities, and resources are kept safe. This allows the project team to use whatever tool they prefer without compromising data integrity or collaboration quality.
Step-by-Step Process of Converting XER file to Microsoft Project MPP format
STEP (1)
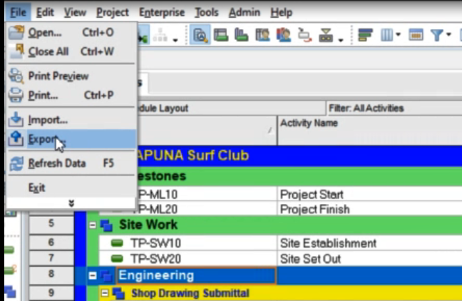
To begin the conversion process, you will need to export the project as an XML file. To do so, open Primavera P6, then open the project you want to export as an MPP file.
From the File menu, select the “Export” option. In the window that appears, choose “Microsoft Project.”
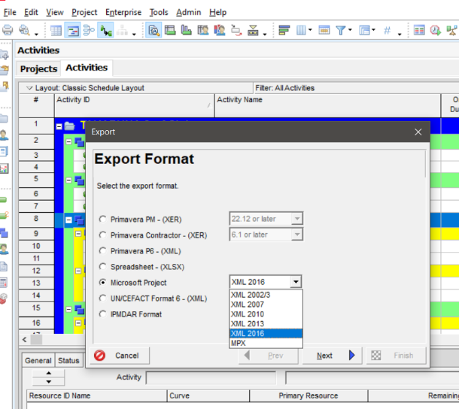
You will then need to choose the Microsoft Project version that you are using on your device and then click “Next.”
STEP (2)
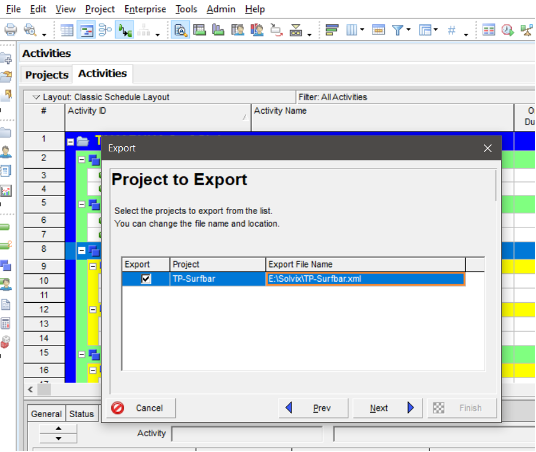
Once you have chosen the MSP version, choose the file location and click “Next.”
STEP (3)
This step is important for ensuring that the data from the XER file is interpreted correctly by Microsoft Project; it is known as MSP Mapping.
MSP Mapping defines how each piece of data in an XER file corresponds to data fields in MPP format.
You can map data yourself like WBS, activities, and resources; however, it is done automatically. You can just check and ensure data are transferred correctly.
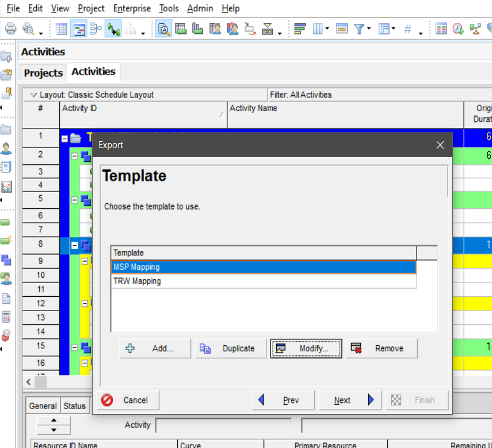
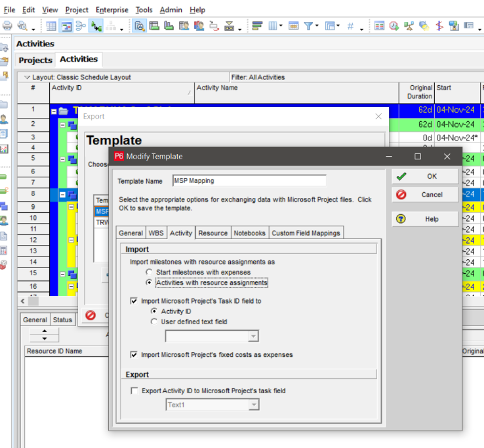
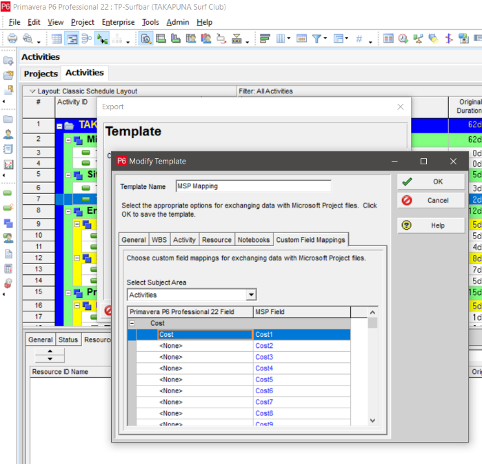
However, if user-defined data is included in your project, you will need to perform custom field mapping. This ensures that all relevant project data is accurately transferred.
Click on “Custom Field Mapping” and Select Subject Area, then choose the user-defined field and the corresponding MSP field and click “OK.”

STEP (4)
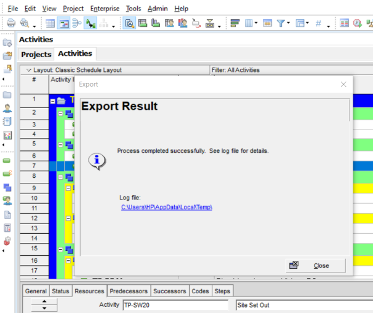
After checking the data mapping, proceed by clicking “Next.” An export confirmation window will appear. Now click “Finish,” and you will be shown a progress window viewing the status of the export process.


STEP (5)
After the project has been exported as an XML file, now it is time to import it to Microsoft Project. To do that, open MS Project and choose from the file menu “Open.”
By default, you will not see the XML file that you saved earlier, so you will need to select “XML format” from the drop-down list found next to the file name, and your file will appear.
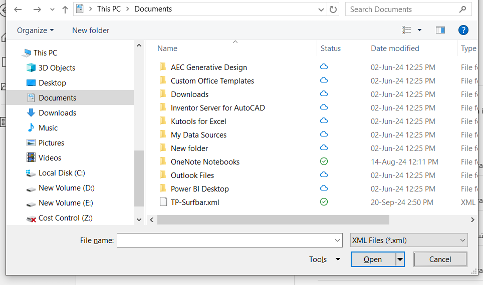
Once the file appears, select it, then click “Open.”
STEP (6)
In this step, you have three options to import:
- As a new project: this option imports data from your file as a completely new project.
- Append the data to the active project: this option imports data and adds it to a currently open project, expanding its task list, resources, etc.
- Merge the data into the active project: this option merges overlapping data from the imported file with the current project data, updating or replacing data that are already there. If you want to update or replace data in a current project, this option is to choose.
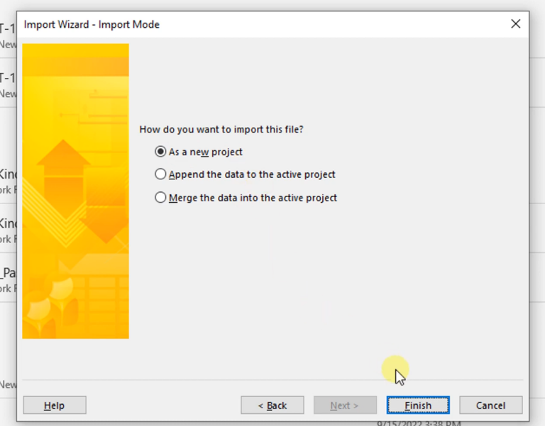
After choosing the suitable option, click “Finish.” The XER data will now appear in the Microsoft Project.
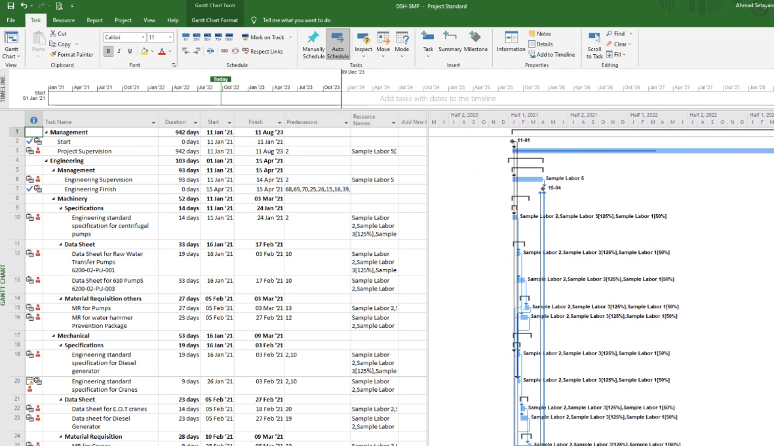
Here, in just a few steps, you can view your project Microsoft Project along with all its data.
Challenges during the data conversion process
One of the most significant challenges when converting XER files to MPP format is the potential loss of some project details that are related to advanced primavera schedules, such as advanced scheduling algorithms and resource leveling techniques in complex projects that can lead to inconsistencies in activities, resources, and schedules as these advanced features may not be fully supported in Microsoft Project. So careful attention to the mapping process is necessary and checking the project after importing into Microsoft Project to minimize data loss.
Conclusion
In today’s World, efficient project management and data transfer from one platform to another are critical to increasing productivity. In this article, we explained how to convert Primavera P6 XER files to Microsoft Project MPP, allowing for easy data transfer between these two widely used software tools. By following this method step by step and ensuring correct data mapping, the project team will not only ensure easier collaboration, but also allows them to maximize the capabilities of both platforms, resulting in more effective project execution, tracking progress, and management which will also lead to increased efficiency across the board.


