Introduction
During the project lifetime, we often need to keep track of our actual vs planned schedule to report if we are on track, ahead, or behind. While using Primavera p6, calculating the delayed days can be a little tricky. Here is a simple guide so that we can detect delays and filter them so that we can have an insight into these delays and deal with them for successful project closure.
Firstly, let us make some definitions clear:
Key Definitions
Total float: it is the maximum duration for an activity to finish without delaying the entire project. The total float always equals zero when the activities are on the critical path which means that any possible delays will lead to a missing deadline for the project. Delays to activities that are not on the critical path and have float will not cause overall project delays. On the other hand, having these delays will be shown as a negative float. It is important to also keep an eye on them cause these non-critical paths can slip to end up having a non-critical path turned into a critical or a near critical path.
- Schedule % complete: it refers to the activity progress % according to the baseline schedule.
- Performance % complete: it refers to the activity progress % according to the actual progress on site.
- While keeping this in mind let us start with our guide.
How to calculate delays in a project and filter them:
Step 1: Set Up a Baseline schedule
Start Primavera P6 log in to your project management account and choose your project, here is a simple sample just to demonstrate the idea and this can be applied to large-scale project schedules as well.
We will consider that you are going to do your first update on your baseline, so let us start with how to make your schedule a baseline and update it afterward.
from the project tab, choose “Maintain Baseline.”
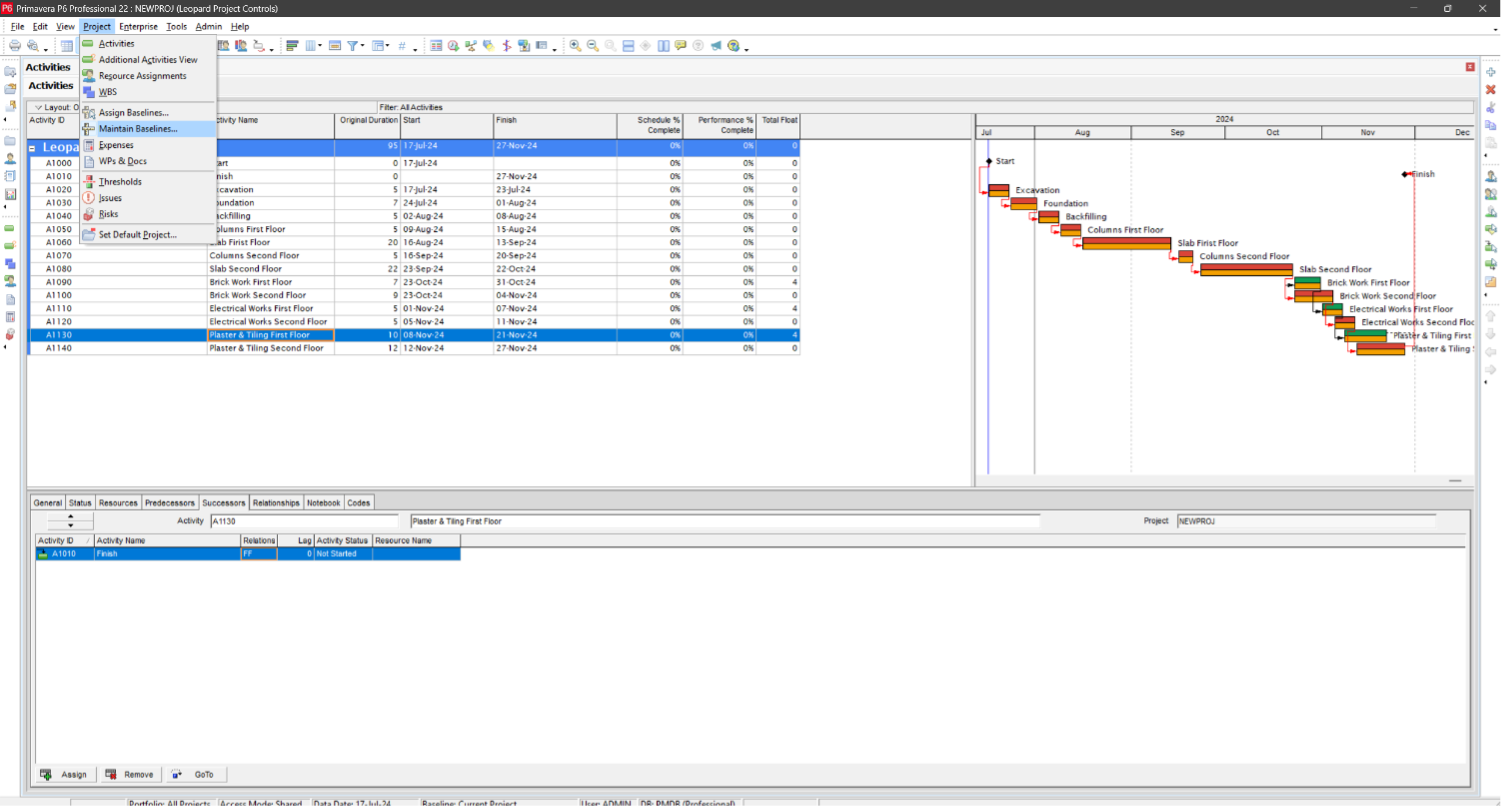
From the shown window press on Add and choose to make the current project as a baseline, a baseline schedule will then be shown as below.
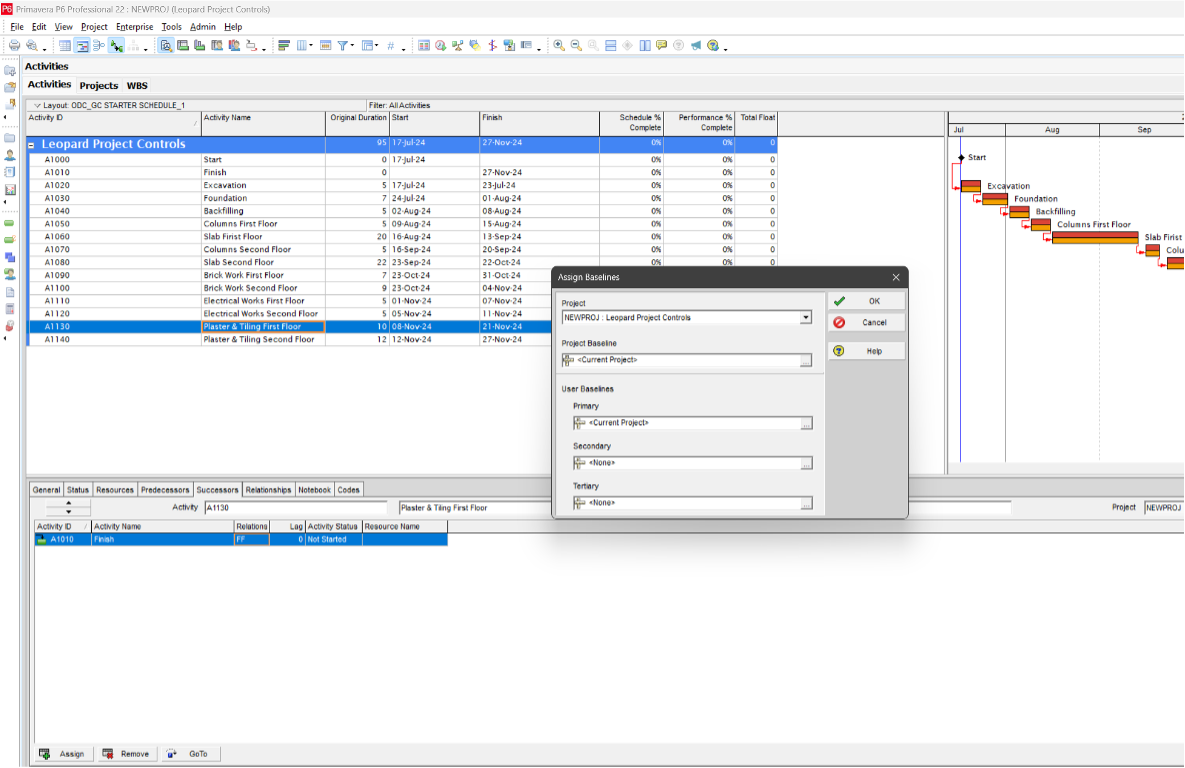
From the project tab, choose “Assign Baseline.”

From the small window shown, from the project baseline tab we choose our project name (the project we maintained as a baseline earlier) and then “OK.”
Mastering construction scheduling is essential for ensuring projects are completed on time and within budget.
Now, we can update our schedule with the actual progress we collect from the site and then compare it with the planned schedule as in the baseline schedule.
Step 2: Create a User-Defined Field
since there is no existing way to detect the delayed days in P6, we will have to do and roundabout and that starts with making a “user-defined field” and to do.
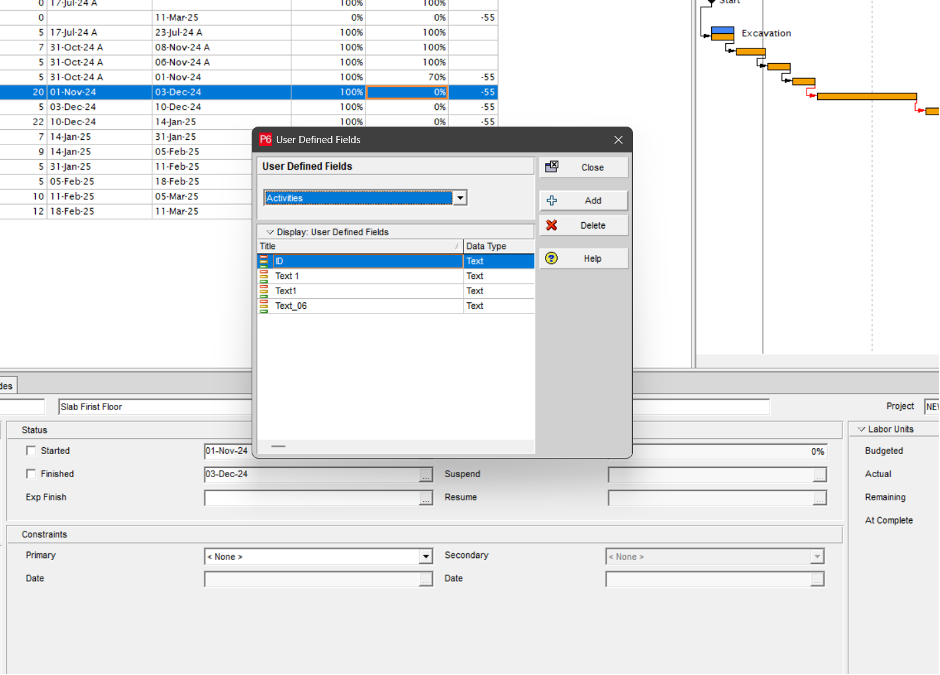
From the enterprise tab choose “user-defined fields”.

From the small window choose “Add”, and make sure the user-defined field is set to activities.
Rename the field to “Delayed activities.”
Set the data type to “integer” since we want to have the data value as a whole number.
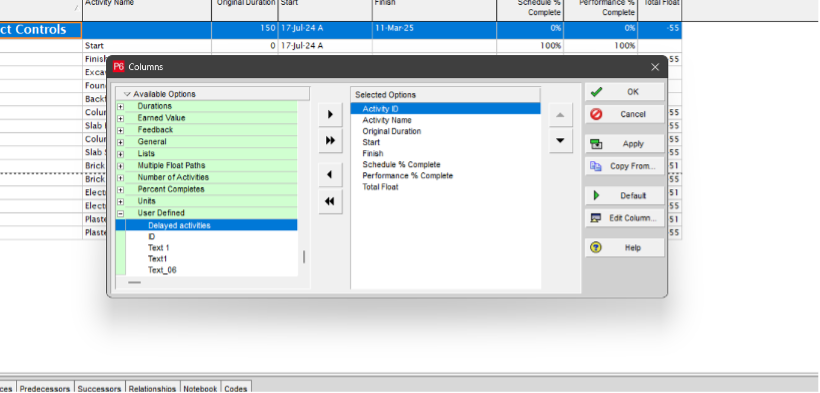
Now we need to show that field in the P6 columns layout, and to do that we right-click in the columns area and choose “columns.”

From the appeared window, from “User Defined” choose “Delayed activities.”
Step 3: Calculate Delays Using Global Change
- Now we need to form an easy equation to calculate the delays, the logic behind the equation is that:
- if we subtract the performance % complete and schedule % complete we can detect the delays
- to do so we need to use the “Global change” tool.
- from the tools tab, go down to “Global change.”
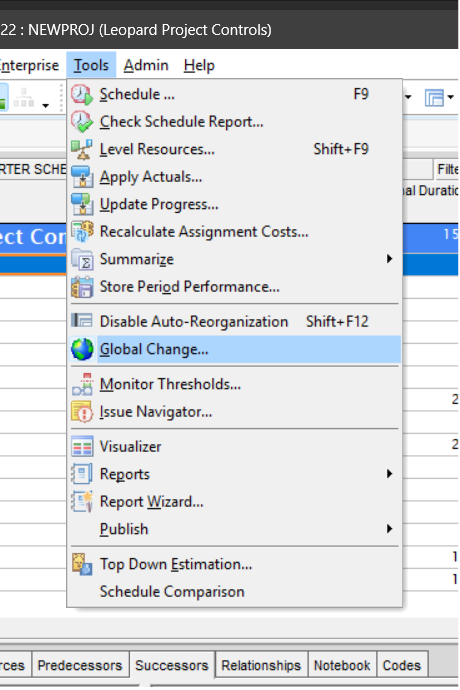
From the small show window choose “New”
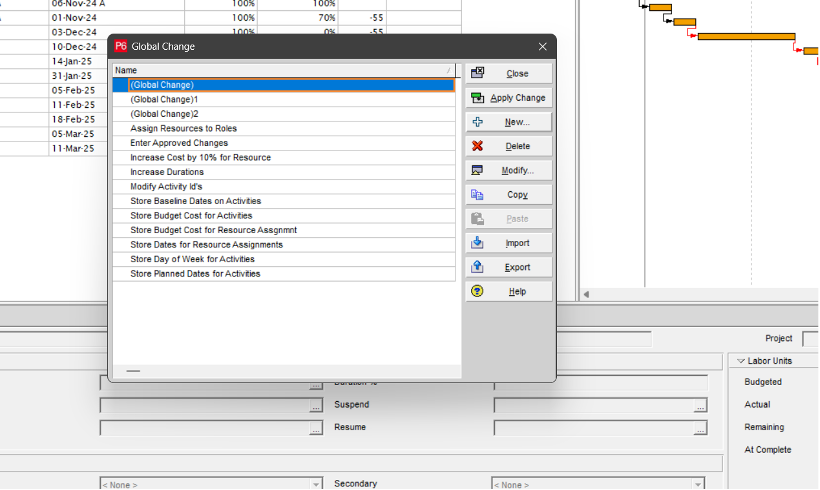
From the window go down to the second partition and choose from the Parameter “Delayed activities”
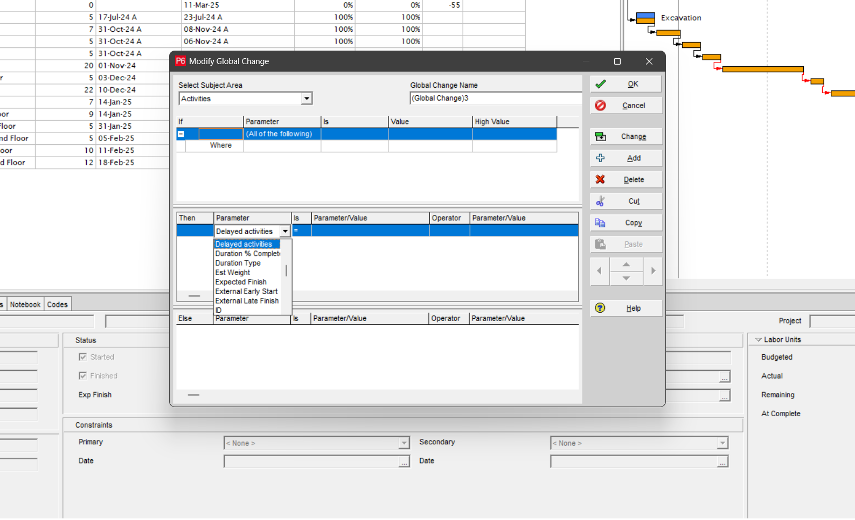
Next, we will need to fill the equation as follows.
From parameter/value choose “performance % complete”, from operator choose “- “and from parameter/value “choose “Schedule % complete”.
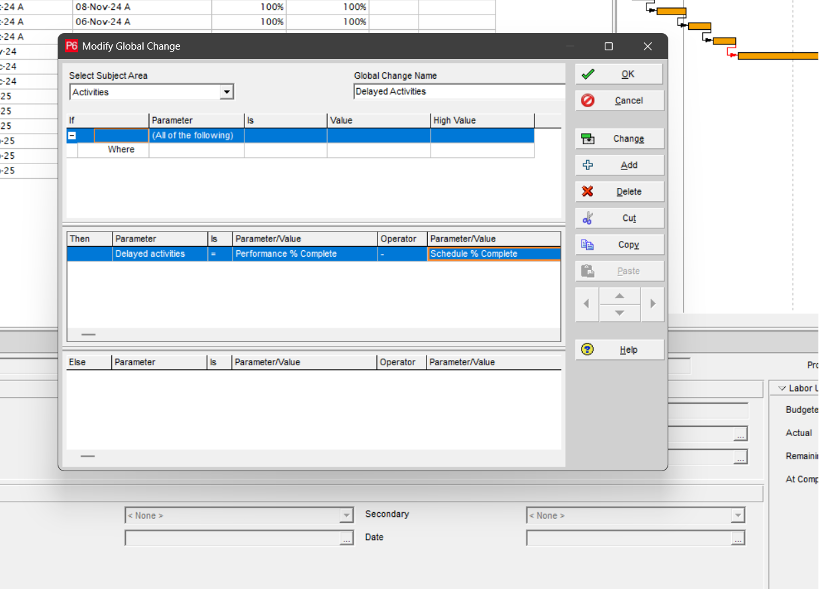
Change the Global change name to “Delayed activities” then press “OK.”

From the main global change menu choose “apply changes”

A log page will appear choose “commit changes.”

Step 4: Apply a Filter to View Delayed Activities
Now we need to apply a filter to on see the delayed activities so it can be easy to report and track them.
The logic behind the filter is that we need to see the negative values that came from the equation “performance % complete – schedule % complete” we made in the User-defined column.
So, to apply the filter, we press on this small filter icon shown in the tools bar then from the small window shown choose “New.”

- Change the filter name to “Delayed activities” and then from the parameter tab choose “Delayed activities” This will apply the filter to the User-defined column.
- From the “is” tab we choose “is less than” and then from the “value” tab we choose “0”
- Then press “ok.”
- From the main filter menu, choose the “Delayed activities” filter and press apply.
- Congratulations! You will end up with this, a column including the delays and a filter only showing these delayed activities.

Conclusion:
In the project management field, tracking and managing delays is crucial for ensuring timely project completion. Using Primavera P6, detecting and analyzing delays requires a systematic approach due to the software’s inherent limitations. This guide demonstrates a practical method to calculate and filter delays by leveraging user-defined fields and custom calculations.
Begin by establishing a baseline schedule to compare against actual progress. Create a user-defined field to capture the difference between scheduled and actual performance percentages. Use the “Global Change” tool to calculate delays by subtracting the schedule percentage complete from the performance percentage complete. Then, apply a filter to isolate activities with negative values, which indicate delays. This process enables project managers to identify and focus on delayed tasks, facilitating timely interventions and informed decision-making. Implementing this approach enhances your ability to track project performance accurately and address issues proactively, contributing to a more controlled and successful project closure.
If you’re looking for expert guidance in managing your project timelines, contact Leopard Project Controls for professional CPM scheduling consulting services to keep your projects on track.


