Before starting Construction and after the design is finalized, here comes the planning process, in which the contractor needs to plan the project timeline and budget.
Resource Allocation is a crucial part of this process to complete the project on time with decent quality and within budget. These resources vary from Labor, materials, equipment, and subcontractors if the contractor needs someone with specific skills to execute the job.
In construction projects, these allocated resources in the planning phase require monitoring and controlling throughout the project duration to ensure the successful completion of the project.
In this article, we will discuss how to optimize resource management using the Critical Path Method (CPM) with the help of Primavera (P6) Schedule Software and Microsoft Excel.
The following graphical representation shows the steps to achieve effective resource allocation in your construction project that can be effectively monitored later throughout the project duration.
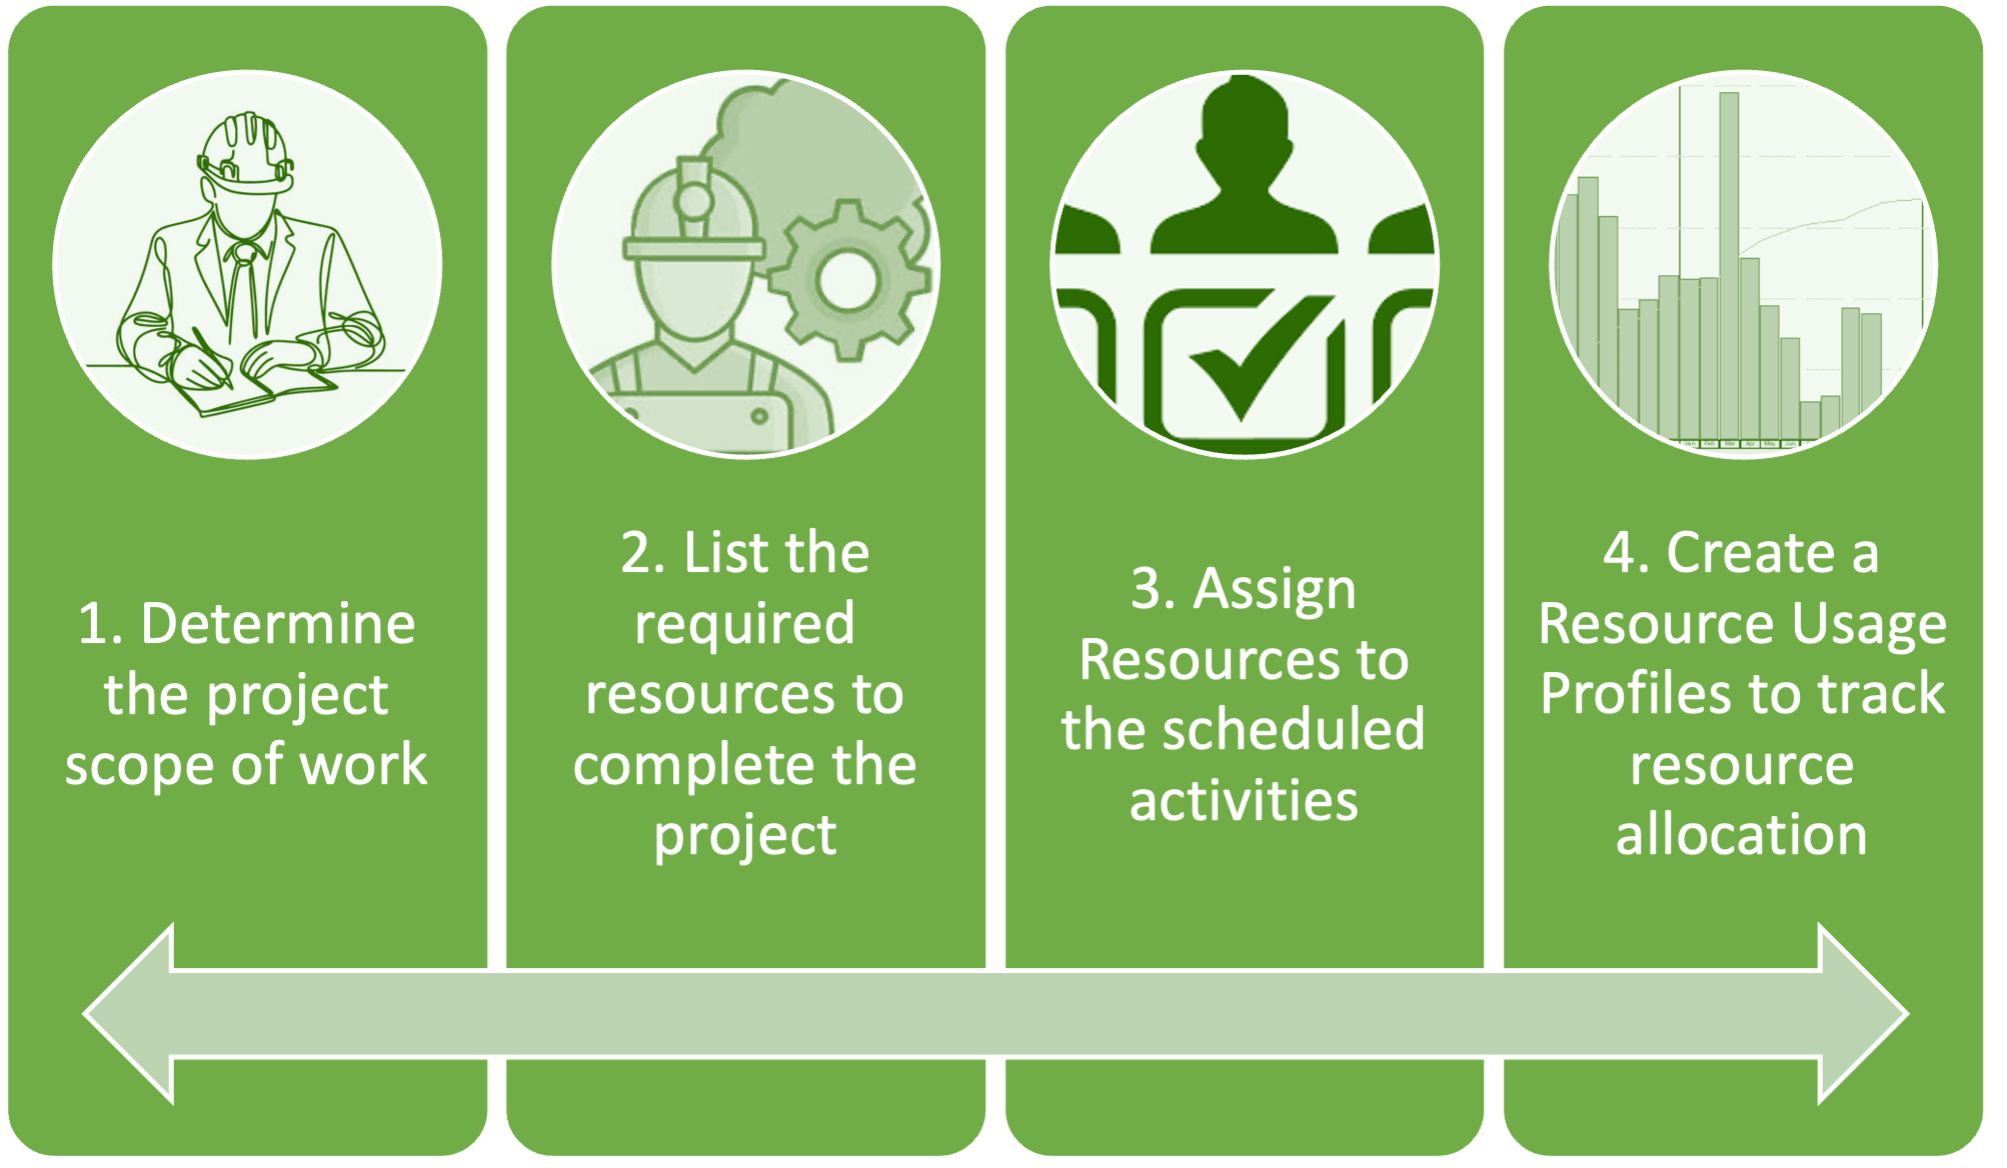
Steps to achieve effective resource allocation in your construction project
1. Determine the project scope of work.
Understanding the project scope is crucial as a basis for the next step. This understanding includes reviewing construction drawings, Specifications, and Schedule of Variance.
These documents can ensure you are aware of the contract’s general requirements and conditions. Furthermore, in the planning phase, determining the project duration and any interim milestones with specific completion dates will accelerate the creation of the resource plan.
One more factor is the project phasing or the construction sequence. The specs also will determine how to measure and monitor the progress of works during the project duration.
All these factors will help to create a well-defined resource allocation plan.
2. List the required resources to complete the project.
After reviewing the project scope and determining the required resources, the software part of the process comes. We will use the Primavera P6 software due to its efficiency in managing resources.
Here is how you will incorporate the resources in the software:
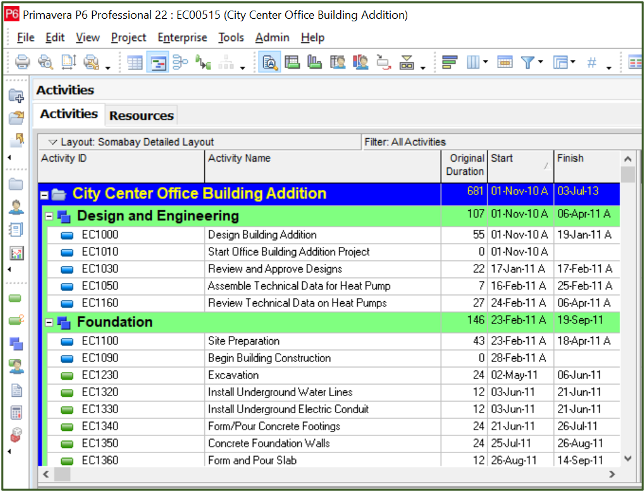
- After opening the project, select the Click the “Resources” icon (marked in red) to start adding resources.
2. Select the Plus icon to add a new resource

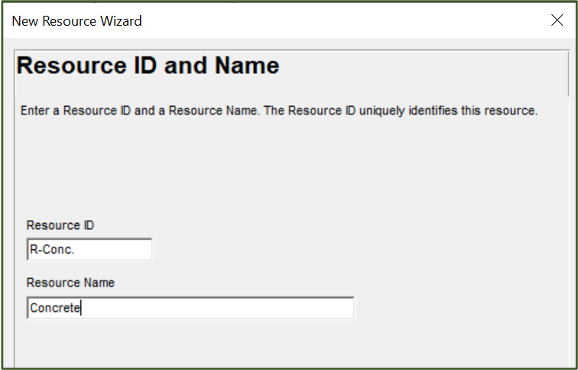
3. This wizard will appear. We will create a Resource named “Concrete.” Enter the Resource ID and the Resource Name then click Next.
Effective resource allocation is crucial for successful construction project scheduling. By optimizing how resources are assigned, you can streamline your project’s timeline and enhance overall efficiency.
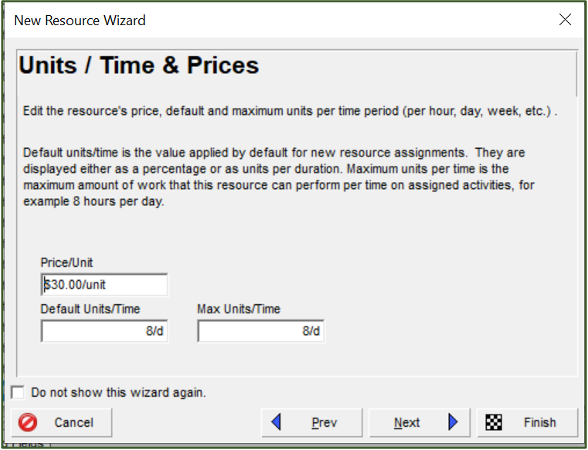
4. Enter the Resource Type “Material” and choose the unit of measure “Cubic Meter.”
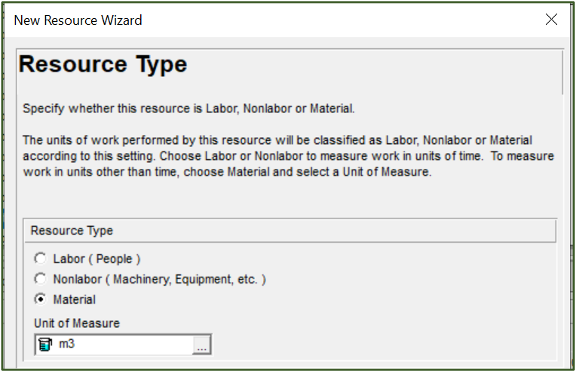
5. Add the “Price/Unit” for the material, Ex: $30/m3.
6. Set the “Default Units/Time” to define how many units per day this resource will typically perform. Let us say 8 cubic meters per day.
Then Click Finish.
7. Keep adding all the resources the same way as we added the “Concrete Resource.”
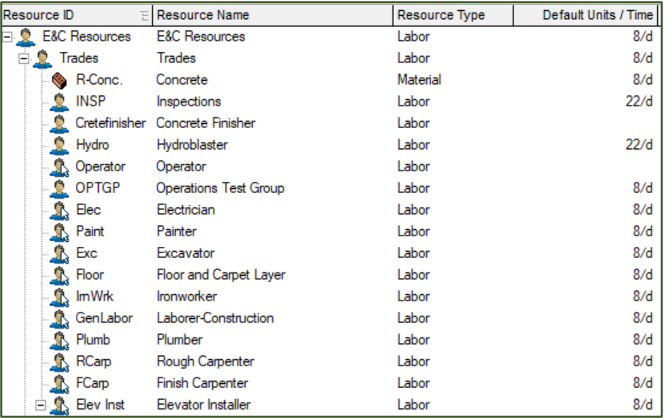
The result will be as follows; a list of all the resources (Labor, material, and equipment) is added to the resource dictionary in the P6.
The next step is to assign these resources to the planned activities in the schedule.
3. Assign Resources to the scheduled activities.
After generating the Resource Dictionary of the required resources, you are now ready to assign these resources to the scheduled activities. You can do so by following the below steps:
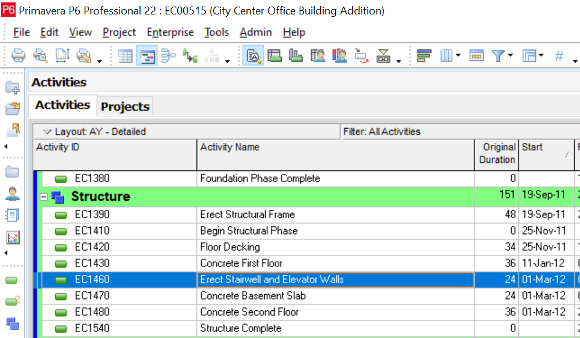
- Open the Activities window and click on the activity you want to assign the resource.
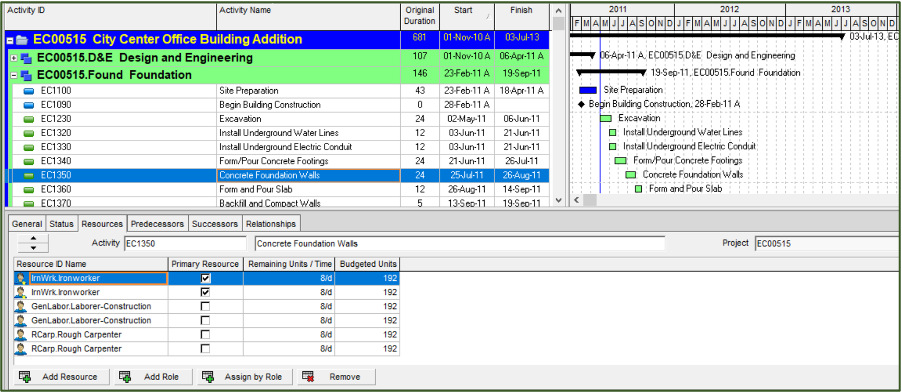
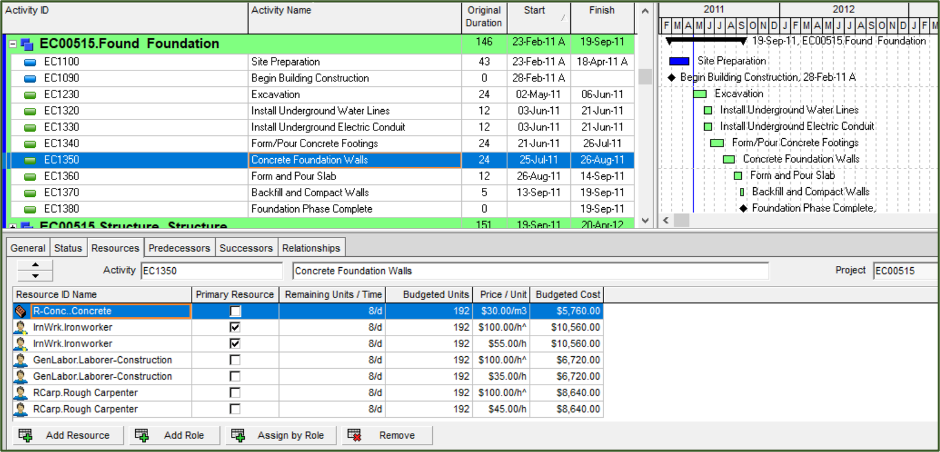
- We want to assign the Concrete Resource to Activity “EC1350 – Concrete Foundation Walls”.
2. Open the Activity Details window and click the “Resources” tab.
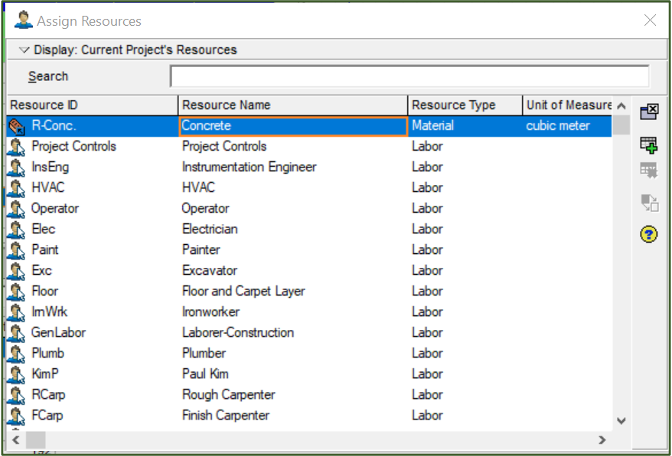
3. Click on “Add Resource” and Type the Resource ID in the Search button to assign the resource to the activity.
- Double-click the resource or click on the icon “marked in red” to assign the resource.
4. Keep assigning the required resources to the scheduled activities until you finish adding all the resources.
– For the Concrete resource:
- Units/Time: 8 m3/day.
- Budgeted Units = (Units/Time *activity duration) = 8 m3 * 24 days = 192 m3.
- Budget Cost = (Budget Units * Price/unit) = 192 m3 * $30/m3 = $5,760.00.
4. Create a Resource Usage Profiles to track resource allocation.
Once you assign all the resources to the schedule, here comes the part where you can generate a profile for each resource showing the resource distribution all over the project duration.
To generate the Resource Profile Graphs, click the “Resource usage profile” icon marked in red in the figure below:
Now choose the resource you want to show a graph for. Let us analyze the Concrete Resource we added earlier.
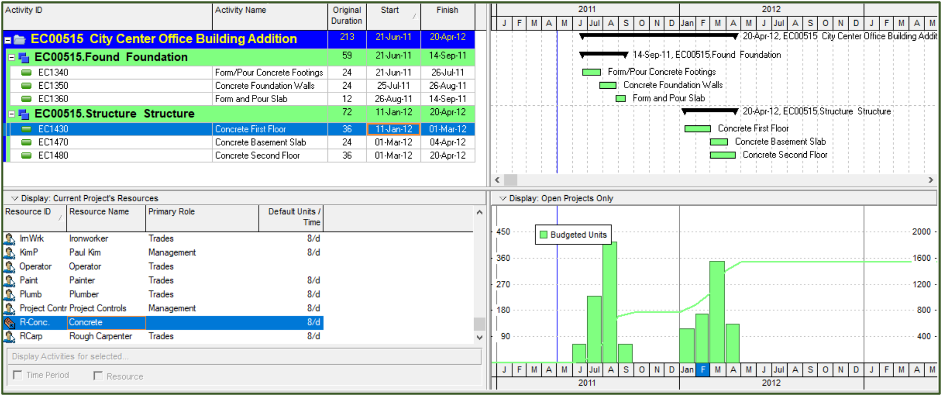
The above figure shows the concrete distribution of the Foundation and structure activities. It shows that the start of this resource will start on June 21st, 2011, with the start of Activity EC1340 – Form/Pour Concrete Footings and finish on September 14th, 2011, with the completion of Activity EC1480 Concrete Second Floor. The peak is in August 2011 with 415 cubic meters.
However, the schedule shows resource gaps that exhibit periods of resource inactivity. Subsequently, work will resume with Activity EC1430 Concrete First Floor through Basement Slab through second floor. The peak is in March 2012 with 349 cubic meters.
The cumulative budgeted units of the Concrete Resource needed in this project is 1539 cubic meters by the end of April 2012.
Conclusion
Implementing resource allocation in the early stages of a construction project helps in finishing it on time and within budget. By following the steps outlined in this article, you can develop a powerful resource plan for your project. Using P6 software can help assign the resources to the schedule and track resource usage throughout the project while Microsoft Excel can be much faster and easier when it comes to allocating a bulk of resources.
Contact Leopard Project Controls today for your next CPM Scheduling Project.
OUR SERVICES
CONTACT US

SEYAR AZADANI, PMP
PRESIDENT & CEO
Seyar Azadani has over 20 years of CPM scheduling and construction management experience working with general contractors and project owners, including the USACE, DOT, VA, Meta, QTS, Turner, Donohoe Construction, and Whiting-Turner company. As a Construction CPM Scheduling Consultant, Seyar has provided Primavera P6 CPM Scheduling services for government agencies and the private sector, representing owners, general contractors, construction managers, and architects.
Seyar has proven knowledge, expertise, and experience in utilizing Oracle Primavera P6, Primavera P6 Team Member, Primavera Unifier, Bluebeam, MS Project, Procore, eBuilder, Tableau, Navisworks, and Autodesk Revit. As a project controls specialist, Seyar has assisted Meta and QTS with Data Center projects, including new build projects, retrofit projects, and leased spaces.
Seyar has provided project controls services to projects ranging from civil to industrial to high-rise construction, including hospitals and healthcare facilities, roads and highways, high-rise apartment buildings, and commercial projects, utilizing Primavera and MS Project CPM scheduling tools to create and maintain the CPM schedules for his clients. With the US Army Corps of Engineers projects, as a contractor and construction manager, Seyar has built military facilities, including completing the construction of a USACE training facility, a $200+ million project in the capacity of project construction director.
Seyar has a Master of Science degree in Construction Management from New York University (NYU) in Jan of 2012 and a Bachelor of Science degree in Civil Engineering in 2004.