Resources are required to carry out the tasks in the project. We need to assign resources to the tasks in the project schedule to track the task progress, resources, and cost.
To Update/Add Resources:
The first step is to add/update the required resources in the resource pool for the project. To do that we will click the “View” tab and click “Resource Sheet” in the Resource Views group.
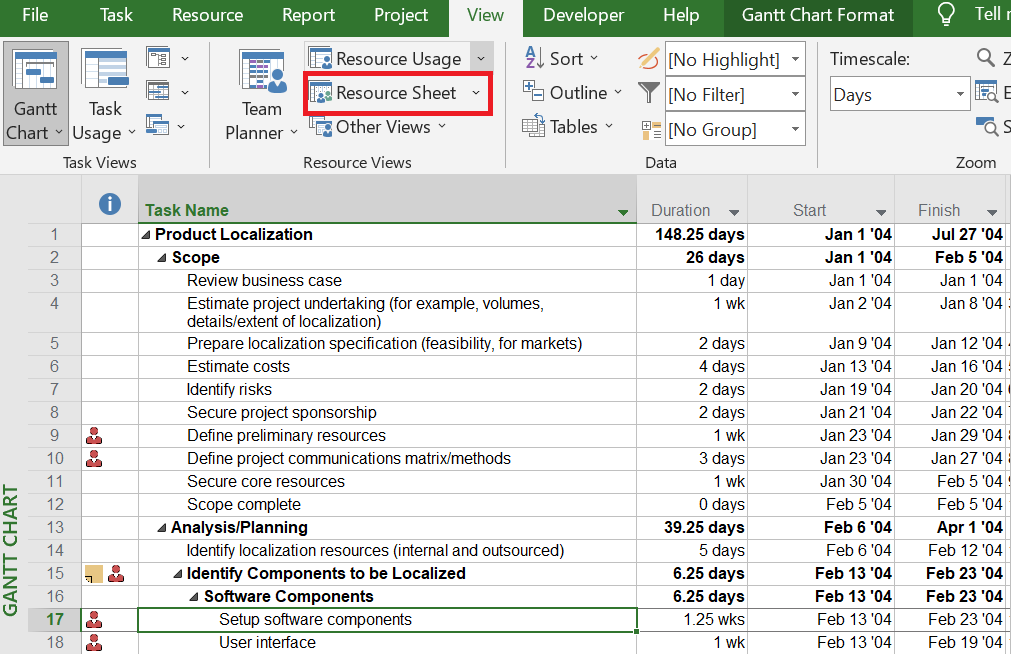
When we click the “Resource Sheet,” the resource sheet will appear below with resources already available in the resource pool.

Updating Resource:
The “Resource Name,” and “Calendar” shall be updated in the respective columns of the “Resource Sheet” if required.
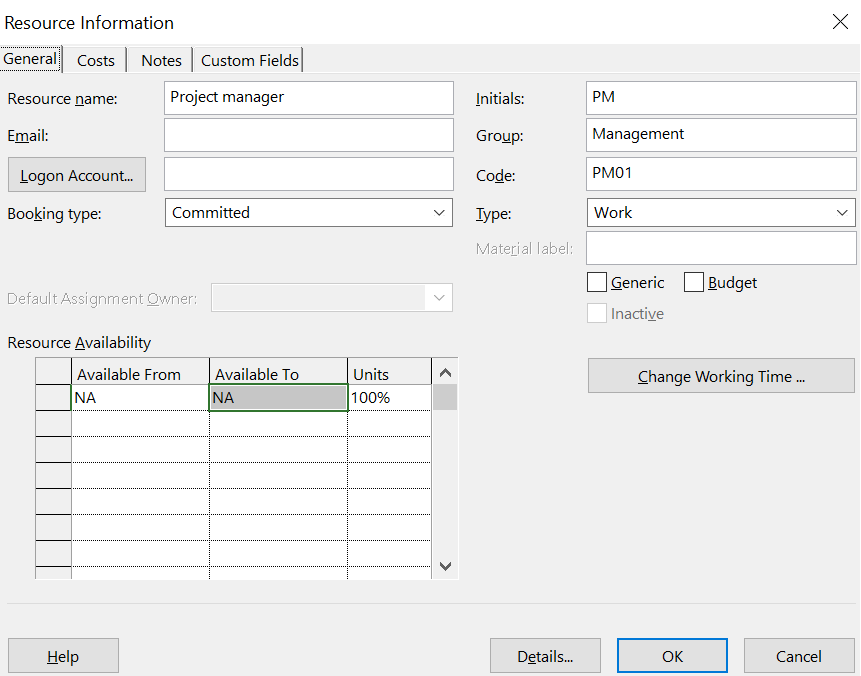
Then to view the resource information we will double click the “Resource Name.” In the resource information window, we can update “Booking type,” “Initials,” “Group,” “Code,” “Type,” “Resource Availability,” “Notes,” and “Custom Fields.”
For instance, we select the resource named “Project manager” and double-click to view the resource information. The Booking type is “Committed” which is the default. The “Initial” is PM, the “Group” is Management, and the “Code” is PM01. There are three types of resources in MS Project such as “Work,” “Material,” and “Cost.” The “Type” for “Project Manager” is “Work” since all the manpower allocated to the tasks is to be considered as “Work.”
In resource availability, we will keep the default value “NA,” in the “Available From” field and “Available To” fields. This means the resource’s starting availability is the same as the project start date and the resource’s ending availability is the same as the project finish date. If the resource is available only for a specific period, we need to enter the dates in the “Available From” and “Available To” fields. We will enter” Units” as 100% which indicates the full-time availability of the project manager to the Project.
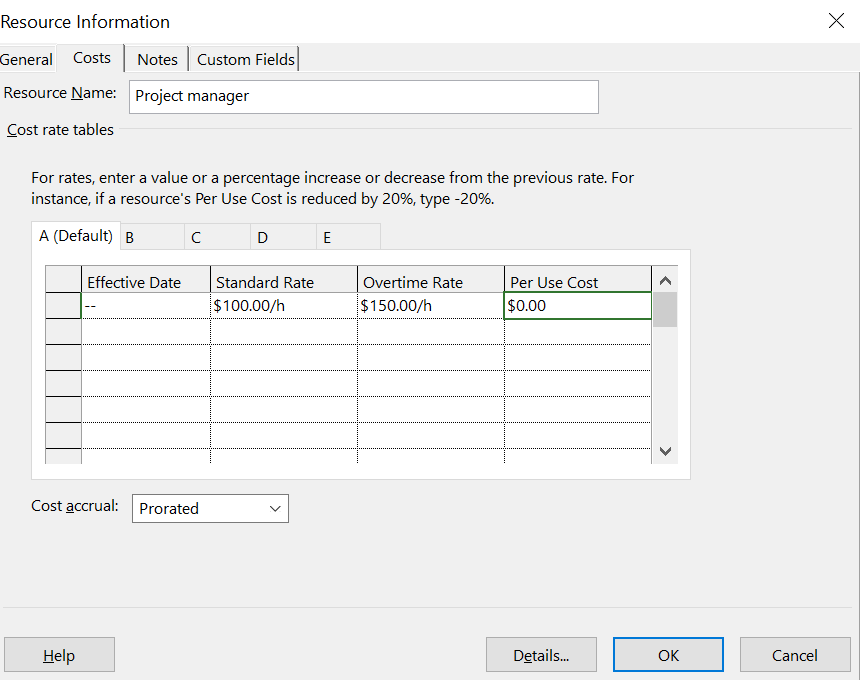
To update the Cost, we will click “Cost” in the “Resource Information” and enter the values as $100 for “Standard Rate” and $150 for “Overtime Rate.”
Adding Resource:
To add a resource, we will click the “View” tab and “Resource Sheet.” For instance, in the “Resource Sheet,” we will add a resource Scrum Master in the “Resource Name” column.
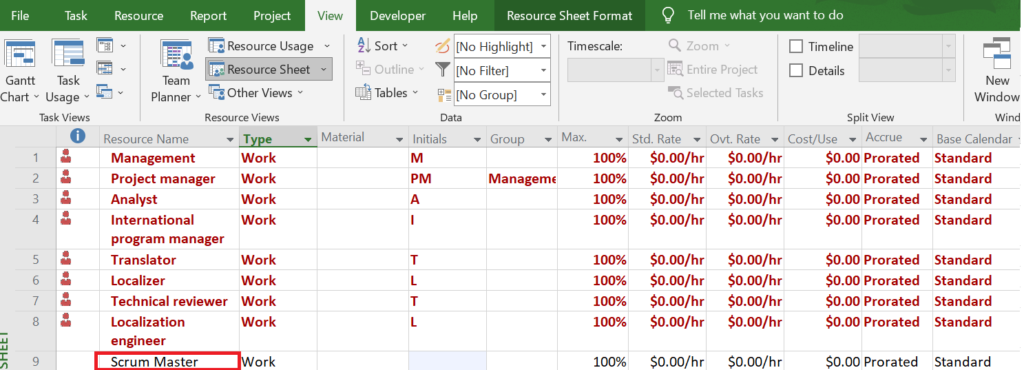
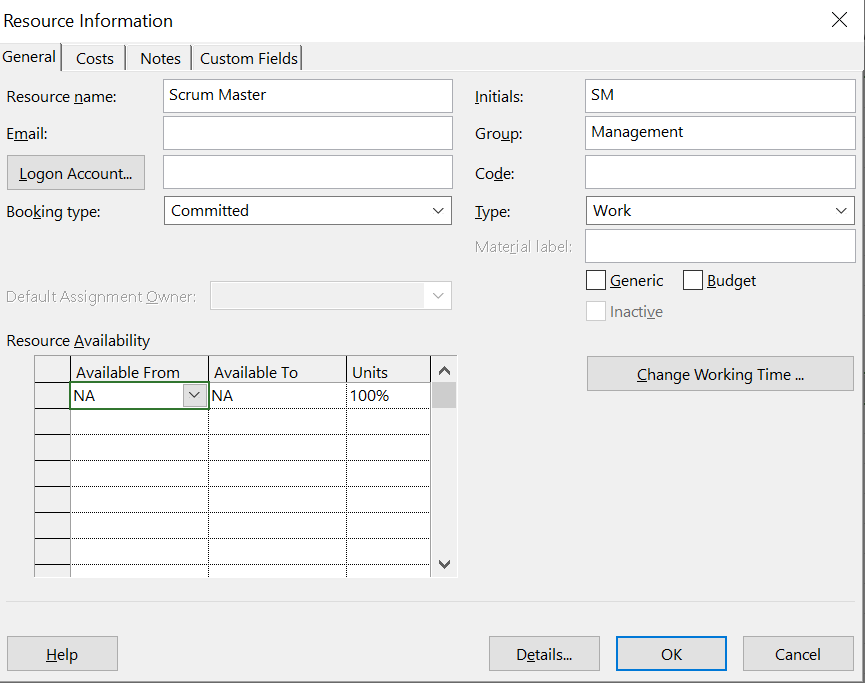
We will double-click the resource name and navigate to a new window, “Resource Information.” In the resource information window, we will enter SM as “initial,” Management in “Group,” select “type” as Work, and enter 100% in “unit. We will keep the default option NA for “Resource Availability” which is the default.
Assigning Resource:
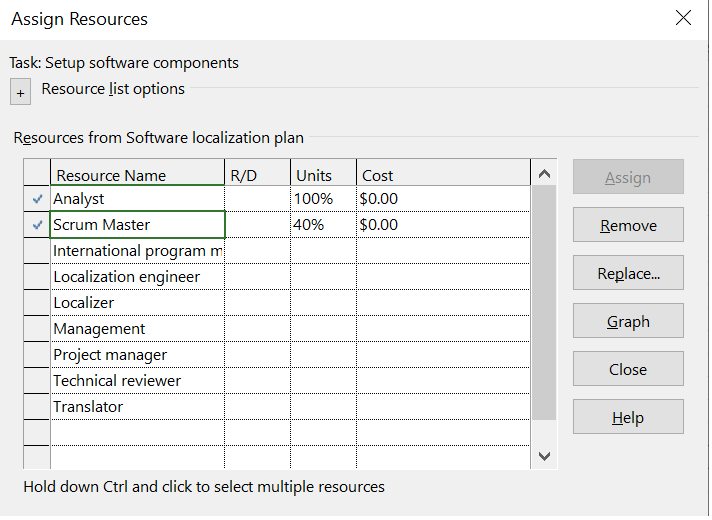
To assign a resource to a task we will open Gantt Chart, by clicking the “Gantt Chart” pull-down menu and selecting “Gantt Chart”. Then we need to click the “Resource” tab, and “Assign Resources.” For instance, we will select the task “Setup software components” and click the “Resource” tab and “Assign Resources.” Then in the “Assign Resources” window we will select the “Scrum Master” in the “Resource Name” column and enter 40% in the “Units” column. Note that we have entered 40% in the “Units” column since the scrum master works part-time for the project, which is 2 working days/ week.
Conclusion
Assigning resources to tasks helps to effectively distribute the workload and manage the resource allocation of the project.


