Do you know that you can generate a useful driving predecessor logic report in Primavera P6? This blog helps you understand its importance and how to generate one. Primavera P6 is highly used by construction scheduling consultants in construction projects for planning, managing, and executing projects.
Understanding the relationship between activities is imperative for performing scheduling practices. You need to know which particular predecessor is driving the activity among the several predecessors assigned to the activity. It often gets difficult and time-consuming even on a project with fewer activities to figure out the driving predecessor for each activity. This is where Primavera P6’s robust reporting feature comes in which generates a project schedule driving predecessor report. This report helps you identify the driving predecessors which are resulting in delaying an activity or the overall project.
How to Generate a Driving Predecessor Report for CPM Scheduling
This blog post explains the step-by-step process of generating the driving predecessor report from Primavera P6.
The project shown in figure 1 below is going to be used as a demonstration project.
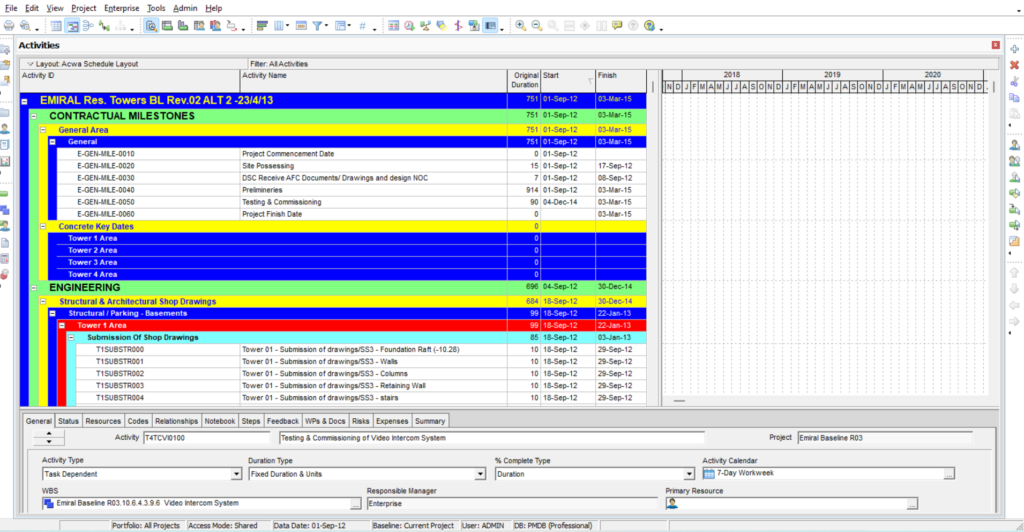
Figure 1
Let’s start and generate a driving predecessor report for this schedule. First of all, you need to click on the report icon present in the enterprise toolbar as shown below in Figure 2.

Figure 2
After going to the report window by clicking on the report icon on the left, you need to click “Add” under the “Edit” tab and the following report wizard shown below in Figure 3 should pop up. Click “Next”

Figure 3
In “Select Subject Area” you need to check the Activities options only as shown below in Figure 4.

Figure 4
In the “Select Additional Subject Areas” dialog, as shown below in Figure 5 highlight the predecessor option on the left of the dialog’s drop-down menu and click on the arrow to include the selected subject area.

Figure 5
When the predecessors are included in the “Selected Subject Areas” as shown in figure 6 below, click “Next”

Figure 6
In the “Configure Selected Subject Areas” dialog, you need to ensure that “Activities” is highlighted and then click the “Columns” tab as shown in figure 7 below.

Figure 7
Include the options like Activity ID, Activity Name, Start & Finish as shown below in Figure 8.

Figure 8
After including all the desired parameters, now click group & sort and group by WBS as shown below in Figure 9.

Figure 9
Please make sure to uncheck the following boxes.
- Show Grand Totals
- ID/Code
Now click sort as shown below in Figure 10 and sort start and finish in ascending manner.

Figure 10
Now set the filter as displayed below in Figure 11.
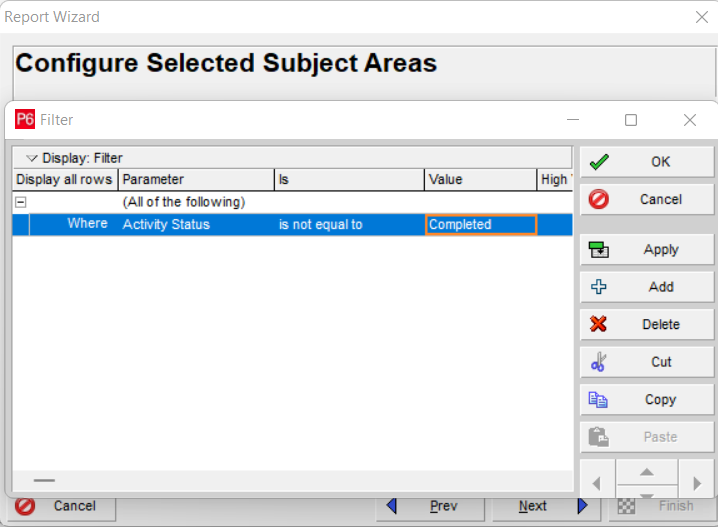
Figure 11
You need to rename the “Activity Name” column as “Predecessor Name” as shown below in Figure 12.

Figure 12
Now click “Predecessors” in configure selected subject area dialog and click “Columns”. Please refer to the figure 13 below.
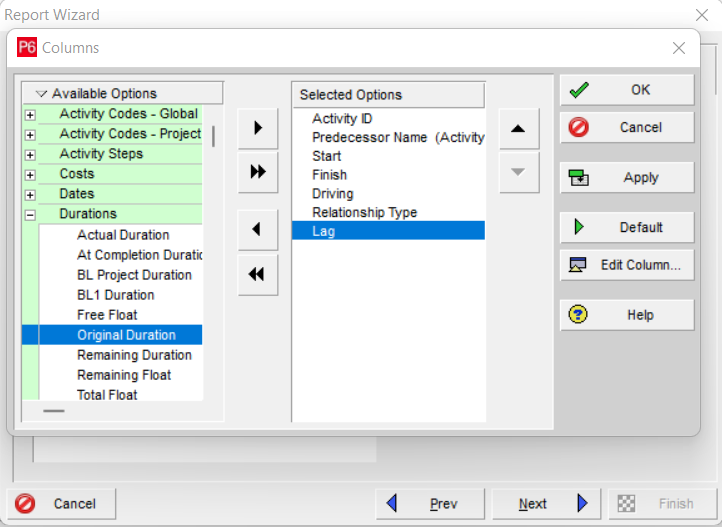
Figure 13
After adding all the columns shown above in Figure 13, click next to Figure 14.
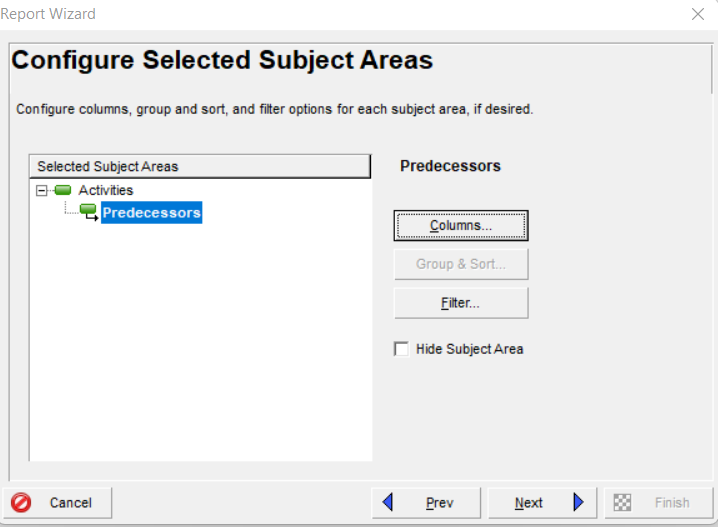
Figure 14
Add a proper title to your report as shown in Figure 15 below.
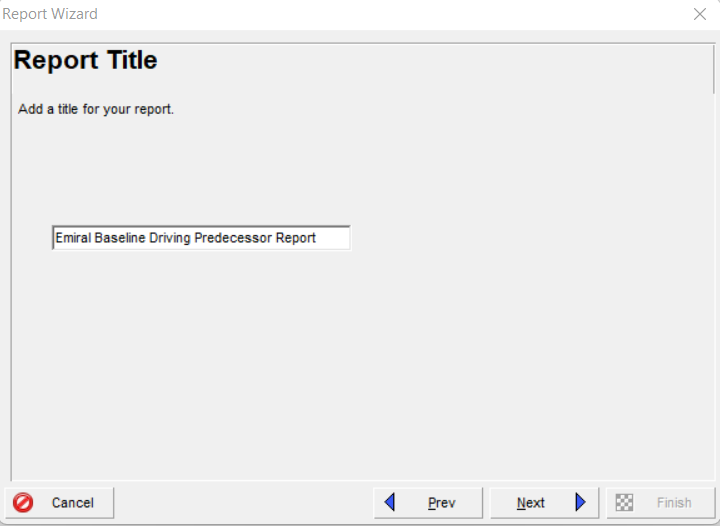
Figure 15
After adding the title, click next and then click “Run Report” in the report-generated dialog. Please refer to the figure 16 below.
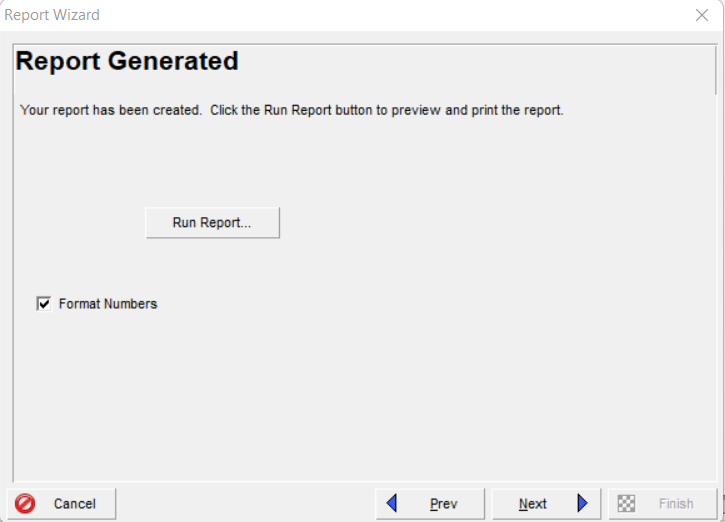
Figure 16
Check the “Print Preview” box in Figure 17 and click Ok.
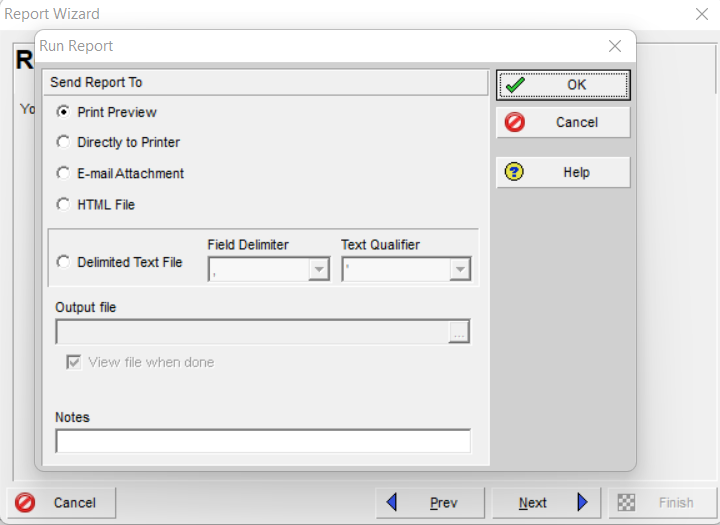
Figure 17
After clicking “OK”, below figure 18 is a glimpse of the project’s driving predecessor report generated by Primavera P6.
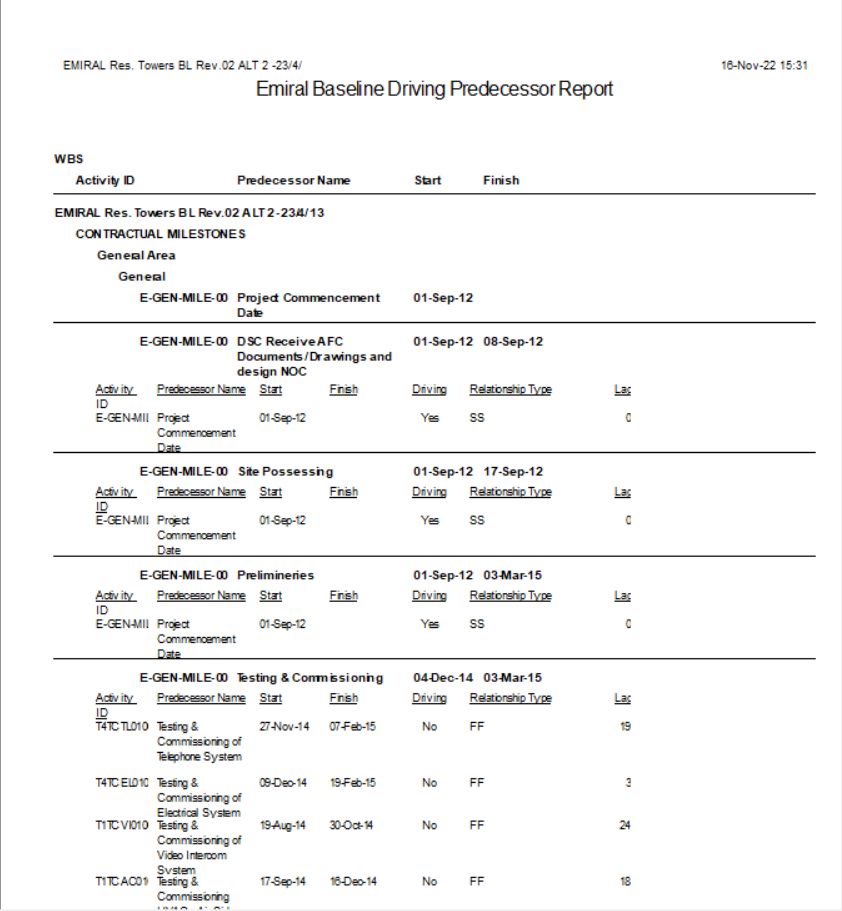
Figure 18
Now you can save this report for future use by clicking on the “Save Report” option shown below in Figure 19.
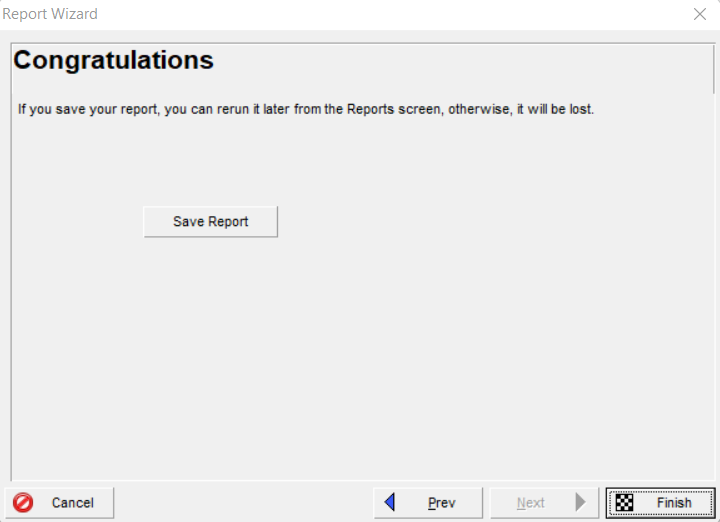
Figure 19
Conclusion
Although it takes time and effort, generating the driving predecessor report in Primavera P6 is still worth it. you can also use these reports as an owner-representative consultant. It provides you with valuable information like the predecessor of each activity, relationship type (FS, SS, SF, FF), and whether the predecessor is driving or not. It also provides you with lag or lead associated with each predecessor.


