Creating a professional Oracle Primavera P6 schedule involves aligning your activity IDs with some client guidelines or made-in standards. These guidelines or standards vary a lot from one client to another one. Let’s say that you have created a schedule of +1000 activities and you need to meet some new guidelines from your client on how to make the activity IDs. You have three choices:
- Update these activity IDs manually.
- Use the Built-in Oracle Primavera P6 function.
- Use a combination of Microsoft Excel and Oracle Primavera P6 to update these activities.
Updating all the activity IDs manually will be a very time-consuming effort, especially if you are working with a very large schedule with +1 000 activities, so, better to avoid this method.
Using the Oracle Primavera P6 built-in function “Renumber Activity ID” under “Edit” in the “Menu Bar” has its limitations to generate specific activity IDs for each WBS.

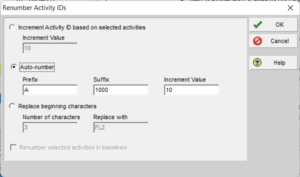
Figures 1 & 2: Updating Activities IDs with built-in Function in Oracle Primavera P6
The fastest and smartest way to update the activity IDs in the Oracle Primavera P6 is by getting help from Excel. To do this, we need to follow the steps below:
Step 1:
The very first thing to do is to have all your activity IDs and activity names in a simple Excel sheet and then put your newly created activity IDs in another column.
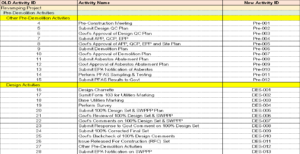
Figure 3: New activity ID created in Excel as per client requirement
Step 2:
Now we have to set up our already created schedule in Oracle Primavera P6 in a way that it will accept our new activity IDs. To do this, we have to create a new user-defined field in Oracle Primavera P6. In this example, we will call it “New Activity ID.”
To create this new user field, choose “Enterprise” on the menu bar and click on the “User Defined Fields. A new window will open. On the “User Defined Fields” window, click on “Add.” A new title will be created. We call it “New Activity ID.” Click on “Close” and it’s done. We have our new user field that will receive our newly created activity IDs.
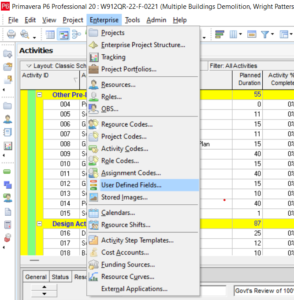
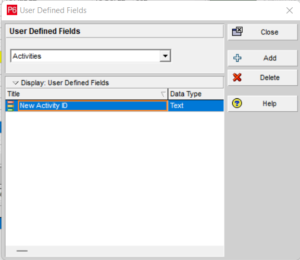
Figure 4 & 5: Create a new user-defined field in Oracle Primavera P6
Step 3:
Now that we have created our new activity IDs in Excel and have set up Oracle Primavera P6 with a new user field that we called “New Activity ID,” we are almost done. The next step is to export our schedule with the old activity IDs into Excel.
To export our schedule into Excel, we have to click on “File” then “Export” and in the “Export Format” window, we select the “Spreadsheet – (XLSX)” option, and then click on the “Next” button.
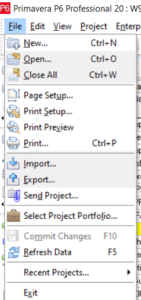
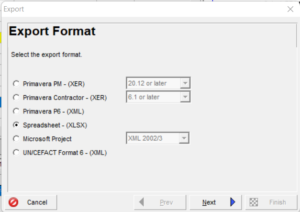
Figures 6 & 7: Exporting the Oracle Primavera P6 schedule to Excel
We then select to export the “Activities” data and click on the “Next” button.
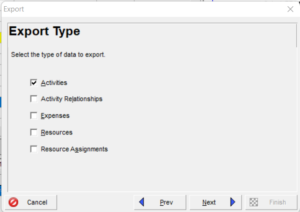
Figure 8: Exporting Activities Data
On the “Projects to Export” window, we select our subject schedule and click on “Next” to move to the next window:
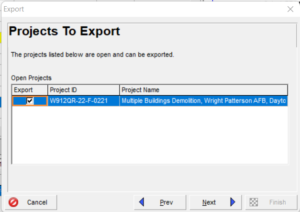
Figure 9: Selecting projects to export
Now we have to select the activity data to be included when exporting into Microsoft Excel. This will be done on the “Select Template” window by clicking on the “Add” button and then clicking on the “Modify” button. On the “Modify Template” window, we will select these options: Activity ID, Activity Status, WBS Code, WBS Name, Activity Name, and the user-defined field that we called “New Activity ID”. We then click on the “OK” button and then on the “Next” button to move to the next window.
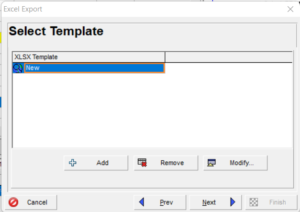
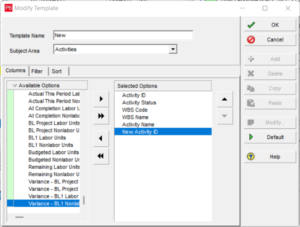
Figures 10 & 11: Exporting template setting up
In the next window, under “Select Excel File” we can name our Excel file and on which folder to save it:
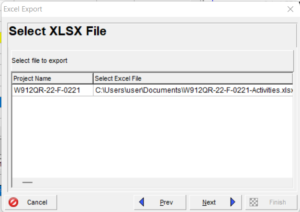
Figure 12: Naming & saving your file
In this last window, you will finish the process of exporting and then you will have your file where you saved it.
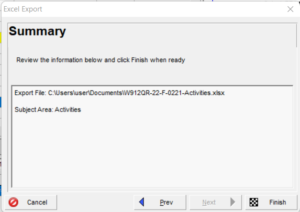
Figure 13: Completing the exporting process
Step 4:
Now that we have our activity data in Excel, we will copy and paste our new activity IDs (created in step 1) into the exported Excel sheets. It is very straightforward, just copy the new IDs into the column “New Activity ID” and no need to touch anything else.

Figure 14: Copping the new IDs into the “New Activity ID” column
Hint:
- Always format your data in Excel as “Text” and be mindful that “1” is not going to be the same as “001.”
- Use a Vlookup formula in Microsoft Excel to match your new activity ID with the already existing one. It’s going to be very fast, very easy, and accurate.
Step 5:
On the menu bar, we select “Import,” then choose “Spreadsheet – (XLSX)” format and click on “Next.”
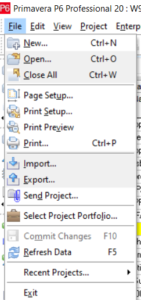
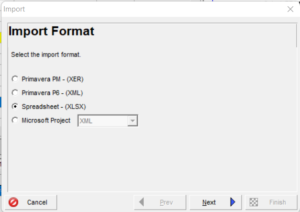
Figures 15 & 16: Import the Excel file to the Oracle Primavera P6
Then, select our saved file on the “Select Excel File” window and click on “Next.”
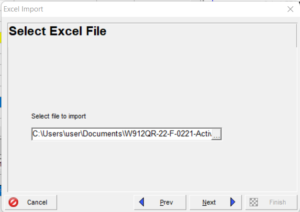
Figure 17: Select Excel File
We select the Import type as shown in the below image:
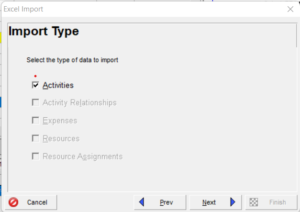
Figure 18: Import Type Data
Now we select the project we will import our data to and we click on the “Next” button.
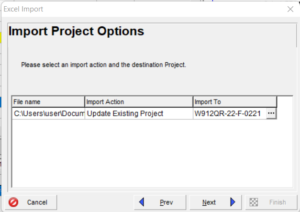
Figure 19: Select which project to import your data
Now we complete the process by clicking on the “Finish” button.
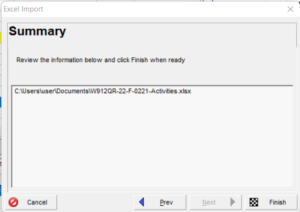
Figure 20: Complete the import process.
Step 6:
Now that we have all the needed data in our already-created schedule in Oracle Primavera P6, we just need to move the data in the user-defined field that we have created and put it into the activity ID.
For this, we will use the “Global Changes” built-in function in Primavera P6. To access it, we go to “Tools” click on “Global Change” and click on the “New” button in the opened window.
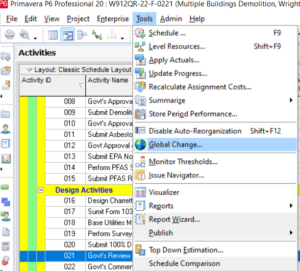
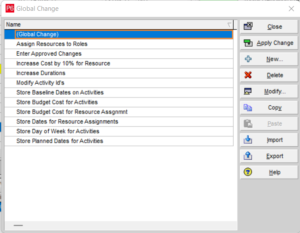
Figures 21 & 22: Creating a New Global Change
On the “Modify Global Change” window, we go to the middle section and click on the “Add” button and do as shown in the below snapshot:
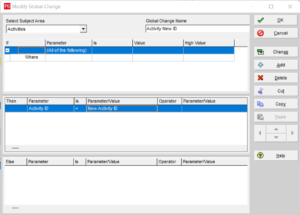
Figure 23: Setting up the global change
We are telling Primavera P6 that the Parameter is our old “Activity ID” and the operator is “=.” The new value will be the “New Activity ID” that we had created as a new user field.
Then click on the “Change” button, commit the change, and then, voila, you have your new IDs.
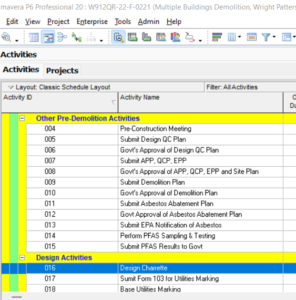
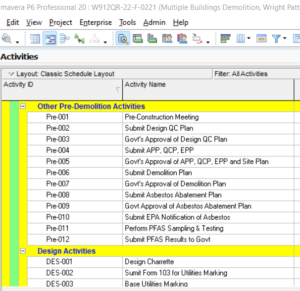
Figures 24 & 25: Updated Activity ID
Conclusion
Using the combination of Excel and Oracle Primavera P6 can save time and effort when updating activity IDs. A task that could take extensive manual work can be done in a few minutes or maybe seconds. Contact Leopard Project Controls for your next CPM Scheduling Project.


