There are three ways of creating a new project in Primavera P6:
- Create new – Create a new project in Primavera P6 from scratch
- Import – Import already existing data to Primavera P6 from spreadsheets or Microsoft Project
- Copy/Paste – Duplicate existing data from an already existing project
In this blog, we will go through how to create a new project in Primavera P6 with the help of Project Wizard.
There is a built-in Wizard in Primavera P6 that helps users, such as project managers, students, and P6 professionals with the most accurate way to ensure all the necessary information is filled out properly. However, as you become a more experienced user of P6 you may turn off Project Wizard and use other ways to create projects.
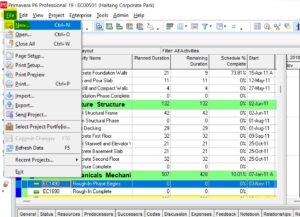
Step 1: On the upper left-hand side you will see the “File” icon. Click on it and choose “New” to launch Project Wizard.
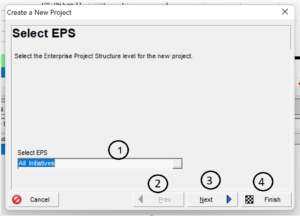
In the new “Create a New Project” window:
- Select the EPS – Type or select data in which your new project should be structured.
- Prev – Click the button to go to the previous screen.
- Next – Go to the next screen in the wizard.
- Finish – Click on the button if you have completed all the steps and entered the data. You can click on the finish button anytime. However, if you do not set up all the information in the Wizard, Primavera P6 will use default data or no data.
The following fields should be completed before the user exists the wizard:
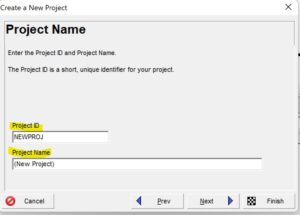
- Project ID (this must be unique because every project is unique)
- Project Name
- EPS Location
- Responsible Manager
- Planned Start Date
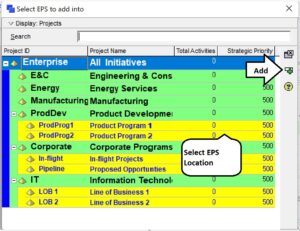
Step 2: Select the appropriate EPS Location where your new project will reside.
Step 3: Enter the Project ID and Project Name and click Next.
Step 4: Enter the Project Start and End Date.
Use the Calendar to set the Start and Finish dates of the project. Selecting the Finish date is not mandatory in Primavera P6. You can either assign it at any time during the project life cycle or Primavera P6 will automatically calculate after assigning durations to the given activities.
Navigation in the calendar:
- When you open up the calendar, it will show the current date/month/year. Use arrows to navigate in it.
- Click the desired date/month/year and after that click Select.
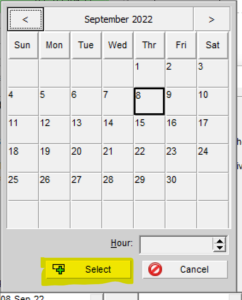
After assigning the desired dates click Next to continue setting up the project details.
Step 5: Enter the name of the Responsible Manager.
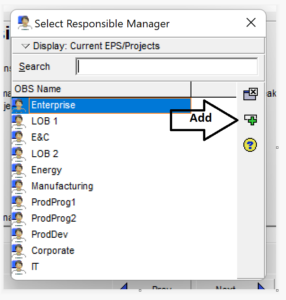
The Responsible Manager is selected from the Organizational Breakdown Structure (OBS) and is the person in charge of or responsible for the given project.
Organizational Breakdown Structure, also known as OBS, is a hierarchical representation of an organization’s management structure representing individuals and their roles. It can also be structured to represent individuals’ names, departments, teams, and types of responsibilities. However, most of the time, organizations choose to represent the departments, individuals, and roles only.
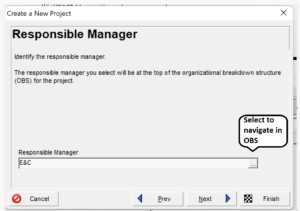
Add Responsible Manager from OBS elements and click on the Add button. Then, click on the Next button to continue setting up the project details.
Step 6: Select the Assignment Rate Type.
The default rate type set for resources in Primavera P6 is “Price per unit (Price/Unit).” However, you have options to use a different rate.
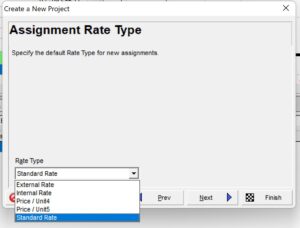
After successfully completing the above given six steps, P6 Professional creates and adds your new project to the chosen EPS. You now have the ability to start adding WBS, activities, durations, and other parameters to the project.
Conclusion
Primavera P6 allows its users to create projects from scratch with the help of its built-in Project Wizard and predefined properties for the project such as Responsible Manager, Planned Start Date, Planned Finish Date, and more. Contact Leopard Project Controls for your next CPM Scheduling Project.


